Manicures are nice, and for a nice treat for yourself once in a while, they can be fun and pampering, but they are expensive, especially if you’re going to get one every week. However, you don’t have to spend a fortune to have beautiful nails!
The following are some tips to help you achieve perfectly polished nails, do it yourself, inexpensively and easily.
Perfectly Polished Nails Tip #1
The most important thing you can do to have healthy, perfectly polished nails is to eat well, drink plenty of water, and take vitamins to supplement your nutrition. Nail health and growth is directly related to nutrition and overall health. Changes in diet and poor nutrition can lead to brittle, dry, cracked nails, or nails with dents or lines in them.
Perfectly Polished Nails Tip #2
Before polishing nails, it’s important to clip, file, and shape the nail, and then when finished, remove all nail dust from the nail. Rinse hands with mild soap and warm water and then dry thoroughly before polishing.
Perfectly Polished Nails Tip #3
Removing excess cuticle matter around the nail and near the nail bed will allow the polish to apply smoothly without worrying about getting polish on hangnail matter on the sides of the nail. Using a set of nail clippers or a small pair of scissors, you can clip the cuticles back as close to the finger as possible. DO NOT pull the hangnail cuticle loose though, as this can result in bleeding and possible infection.
Perfectly Polished Nails Tip #4
Pushing back the cuticles at the nail bed, where the nail meets the fingers, will help with the shape and look of the polished nail and it will also help your polish last longer. As nails start to grow out, there will be a line between the polish and the cuticle. If you gentle push the cuticle back before polishing, this line will take longer to appear and allow your polish to last longer before reapplying.
Perfectly Polished Nails Tip #5
Removing excess oil from the nail will help the polish ‘stick’ better and last longer. It’s also important to soften the cuticle before pushing it back, as in Tip #4. There are many cuticle softeners on the market, but simply soaking your fingers in a small dish of Dawn Dishwashing Detergent will not only help remove excess oil from your fingernails, but it will also soften the cuticles for pushing them back. Just soak your entire fingertips and nail in the liquid soap for 2-5 minutes, and then rinse and dry thoroughly.
Perfectly Polished Nails Tip #6
Using a soft emery board, not a nail file, lightly buff the top and sides of the nail. Do not file or rub it, but just a very light buff to make the nail very slightly rough. If you buff too hard, you will make the nail look rough. Lightly buffing the nail provides a nice foundation for the polish to adhere to without causing it to appear rough.
Perfectly Polished Nails Tip #7
While some will advise you to put a bottom coat or a clear coat or base coat of nail polish on the nail before you apply your color, this is not necessary and can actually reduce the life of the color on your nails. If you’ve followed the tips listed above, there is no need to use a base coat, since the nail is properly prepared to receive the colored polish.
Perfectly Polished Nails Tip #8
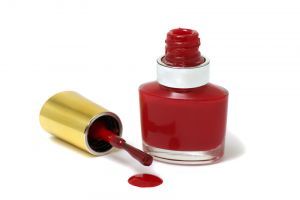
Once you have picked your nail polish color, you now need to mix the color. Most nail polishes come with small metal balls to help mix the color in the bottle. DO NOT shake the bottle! Shaking the bottle to mix the color will cause air bubbles to form that might leave bubble on your nail when you use the color. Instead, hold the bottle between your hands to warm it and then roll it back and forth between your hands for a minute or two.
Perfectly Polished Nails Tip #9
When applying the color to your nails, it’s important that the brush you use be clean and soft. Stiff brushes are often found in less expensive nail polish. You need to put an ample amount of nail polish on the brush. Too little and the nail will not receive a good coating and too much and it will be hard to keep the color only on the nail.
Generally, you will pull out the brush, wipe it on all sides of the bottle to remove as much polish as possible, and then dip the brush again, this time swiping it against the bottle rim on one side. Then carefully turn the brush and apply the side with the polish to the nail starting at the tip of the cuticle, dead center on the nail. In one smooth motion, swipe the brush down the center of the nail. Wait 3-5 seconds, and then do the same on the left side of the nail, and then wait another 3-5 seconds and do the same on the right side.
Perfectly Polished Nails Tip #10
Let the nail polish completely dry for at least five full minutes before adding a clear or top coat to the nail. A polish sealer or top coat polish can help prevent the color from chipping and peeling. Once the top coat has been applied, be sure to let your nails dry for another full five minutes minimum before touching or using your hands.