About a week ago while browsing for a basic red nail polish, my eyes glistened when I spotted something entirely new, and my direction of spending just around $5.00 on basic red nail polish, quickly ended up becoming a $30.00 purchase. This was because my eyes quickly spied a display rack at the end of the isle featuring a bunch of brand new Sally Hansen Gel Nail products.
The first thing that bothered me about Sally Hansen’s all new gel manicures, was that everything was all too confusing on the display rack. I had to really read the packages, because you can easily accidentally buy just Step 2, without realizing this entire new concept requires a bunch of other products in order to get the end result. A base coat, a gel color, and a freaking top coat! Oh, but that is not all, you will also need to purchase an LED light in order to cure the gel.
I became quickly overwhelmed with exactly what I needed, so instead I went with their Salon Insta-Gel Strips Starter Kit. Basically I had the option of purchasing the nail strip version, or the much more expensive nail color version. I opted for the lesser. However you can simply buy a gel color, and use it with this kit, if you do not like working with nail polish strips. I am seasoned in how to apply them, so I had no issues with that.
I did however buy an additional gel nail color to use at a later date.
Anyway, with that out of the way, you are probably wondering what the hype is all about when it comes to gel nails.
Basically it is a mirror shine, chip resistant manicure that will last up to 2 weeks, with a finish as stunning as you would receive from a nail salon. I can vouch that Sally Hansen’s nail polish strips alone, without the glitzy gel top coat, lasts me for a month. So I imagine now that they are covered in the gel topcoat, they could last as long as I do not remove them.
It sounded great, but for the price of nearly $30.00, which is about the price of a gel wrap in a salon, I had to wonder if this kit was worth it. Or if I got suckered into another cheap gimmick.
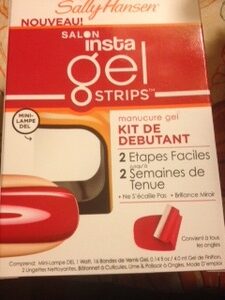
The Salon Insta-Gel Strips Starter Kit:
In the box you have 2 packages of standard nail polish strips. Trust me, you can use any nail polish strip from Sally Hansen, you do not need to purchase the higher priced Gel strips. They are exactly the same, it is basically the top coat that does the magic.
You also do not need to purchase a base coat, when using the strips, and this kit did not come with one.
If you use polish strips solely, you do not need the base coat. If you use gel nail color, you will need to purchase a base coat to go with it.
Anyhow, in the kit, 2 packages of nail polish strips, which only include enough strips for 1 gel manicure. However if you are clever, and your nails do not require an entire strip per nail, you can get 2 manicures out of it. It’s a little disheartening to have spent that much money realizing that I would only get enough strips for 2 uses, meanwhile in the topcoat gel polish, there is enough gel polish in the bottle to last for quite a bunch of gel manicures.
In the box you will also find a nail file, a mini LED light to cure the nails, 2 nail wipes, which are nothing more than pads soaked in alcohol, and your gel top coat.
To Apply:
First and foremost, make sure your nails are free of dirt and oils, so go ahead and wash them paws!
Next you will be applying each nail polish strip, which is the most time consuming annoying process in the entire ordeal. I am able to get 2 nails covered with 1 strip, as my nails are only semi-long. For those with much longer nails though, you will need to use an entire strip. Your nail length will literally determine how many manicures you can get out of the Salon Insta-Gel Strips Starter Kit. For me, 2 manicures. For others, just 1.
Once you go through the annoying ordeal of applying the nail polish strips on each finger, you will then apply a thin layer of the gel topcoat. You can only do one nail at a time, but thankfully the cure time is literally just 30 seconds under the mini LED lamp that is included with the kit.
The lamp turns on with the press of a button, and will auto turn off after 30 seconds. You can then move on and polish the next nail until the process is finished, and you have applied a thin topcoat to each nail.
Now the oddest part about this gel manicure was that after curing under the LED lamp, the nails were still tacky, and I thought they needed to dry for longer. No matter how long I waited they were still tacky and wet feeling.
Well, it turned out I was wrong, the nails are supposed to be tacky after they cure, this is when your mini alcohol soaked pad comes in to play. You will need to use it to wipe the nails clean, the tacky feeling vanishes and wallah, you are left with gorgeous mirror shine nails, with a shiny finish, and a thicker healthier feel overall.
Overall:
I like the finish, my nails look as if I stepped out of a nail salon, only with the convenience of doing it myself at home.
But Is Salon Insta-Gel Strips Starter Kit worth the money?
I would say yes, as it is in fact just a starter kit. You have the possibility of getting 2 manicures out of it, and you will have plenty of top coat left over to purchase either new nail polish strips to use with the leftover topcoat, or you could go out and buy a base coat and gel polish color to use.
The LED light that is included is also included, and it is not battery operated. It plugs in, so you do not have to worry about having to buy batteries on a constant.
All in all, I like the result of my nails. I have had the red color strips on for a week now with absolutely no signs of wear, chipping, or fading in the mirror shine.


