If you’re a black girl like me, you went to college with no idea of how your hairdresser makes your hair shiny, beautiful, and most of all, straight. All I knew was don’t scratch the day before you get a relaxer so it won’t burn too much.
When I started paying for my own relaxers, the $50 price tag was a bit much. And who wants to get up at 7 am to spend four plus hours on a Saturday reading old copies of OMagazine? I could imagine better ways to spend my mornings-that is, by sleeping.
Enter: the relaxer in a box. They promise straight hair, at the risk of burning your scalp because you don’t know what you’re doing (There’s a reason you pay someone to do it, after all). But I was way past due and my wallet demanded a cheap alternative. Now, I can say I’ve done it! Here’s a quick guide:
Step One: Buying the Relaxer
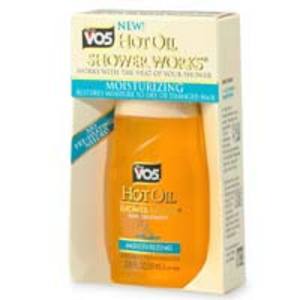
Relaxers or “perms” run from $5-10. You can find them anywhere from beauty supply stores to the “ethnic hair” sections of grocery stores and Wal-marts. Choosing a trusted name like Luster’s or Motions is probably a good way to go. For the best results, ask your mom or hairdresser what they recommend. Relaxers usually come in two formulas: regular or super. Decide based on your hair texture. If your hair is very thick or coarse, super is for you.
If you’re touching up new growth, you only need half of the relaxer mix. A plastic container to store the rest might be useful.
Don’t scratch, wash, or comb the hair very much for at least a day before to avoid burning your scalp. Read all the directions before you begin! Once you’ve got a grasp on the process, get everything you need together.
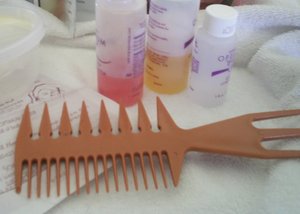
Things you’ll need:
Comb
Towels
Mirror
Scissors (for strand test)
Clock or timer
Step Three: Mixing and Strand Test
Mix the perm according to the directions. Then do a strand test. Snip a little bit of new growth from the back of your head and apply the relaxer to it. Set it aside for a few minutes, the length depending on your hair texture. You’ll notice when it’s straight, but you can check by smoothing the strands over. If they don’t curl back, they’re ready. Note the amount of time.
Step Four: Applying the Relaxer
Your hair should be completely dry. Line your hairline with the protective base. Divide your hair into four sections and apply any pretreatments the directions call for. Check the directions for the maximum amount of time the relaxer can be used on your hair texture, then start the clock or timer.
To apply: starting at the nape of the neck, make a thin part. Dab the relaxer on both sides of the part, careful not to put it directly on the scalp. Be generous-it’s hard to gauge this the first time, but give the hair a good coating. Apply evenly front to back, to the hairline last. Some people rub a little relaxer over the already relaxed hair.
Smooth the hair with short, firm strokes in the same direction you applied the relaxer. Keep an eye on the clock. Test a section of hair at the front for straightness by pressing the hair down. If it doesn’t spring back up, it’s ready. The first time, go ahead and wash your hair when time is up, even if you don’t think it’s perfect. Later, you can get a better grasp on how long to leave the relaxer in. Burning is just that-burning, which isn’t good for your scalp or your hair.
Step Six: Finishing
Wash out according to the directions, using warm water. Make sure you get all of the relaxer out. It’s good to use color-cued shampoo, the kind that turns a different color once all the chemicals are gone. The neutralizing shampoo is a crucial step, since it deactivates the chemicals. Use the conditioners according to the directions-it’s okay if you don’t manage to use half the bottle, just use as much as you need.
Wrap or dry your hair however you please, then congratulate yourself! Reapply every 6 to 8 weeks according to your hair texture. If you wait too long in between relaxers, your hair can start to break. Wait at least 2 to 4 weeks after relaxing to color your hair.
Warnings
According to several sites, relaxers and hair dyes are the most common products the FDA receives complaints about. The chemicals used in relaxers are very strong and can cause 2nd degree burns if not properly applied. Use caution-it doesn’t have to be perfect the first time (or the second, or the third).
Lye relaxers contain sodium hydroxide, a chemical also used in household cleaners. It has a higher Ph level than no-lye relaxers, which contain guanidine hydroxide. Both are effective, but both can cause burns.
A Note About “Straight” Hair
Black women started relaxing their hair because white features, like straight hair, were valued. Though Afros and braids are more accepted now, many black women still feel that they should have straight hair. If you relax your hair, think about what it means for you, not society. Check out the links section for some interesting articles about beautiful, natural black hair!