First of all, anybody who tells you that this is too complicated to do by yourself must work for a salon. They want you to fork over $200 – $400 for them to do something that you are completely capable of doing yourself. Now, if you’re loaded with money and can afford to do that kind of thing, then by all means, go for it! But most of us would willingly save that kind of money and just do it ourselves.
You may think it’s a bit extreme to call this a life-changing treatment, but think about it…how many hours do you spend every single day battling frizzy, curly or wavy hair. If it’s super curly, you probably apply gobs of product to fight frizz and puffiness. If it’s wavy, I’m guessing you’re always attempting to bend the waves in the right direction so they aren’t sticking out every-which-way. Wouldn’t it be AMAZING to be able to blow-dry your hair & have it lay flat all by its self, with minimum styling?! Think of all the time and frustration you will save yourself. The dream of having soft, shiny, straight hair is what brought me to try this treatment.
After seeing so many reviews on this straightening product, and all of the wonderful before & after pictures online, I decided to give it a whirl. I found an awesome deal on it by typing “Brazilian Keratin Straightening Treatment” into an Ebay search, and picked it up for only 35 bucks! I purchased the 2.5 oz bottle of the Global Chocolate Keratin Treatment. You will find some with and without the cocoa added – I chose this one because the cocoa extracts help to fortify and hydrate hair. The particular formula I chose DID contain formaldehyde, which some people prefer to avoid because of the strong odor. After much researching online, I found that the treatments with formaldehyde give better, longer-lasting results.
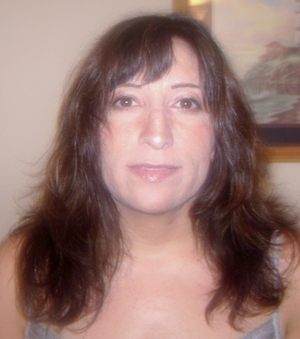
Remember, beauty does not come easy! Get ready for a somewhat lengthy process – I have just below shoulder length hair and the entire event took me about two hours. Although, thinking of how many hours I’ve spent battling my hair in the last year (probably a total of about 300 hours!), 2 little hours pales in comparison. Before you begin, make sure you’re comfortable and have enough time to complete the whole process without taking short-cuts. In this article, I’ll walk you through the steps and what the hair looks like during every step of the process. (In Picture A you can see my “before” hair – the curly, wavy coars mess I had before finding this awesome treatment!) Now, on to the process…
YOU WILL NEED
Clarifying shampoo to remove debris and styling product from hair. This usually comes with the kit, but if not, just buy a clarifying shampoo at the drug store.
2oz – 6oz of Brazilian KeratinTreatment depending on length of hair. My hair is just below shoulder length, and very thick, so I used the 2.5 oz bottle. It’s always better to have too much than too little. You can always use leftovers for your next treatment.
A straightening iron that heats up to at least 400 degrees (preferably 450 degrees) and is between 1″ and 4″ wide, depending on your personal preference. I used a 2″ wide iron that heated up to 410.
A mask – usually comes with the kit, but if not just buy an anti-dust mask or surgeon’s mask. They can be found at hardware stores near sandpaper/saws.
A blow dryer with both medium and high heat settings.
Plastic gloves to protect your hands during the Keratin application.
Butterfly Clips to hold upper sections of hair in place while you straighten the under-layers.
Plastic Bowl (optional) to pour Keratin treatment into for ease of application.
A wide-tooth comb to remove knots after shampooing and also to distribute the Keratin Treatment through your hair.
A snug shower cap (for the 3 days when you need to shower, but can’t get hair wet).
Step 1 – WASH WITH CLARIFYING SHAMPOO
Scrub your hair using the clarifying shampoo. Remember, this is going to be the last time you will wash your hair for 3 or 4 whole days, so make it count! I lathered, rinsed, then repeated to make sure my hair was squeaky clean. Clarifying shampoos typically remove every bit of product and residue from your hair, so after rinsing, your hair will actually sound squeaky when you rub it, and will probably be a tangled mess. DO NOT use any conditioner after you shampoo. You want the hair to be porous to absorb the keratin treatment. To remove knots and tangles, gently use the wide-tooth comb to gradually separate and untangle hair. If you have a particularly stubborn knot, rub the center of it with your thumb and fore-finger to loosen the hair, then gently un-knot using your fingers. Once all knots are removed, comb through one last time so that hair is smooth and tangle free. **TIP** For someone with especially long and/or curly hair, it might help to wash in sections. Use a giant butterfly clip to separate hair into 4 sections and shampoo/comb each section separately. If I had a problem with knots on shoulder-length hair, I can’t imagine the problems that someone with long hair may encounter.
Step 2 – DRY HAIR COMPLETELY
Dry hair completely using a blow-dryer set on high heat. Make sure hair is thoroughly dry before moving on to the next step. I dried my hair for about 8 minutes, then sat around for another 10 minutes only to find that it wasn’t completely dry. So, I went back in and dried it for another 5 minutes until there was no moisture left.
Step 3 – COMB & SEPARATE HAIR
Comb hair with wide-tooth comb, again removing all knots and tangles. Hair will probably be puffy and straw-like, but not worry – that’s all about to change! Using large butterfly clips, separate your hair into 3 sections (pinning up both sides & most of the back), leaving the bottom-most section of hair hanging down. Throughout the application process in the next step, you will probably be re-positioning the butterfly clips to hold more hair so you can have easy access to the hair you are coating in the Keratin product.
Step 4 – APPLY KERATIN TREATMENT
You can apply the Keratin Treatment in one of two ways:
1) Empty it into a bowl and apply with the same type of flat brush you would use for hair coloring. (Can be purchased at any beauty supply store.)
2) Squeeze directly from the bottle into your gloved hands (or scoop from the bowl with your gloved hands) and apply on the hair from just below the root to the tip.
I used the “scoop from the bowl with your gloved hands” method.
First, put on your plastic gloves. To apply, go section by section (each section being a 2 inch width of hair). Apply the keratin to the upper middle of each section of hair and then distribute it downwards then upwards, using your gloved fingers, until the entire section is coated. Rake through the strands with your fingers to ensure that all hair in the section is thoroughly coated. I’d suggest using a small amount to start so you don’t run out. You can always go back and re-coat the strands once your entire head of hair is coated and you have left-over product. If you feel that you’ve applied too much product, comb through with the wide-tooth comb to remove any excess. Hair should be saturated with product, but not so wet that you see globs of the product on your strands. (Pictures B& C show how my hair looked immediately after applying the Keratin Treatment.)
**TIP** – again, if you have very long or thick hair, pile more hair into the clips on top of your head and gradually release it from the clips. This will make for better and easier coating of the sections. The same goes for step 6, when you begin the straightening process. The less hair you have to deal with hanging down from the clips during steps 4 and 6, the easier the process will be.
Step 5 – DRY HAIR ON MEDIUM HEAT
The first part of this step is to put on your mask! You can either keep your gloves on or remove them. I removed them because the latex kept sticking to my hair when I was trying to run my fingers through it during the drying process. Now, you want to completely dry the Keratin Treatment that you just placed in your hair. Using a hair dryer set to high speed, but medium heat, blow dry using either your hands or a vented brush to rake through and lift hair as you dry. DON’T flip your head upside-down to dry the under layers – the fumes will be too strong, seeing as how the hair will be flying into your face. If you can’t seem to dry the under-layers, use a butterfly clip to secure the top sections of hair while you dry underneath. Once hair is COMPLETELY dry, wait 10-15 minutes before proceeding to the next step.
(Now is a good time to turn on your straightening iron so it’s pre-heated. If it goes up to 450 or 500 degrees, set it at 500 for maximum results. Mine only goes to 410, and that worked just fine, but I would not recommend going any lower than 400 degrees because any lower will not seal the Keratin Treatment onto your strands.)
After waiting the 10-15 minutes, you will often find that patches of your Keratin-coated strands are not as dry as you thought they were, and you will need to go over it once more with your dryer set to medium until they dry completely. If you do not dry your hair completely, the next step of the treatment will not be as effective and you’ll be left with wavy strands rather than straight ones. At the end of this step, I was already amazed at how straight and shiny my hair looked, and I hadn’t even straightened it yet!)
Step 6 – USE FLAT – IRON TO STRAIGHTEN HAIR
Now, you’re finally ready to begin straightening! Comb your hair again, one last time to make sure there are no tangles or knots. Again, your hair will feel very dry and frizzy, but that’s all about to change. Section hair back into the large butterfly clips, the same way you did in Step 3. You want just the very bottom layers to be hanging free. Make sure your iron is hot, and set to the highest temperature setting – no lower than 400 degrees.
Make sure you’re wearing yourmask before you begin straightening! Now that you are putting the hot iron in contact with the Keratin, some fumes will develop – so make sure you have windows/doors open for some ventilation. Starting with the front sections of hair that are hanging down, free from the clips, begin straightening in small sections (no bigger than 2 inches wide). Go over each section with the iron at least 5 times. I went over each section about 10 times since my iron doesn’t go to the recommended 450 degrees. (Picture D shows me undergoing the straightening process.) Continue this process with the 2 inch wide sections of hair until your bottom layer is completely straight. It might be a bit tricky to get the back layers straightened unless you tilt your head all the way to the left or right while straightening. Tilting your head will cause the back layers to sway whatever direction you choose, so you can have easier access to the sections in the back. It also helps to have access to a double-mirror so you can see the results on the back of your head. If you don’t have one, just use a hand held mirror to look into while you stand facing away from your main mirror – this will allow you to view the back of your head.
Continue this process (gradually releasing hair sections down from the butterfly clips) until your entire head of hair is straight. Be careful when straightening your bangs – hair gets very hot and it will hurt when you release them from the iron and they fall against your forehead! When straightening my bangs, I tilted my head all the way back before releasing from the iron so they would fall onto the rest of my hair rather than my forehead. This worked well, and prevented any burns. Have patience with your bangs – I found the bangs to be one of the tougher sections.
Congratulations! You’ve finally completed the treatment process. Now flop down on your sofa and grab a big glass of wine to celebrate your newly straightened hair and the fact that you didn’t pay a beautician 300 bucks to do this for you! This is how your hair will look for the next 3 or 4 days. If you can stand to go 4 days without shampooing, then by all means, do it – but never shampoo before the 3 days are up. The natural oils in your hair cause the Keratin to settle deeply into the strand cuticle and this is what makes the treatment last. When your hair starts to re-gain its waviness and curl, you can do the treatment again. You can actually do it every month, if you need. The more you use the Keratin, the silkier and softer your hair will stay.
(Pictures E shows the final result – my shiny straight hair!)
DO’s and DON’Ts
DON’T do this a day or two before a special event! (The product leaves hair rather filmy & greasy until it can be washed 3 days after applying).
DON’T take short-cuts or rush when ironing your hair. If you’ve gone over each section of hair 4 or 5 times, go over each one again an additional 3 times or more, even if your hair already looks really straight.
DON’T use a flat iron anywhere under 400 degrees. Directions suggest one at 450, I used one at 410. The hotter the better, for optimum results!
DON’T use clips or pony tail holders for longer than half an hour, until after your 3 day time period is over. If you do, re-iron that hair so it doesn’t take on a funky shape!
DON’T use any shampoo/conditioner/styling products that contain Sodium Chloride (Sulfates) as part of your after-care routine.
DON’T shampoo every single day after the 3-day waiting period. Every other day or every third day is best to make the treatment last longer.
DO complete this process in a well-ventilated room. Keep bathroom door & window open, and/or use a fan that blows to the outside.
DO relax and take breaks if your arms get tired from all the straightening. There’s no time limit, take as many breaks as you need in order to do a good job!
DO be prepared for your hair to be stick-straight for 3 days. After you shampoo, it will go back to it’s lively self.
DO re-iron your hair every morning after waking up. Your hair gets bent into strange positions while you sleep, you don’t want it to stay that way!
DO dry and re-iron your hair if it gets wet from rain, showering or sweating during the 3 day period.
DO remember to wear your mask when re-ironing your hair during the 3 day period. The fumes are still strong until the mixture is washed from your hair.
DO allow at least 3 full days before washing your hair.
DO enjoy your new head of silky, soft STRAIGHT hair!
AFTERCARE TIPS
Use a shampoo and conditioner that DO NOT contain Sodium Chloride. These salt/sulfate based shampoos and conditioners are good to avoid anyways – they strip the hair, making it dry and frizzy. They’re especially bad to use after a Keratin Treatment because they strip the Keratin from your hair, making all of your hard work literally go down the drain. You can find these sulfate-free products online or at most health-food stores. Some online stores charge much more for sulfate free products than they should, in attempt to make consumers think that products of this nature are rare & hard to find. I looked around online and found some upwards of 40.00 per bottle! Rather, I’d suggest a health food store, Sally Beauty Supply, or Ulta. I purchased the Alba Coconut brand shampoo/conditioner at Whole Foods Market for about $7 per bottle, and recently found that L’Oreal has a supermarket brand called Ever Pure that is Sulfate Free. I tried their Deep Conditioner Mask & absolutely love it. This should be available at most Walmart Stores, and costs about $8.00. Hopefully as Sulfate-free products grow in popularity they’ll become more widely available.
Try to wash your hair only every other day, or less. The natural oils in your hair make the Keratin Treatment last longer. If you shampoo your hair every single day, the treatment will last around 1 ½ – 2 months. However, if you shampoo every other day or less often, it should last 3 – 4 months.
Avoid frequent visits to swimming pools. The chlorine removes the Keratin from your hair as well. Swimming occasionally will do nothing, but if you swim daily, don’t expect the treatment to last more than 1 month.
You will probably need to buy some new styling products – if you need to use any at all. Before the treatment, I needed to use the heaviest styling products I could find because I wanted to weigh down my puffy hair. If a product claimed to NOT weigh hair down, I didn’t want it! A product called Jonathan Silky Dirt Crème was my best friend because it texturized my tresses, adding separation, definition & weight. I’ve now abandoned my previous favorite and am on the hunt for volumizing products. I never ever thought I’d see the day when I’d be seeking volume! So far, the only one I’ve tried is John Freida Luxurious Volume Bountiful Body Mousse. I apply it before blow-drying and it gives my hair a nice amount of body while leaving it soft and silky. To hold the style I use a few sprays of Dove Flexible Hold Aerosol Hairspray, and those are the only two products I need to use! The quest for volume is going to take some experimenting with different brands. Since I’ve never used volumizer before, I’ll have to go through a period of trial & error.
Smooth, shiny, silky hair that feels as though it was never touched by color, perms, bleach, or the elements. It’s like having virgin hair again, and I can’t help but run my fingers through it just to enjoy the fact that it’s no longer a tangled nest of hair.
STRAIGHT hair that you won’t have to battle with every morning! I can’t even tell you how sick and tired I was of trying to tame my hair every single day. I had finally given up and decided to leave it wavy. It always looked somewhat out of control, because I was sick of frying it with the hot iron in the morning, only to be left with a semi-straight frizzy mess. This has completely fixed the problem. Now, I only need to go over a couple of out-of-place strands in the morning for a perfect, fast style.
No frizz at all. And I do mean NO frizz! Immediately after drying with my blow-dryer my hair is silky, soft and frizz free – with no need to apply gobs of styling products to create soft shining tresses.
CONS
The fumes were a bit strong when I first started straightening – especially as I straightened the hair closest to my face. My nose felt like it was burning inside and my eyes watered a little bit. This passed after a couple of minutes, but if it’s too strong for you, take intermittent breaks when straightening the hair near your face and keep your head tilted back as you straighten. This will cause the fumes to go backwards, rather than forwards towards your face.
Some sections of my hair are still a little bit wavy. However, I think this is largely due to human error, and not to defective product quality. I should have used an iron that heats to at least 450 degrees, and probably should’ve gone over the more stubborn wavy parts of my hair with the iron a few more times. However, for the most part, my hair is 90% more straight than it has ever been and I only need to spend a couple minutes every morning smoothing out the semi-wavy strands. You live you learn! Next time I will use a hotter iron and make sure to pay special attention to the wavier sections.
All of this considered, choosing to use this Keratin Treatment in my hair was one of the best beauty decisions I’ve ever made. I’m insanely happy with the results, and have already saved several hours of time in the styling department. Friends and co-workers comment on how wonderful and healthy my hair looks – they thought I was going through the arduous process of straightening it every single day, until I told them my secret! I hope this treatment works as well for you as it did for me. Happy Straightening!