When you’re making how-to videos, Photo Stories, slideshow videos, or just looking for a simple audio track to insert into a random video, it’s good to know how to loop a song or a section of a song. One of my favorite resources to do this is Adobe Audition. In this tutorial, I will teach you how to create a loop of a song that you can reuse again and again for your videos.
Step One: Open Your Track in Adobe Audition
Open Adobe Audition and click the “open” command. Navigate to the song you want to edit and make sure you are in the “Edit View” and not the “Multitrack View”. You can find these tabs at the top of the waveform window in Audition.
Step Two: Select Loop Area
If the track was created to be looped, you’re in good shape and probably don’t need this step. However, if you’re trying to grab just a 30-second snippet of a song to loop, you’ll need to select this now. It is preferred that there is no fade at the beginning or end of your loop, so make sure to select a loop section that is uniform in sound. To do this, select the “Time Selection Tool” just below the Adobe Audition toolbar. (Hint: it looks like a selection cursor in Microsoft Word).
Choose the beginning of your loop, press down at the appropriate waveform, and select the portion of the song you want until it is completely highlighted. Copy this section using Ctrl+C on your keyboard, then choose “File > New” in the Audition toolbar. Paste the waveform into this new document and save it as a new track.
Step Three:Take Out the Silence
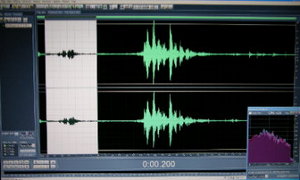
The key to making a good loop is to make sure there’s no silence at the beginning or end of the track before you start making the loop. If there is, this silence will play in between each loop and will form a disconnect in your ear when you watch the video, which is pretty annoying. At first glance, though, you may not see the silence. To fix this, select the magnifying glass with the “+” sign below the waveform in the play bar. Zoom in until you can see blank space on either side of your waveform. Using the selection tool, carefully select any empty portions and press “delete.”
Step Four: Loop Your Song
Once you’ve deleted the silence, press “Ctrl+A” on your keyboard or simply select the entire wave with your mouse and copy the waveform. In the play bar below the waveform, select the “Go to End” key (which looks like an arrow with a line at the end) to go to the perfect end of the song. Paste the copied waveform. Now you have a song double the length of the new track you started. Play through the entire portion, or at least the part where the two sections come together, to make sure it sounds right. If you’d like a longer loop, simply repeat this step until your loop is long enough.
Step Five: Add a Fade
If you don’t want to just chop off your wave at the end, you can add a fade at the end very easily. Select the last five seconds or so of your loop with the mouse, and under the “Favorites” tab at the left of the window, select “Fade Out.” This will automatically fade your music so you don’t have to fiddle around with the dynamics yourself.
Save your work; you’re now finished with your loop!


