Intro:
Many different software programs can be used to process your EVP recordings. This article/guide is specifically for Adobe Audition 1.5 and how that program can be utilized to process/clean your EVP.
Prep:
Before beginning you will need a few basic items.
- The software. Adobe Audition 1.5 is not cheap but it is well worth the near $300 price tag. Numerous sites offer trial downloads, one of which is www.download.com. Many of the paranormal investigators (also known as “ghost hunters”) that I know either work with Adobe Audition 1.5 or the new 2.0 or are saving their pennies so that they can get one of them. The newest version (2.0) has many of the same features but they are not accessed in the same way as the 1.5 version.
- Another item that you will need is a patch cord. This is used to transfer your recording onto your computer and when you use Adobe Audition 1.5 you can upload directly to Audition by creating a new file. Generally I stay away from the USB connection wires and go more for the double male end stereo patch cords. To use this cord, plug one end of the patch cord into the Headphone jack on your recorder and the other end either into the microphone jack or directly into your sound card on your computer.
- As with recording for EVP, you will also want Headphones to use when working with the Adobe Audition 1.5. This helps to keep the sound right by your ear and it helps you to pick out the quieter EVP that you may record.
- The last item that you will need is a recording; preferably one that you believe (after listening to it) has at least one EVP on it.
Processing your recording:
Now you are ready to upload your recording onto the Adobe Audition 1.5 software. Follow the steps below to help you through one cleaning of an EVP. For the sake of this article we will say that the recording I will hypothetically be using has at least two EVP within it. If yours has more, simply repeat the steps as needed until all of the EVP you hear have been analyzed. I would suggest that you read each step before doing it.
Step 1:
Make sure the volume is at the highest it can go or as loud as you can stand it before uploading to your computer.
Step 2:
Plug in both ends of your patch cord, one end into your recorder and one end into your computer (either the line in jack or the microphone jack). If you are using the line in jack double click on the volume bottom (usually a speaker icon) on the bottom right corner of your screen. Then go to Properties. Then click on line in. If you are using the microphone jack be sure that your microphone is unmated.
Step 3:
Open your Adobe Audition 1.5 on your computer screen.
Before uploading click on Edit, which is located in the top left of the Adobe screen in-between the words File and View. A drop down menu will appear. Make sure that the Enable Undo/Redo choice has a check mark next to it. If it does not, then click on it to make one appear.
Step 4:
Now it is time to upload your recording.
Click on File
Click on New
A box should appear on your screen that says New Waveform at the top.
For Sample Rate select 48,000
For Channels select Stereo
For Resolution select 16-bit
Click OK
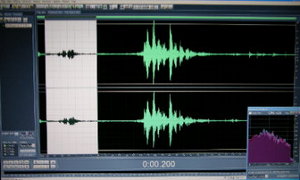
You should now have a blank grid on your screen. Because it was selected as Stereo you will see two lines that are going to record. Mono would only have one.
Step 5:
Select the Record button (button with the red dot) in the lower left hand corner of your Adobe screen. This takes some timing on your part, but at approximately the same time hit the Play button on your recorder. You will see the sound waves record. If you are not listening to your recording as it uploads then be sure to watch for when it is done and then select the Stop button (the button with a square on it located in the lower left corner of your screen) on your Adobe screen as well as stop your recorder. If you are using a digital recorder you can watch the time and be able to tell when it has finished uploading that file. If you are using a cassette recorder be sure to watch the wave lines until they flat line. Don’t worry about recording a few minutes of nothing at the end of your recording as that can be edited out later.
Step 6:
Listen to the recording (with your headphones) you just uploaded onto your computer. If it is too loud adjust the volumes and try again. If you don’t hear anything be sure to check and make sure nothing is muted and that the volume is turned up on your recorder, headphones (if applicable) and your computer and that the patch cord is completely plugged in (and also in the correct jacks).
Step 7:
This step is only to be gone through once you are satisfied with how your uploaded audio file sounds.
As you listen to your recording watch the bar move across the wave. When you hear something that you would like to analyze further place your cursor over that area and click. This will leave another bar in that place. To highlight the area click on the bar that just appeared and drag it over as far as the sound clip you would like to analyze goes. This may take some practice on your part. Once the area is highlighted you can press Play to listen and make sure you got the complete clip you meat to separate.
Once you have the complete sound clip (usually each EVP has it’s own sound clip unless two or more are very close to each other) Right click and select Copy to New. A new screen should appear containing only the sound clip you just selected. You can go back to the complete sound clip by selecting it from the files menu along the left side of your Adobe Audition screen. As you get better at this step you will find that you are able to listen to your complete recording while at the same time selecting and copying to new the clips that you would like to analyze after listening to the entire file. What you will be left with is your complete unaltered recording (always good to keep) and a list of smaller clips from that file that you can process. All of these will be listed in the file menu along the left side of your Adobe screen.
——————————————————————–
Now that you have each section separated from the original recording you can get to work on “cleaning” them up. Remember that the more you do to a recording the more it comes into question by the skeptics so the thought going into this should be “less is more”. If you do any of the following actions and do not like how it sounds afterward you can click on Edit (top left of your screen again) and then select Undo. You can undo any action as long as you do not save the file before you are finished with processing it. This feature is not included with a lot of other programs used for processing EVP and is one of the reasons that paranormal investigators like this program so much.
Below you will find some actions that you can use along with steps needed to make them work. Only use what you feel is needed for each recording. There is no standard on what should be done with each recording, as all recordings are different. Some recordings may only need to be separated from the original recording and be all set. Others may need just a little boost to make them louder. And some need quite a bit of work in order to clear out background noise, boost the sound, remove hiss, get rid of some static, etc. Personal discretion is required and if you feel one makes it sound worse than it did before then go back. Sadly, not all (in fact most) EVP are not very clear and are open to interpretation. Try to do some of the following in different order and see if the recording sounds any better or worse. You will find other functions not listed below as I am only including steps to get you going on working with Adobe Audition 1.5 to process your EVP recordings. Don’t worry though; I am making sure that I add enough possible functions to clean just about any EVP. One tip that I will pass along is to not just do the function(s) on the EVP, but to do it on the entire selected clip, whether human voices are included or not. This will keep the recording more uniform and less like sounding as if the EVP was added in later. If you are looking for the Hertz level of a certain EVP you will need to get it prior to altering the recording in any way.
Amplify:
This is the first function you will do to any recording when beginning to process it. Unless the sound level is perfect amplification needs to be done first. Get the recording as loud as you want it (even if it sounds bad with static and such) before going on to another function to try and clean it up more. Trying to amplify a sound clip after you have used another function on it will distort any of the work you have done on it.
Highlight the area you want to amplify. If it is the entire recording simply double click on the wave pattern to select all.
Click on Effects (located in the top navigation bar in between View and Generate)
Hover over Amplitude
Select Amplify/Fade
Generally you go in small increases by selecting 3dB Boost and then clicking OK.
If you know that you need a larger amplification boost then select 6dB Boost and then click OK.
Continue to do this step until you are satisfied with the sound level of your recording.
Listen after every increase.
Hiss Cut:
This is used is there is a lot of static hiss in the background of your recording. Take note of the fact that many EVP are imbedded in static that has been recorded so any hiss cut to those EVP will also decrease the clarity of the EVP.
Highlight the area you want to perform a hiss cut on.
Click on Effects
Hover over Filters
Click on Scientific Filters
You will see a box appear that has a Presets menu on the right hand upper side.
Select Hiss Cut (above 10kHZ) to start.
Click OK
This is the smallest hiss cut and is very accurate. This only cuts the hiss above 10kHz and more often than not leaves all EVP.
Listen after each hiss cut.
Subsonic Rumble Filter:
If you have taken the time to listen to any of the EVP posted on the Internet you have probably heard at least one that has a warble sound in the background. This is called subsonic rumble and it tends to be a problem more with digital recorders than with cassette recorders. More often than not subsonic rumble appears in a recording when the recording settings were not set to their highest setting available.
Highlight the area you want to perform the subsonic rumble filter on.
Click on Effects
Hover over Filters
Select Scientific Filter
Click the Preset Remove Subsonic Rumble
Listen to your recording.
Noise Reduction:
This is a very sensitive feature but it works well on cassette recordings and when there is background chatter. This feature can easily be overdone so remember that you have the Undo option if needed.
Highlight the area you want to reduce noise in.
Click Effects
Hover over Noise Reduction
Select Noise Reduction from the side menu.
In the top right of the new box you will see a button that says Select Capture Profile
Click that button.
When that is done you now have to do the tricky part.
You will see a graph at the top of this area and a slide bar underneath it with three colored areas, Green, Yellow and Red. If the slide bar is anywhere other than the Green area move it all the way to the left and back into the green area. The slide should NOT leave the green area completely. This takes practice to use this feature so take your time and notice how the slightest shift can make a big difference.
Time/Pitch:
Sometime EVP are very fast and that makes it hard to understand what is being said. Often you will find that a phrase in an EVP gets “smushed” together, thereby making each word in that phrase hard to understand as well. When this happens the following is used to stretch the EVP to make it a little easier to understand each word.
Highlight only the area you want to slow down.
Click on Effects
Hover over Time/Pitch
Select Stretch…
In the Presets menu select Slow Down
Click the box that says Low Precision (the default is high)
Click OK
Listen to what you slowed down. If it is over done then use your Undo button in the Edit dropdown menu.
Click/Pop:
This feature is mostly used on cassette recordings but it can be used for digital recordings as well.
Highlight the area you want to remove the clicks and/or pops in.
Click on Effects
Hover over Noise Reduction
Select Click/Pop Eliminator
In the Presets menu select Hiss + Lots of Clicks
Click OK
Depending on the file size this can take awhile.
Listen when it is done working.
Reverse:
Many paranormal researchers feel that some EVP do indeed have a reverse meaning. Whereas human speech is gobbledygook in reverse, some spirits have mirror speech in reverse, but animals sound the same forward as in reverse. All EVP should be checked for a reverse meaning.
Highlight only the area you want to reverse.
Click Effects
Click Reverse
Listen to what you just reversed.
Use the Undo to change it back to playing forward.
Remove Vocals:
Human voices can get in the way of some EVP. In that case this feature might be able to help you. Depending on how loud the human voices are this feature will either completely remove or severely diminish any humans talking in your recording.
Highlight the area you want human voices removed from.
Click on Favorites in the top navigation bar.
Click on Vocal Remove
Internet sharing:
If you plan on adding your EVP to a website or sending it to one this next step will help make it easier and a tiny bit clearer for the different audio players available as well as make the upload time faster.
Click on Effects
Hover over Filters
Select Graphic Equalizer
Click the 30 Band (1/3 octave) tab at the top of the screen that comes up.
Next go to the Presets scroll menu in the bottom left of the same window.
Scroll down and select Destination: Home Theater
Do NOT change any of the other settings.
Click OK
As the last step in finishing your EVP cleaning process make sure that you save the cleaned file as an .mp3 and not as a .wav.