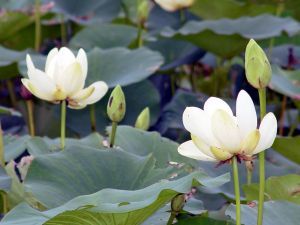
For a tranquil spot to create a calming influence and attract birds to your garden, you can’t beat a water lily pond. Let the beauty that inspired the great French Impressionist, Claude Monet, inspire you as well. Here’s how to build a water lily pond in your own garden.
The Best Location for Your Waterlily Pond
Always situate any garden pond away from trees! Doing so will help to keep leaves out, and prevent tree roots from poking through your underlay. Waterlilies require full sun to grow, another reason to keep this particular pond out of the shade.
How to Design Your Waterlily Pond
For the most natural look, design your pond in a free-form shape. You can use an old garden hose for this, laying it on the ground and moving it around until you like what you see. When you’re satisfied, take a garden spade and mark the shape, then remove the hose.
Now, it’s time to dig! So grab a shovel and a friend or two, and have at it.
Waterlily Ponds, in Depth
A waterlily pond mustn’t be too shallow. In order to grow waterlilies successfully, your pond should be about 24 inches deep, and that depth should be level throughout the entire pool. But make sure that the sides have a gradual slope! This will enable any small creatures that might fall in to scramble out easily, and allow any birds you’ve attracted to wade in for a leisurely bath!
How to Measure for the Liner
Once you’ve finished digging, measure both the length and width of your pond at its widest points. Remember that your pond has depth as well as width and length, so include the sloping sides in your calculations. Now add about two feet to each of these measurements. Don’t skimp on your liner! If it’s too small in any dimension, your pond will continually leak.
Pad Your Pond
Before you lay your liner, scrounge up an old rug or some carpet remnants, and use them to line the hole completely. Cut the rug to match the shape of the bottom, and lay the smaller pieces and remnants around the sloping sides. This padding will prevent rocks, twigs or other sharp objects from poking through and tearing holes in your liner.
When you’re pleased with the placement of your padding, unfold your liner, lay it carefully in place, and add the water.
Plant the Waterlilies
Each waterlily plant will require its own container. The experts at Better Homes and Gardens recommend that you choose plastic pots about 10 inches in height, and fill each to just below 1 1/2 (one and one-half) inches of the top with a mixture of three parts loam to one part of decayed compost or manure. Lay one tuber per pot on its side atop the soil. Now just barely cover the tuber with more soil, and fill the container the rest of the way with about one inch of sand or small pebbles.
Place the Waterlilies in the Pond
For each plant, place two bricks in the pool at the desired location. Now set the container on top of the two bricks, and weight it with stones if necessary. According to Better Homes and Gardens, when the plant is sited correctly, the bottom of its container should sit about 4 inches above the bottom, with the top about 10 inches below the water’s surface.
Landscape Your Waterlily Pond
Place rocks and paving stones strategically around the edge of the pond to hold the liner in place, and add your border plants as desired. Your choice of landscaping materials is endless.
Now just sit back, relax, and wait. You’re off to a good start, and after your lilies have started to bloom, you might just be inspired to grab your paintbox and create your own masterpiece, just like Monsieur Monet.
Related Reading:
Expand Your Concrete Patio the Easy Way: Use a Grid