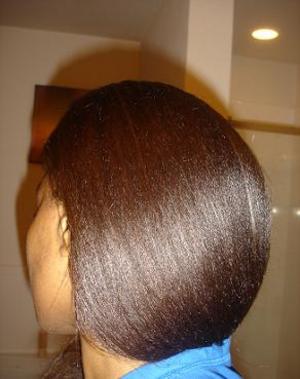
Want to learn how to prepare your hair for chemical relaxing and straightening? This article will teach you a four-step hair preparation strategy that you can use to protect your hair just prior to any chemical relaxer service!
But first, why am I an authority on this issue?
Well first, I am a woman of color who has dealt with my own chemically relaxed hair for over 15 years. For the last several years, I have been into promoting healthy hair care strategies for women of color, and the Internet has allowed me and many others the opportunity to address these populations that would otherwise remain underserved in traditional media outlets. For me hair was a problem, turned hobby, turned passion.
Because of my experience and undergraduate background in science and health care, I regularly disseminate trusted and valuable hair care information and advice on hair care forums webwide. Currently, I am in the midst of writing a manuscript for a more comprehensive work on black hair care and I maintain an online hair album that documents my hair success and progress!
We must begin with the obvious: chemical hair relaxing is a very stressful process on the hair. Because of the aggressive nature of these straightening chemicals and the extreme consequences that may arise from improper usage, careful thought and consideration should be given to preparing the hair for this process.
Prepping the Hair:
First and foremost, only begin the relaxer process with hair that is in tip top shape. Many of us say: Oh my hair is breaking…or shedding let me go ahead relax it! But, you must understand that you are taking a huge gamble with your hair health by proceeding with a chemical relaxer application on compromised hair.
Never relax your hair to “solve” a hair problem. You should always correct the problem first with the proper treatment. If your problem is hair breakage, you must pinpoint the cause of the breakage and treat the hair accordingly. You’ll simply need to increase the moisture you give your hair if your breakage is from an overuse of protein, or increase the protein if your breakage is a result of over-conditioning. If your problem is shedding, be patient and let nature do what it needs to do first. Some have had success with garlic shampoo treatments for shedding problems, but because shedding is a response to natural, hormonal processes, topical treatments may not work.
Only when your hair and scalp have returned to normal should you proceed with your relaxer service. Relaxing your hair will only aggravate the condition you are facing by making your hair weaker and more vulnerable to damage. These strong chemicals could cause you even more breakage, shedding, or permanent hair loss if done to fix an existing hair problem. I cannot stress this enough ladies, relaxing should never be used as a means of correcting hair issues. You must solve the problems of shedding, dryness, or breakage BEFORE you relax your hair.
Your 4 Step Pre-Relaxer Game Plan
Preparing your hair for a relaxer is one of the best things you can do for your hair heath.You can follow these pre and post relaxer strategies whether you self relax or see a stylist for your chemical treatments. Ensuring your hair is in top physical condition prior to the relaxer service will give you better results with the finished product.
Step 1: Clean it Up!
Your final shampooing should take place on the last 3-5 days before your relaxer. At this wash (particularly if you desire a straighter, more thoroughly processed result), you should use a clarifying shampoo to remove any deposits or product buildup on the hair. A clarifiying shampoo, or any “stripping” shampoo containing the detergents Sodium Lauryl/Laureth Sulfate or Ammonium Lauryl/Laureth Sulfate will be strong enough to remove buildup and maintain a clean and clear head of hair. (Assuming you use minimal or non- heavy products leading up to your hair service.) I highly recommend Pantene Pro-V Purity Shampoo ($3-5) for clarifying purposes. If you do not wish to have a bone straight look and prefer some texture, then you may continue to apply your products in their normal ratios up until the relaxer.
Step 2: Toughen it Up!
You should treat your hair to a protein treatment the final wash before your relaxer. Follow up the treatment with a good moisturizing deep conditioning. Giving your hair a protein treatment in the days leading up to your relaxer application gives your hair little more protein to work with going into the relaxer. This prevents the relaxing process from totally compromising the strength of your hair when your inner protein bonds are manipulated. To determine which strength of protein reconstructor to use, I would first do a breakage assessment of the hair. If you are already having some breakage, I would go with a moderate to heavy treatment for damaged hair. I recommend the Aphogee Treament for Damaged Hair (under $8) for heavy protein conditioning. If you don’t have any noticeable breakage, then a lighter/milder treatment should be fine. I recommend Aphogee 2 Minute Keratin Reconstructor or Motions CPR Conditioner for light protein conditioning. Both products are less than $5 at any beauty supply store. You can substitute whatever brand of protein reconstructor/conditioner you like to use. Do not proceed with the relaxer application if you are still having noticable breakage or shedding. After you have completed steps 1 and 2, do not wash, scratch, or do anything to disturb your scalp.
Step 3: Protect It!
The day of relaxer, pay special attention to the length and ends of your hair. The hair shaft and ends are especially vulnerable to damage from the relaxing process unless you protect them. Applying a light coating of something like olive oil, castor oil, a thick conditioner, grease or vaseline to your scalp and hair past the new growth prevents the rest of your hair from being “re-relaxed” as a result of overlapping and runoff during the final rinsing of the relaxer. Protection for the length and ends of the hair is essential because the short, compact nature of the new growth makes it is virtually impossible to avoid overlap. This “chemical run” and lack of protection for the shaft and ends is one of the many reasons quite a few relaxed ladies have thinner, and thinner ends.
Also remember, that oiling the new growth itself may leave you underprocessed because the relaxer has to penetrate through the layers you have put on. If you want a straighter turnout, be sure that you do not coat your new growth– only coat your scalp and hair shaft past the new growth. As always, apply protective base (vaseline, oil, grease) to your scalp, tops of ears, and other sensitive areas . The base will give you an extra layer of protection between the relaxer crème and those areas.
Step 4: Stand Test It!
Perform a strand test before applying any relaxer (or hair coloring chemicals) to your hair, even if you have previously used the chemical in question. Our bodies change, and so does our tolerance and allergies to certain products. Also, it is not uncommon for companies to alter formulas over the years as well. A chemical that may have worked well for you for years may suddenly fail to give you desired effect it once did. Performing a strand test will always let you know where you stand.