Is your deck looking like the outside of a haunted house? Even if it is, deck restoration rather than replacement is your best option. The reason is simple, even an old wood deck will rot in places but remain perfectly strong in others. Deck restoration takes advantage of the good wood remaining in your deck and focuses on replacing or restoring the rotten areas. Here are the steps for a complete deck restoration that will save you thousands of dollars over replacing your old deck with a new one. You’ll find both money saving and time saving tips to make your deck restoration a fun summer home improvement project.
Step #1: Assess the Wear and Tear of Your Old Deck
When assessing the amount of deck restoration needed, begin with the floorboards. Any rotten wood in the floors will have to be replaced for safety reasons. Next assess the strength of the rail beams (not the rail itself). Again, deck restoration on supporting sections must involve complete replacement. Make note of how many beams you’ll have to buy and approximately have much lumber.
Step #2: Saving Money on Lumber
Though pressure treated wood is better for deck restoration, it is more expensive. Since you’ll be priming then painting the finished deck, you can save money by buying cheap 2×4 lumber for the deck floorboards and rail. Also buy wood putty for deck restoration on partially rotten wood.
Step #3: Deck Floor Restoration
Begin at the far end of the deck, pulling out all rotten floorboards with a hammer and chisel. Work your way until you get back into the house or off the deck. Next, replace the rotten floorboards with fresh 2×4 lumber, working your way along the deck, always staying on the part of the deck that has already been restored. Note: Do not lean on the rail or rotten deck sections!
Step #4: Deck Rail Restoration
Any deck rail beams that show deep core rotting should be removed and replaced. However ,for superficial or local rotten, use the wood filler (putty), first scrapping out the rotten wood then filling in the gap. For the deck rail restoration, replace any rotten wood with 2×4 lumber, or simply re-strengthen the old wood by nailing it to the new deck rail beams.
Step #5: Deck Restoration Finish
Once all parts of the deck have been restored, it’s time to give the deck finish attention. Begin by pressure washing the deck to remove any chipping old paint and to expose any rotten wood that you may have missed during the deck restoration. Restore these areas after the deck is dry, and repeat the pressure cleaning if necessary. Note: Pressure cleaning will save you the hassle of having to sand the deck to restore it.
Step #6: Deck Restoration Priming
Protect the restored deck by priming the wood before painting. First protect all areas surrounding the deck with plastic sheeting that you purchase bulk (in a large box) to save money. Use a spray gun that fits into the 5 gallon can of primer. Work slowly, to get the primer into every deck groove. Note: Protecting the house against paint splatter is boring work, but it will save you a great deal of clean up after your deck restoration is done.
Step #7: Deck Restoration Paint
Bring several deck paint samples home and paint small sections of the deck, leaving them to bleach in the sun for a few days. The paint color will change as it dries. You can choose the color you like for your deck restoration after 4 days. Again use the spray gun in the 5 gallon can to carefully cover every part of the deck. Where deck restoration was heavy, you may have to sand the wood putty down a little and paint 2 coats of paint. Note: Priming the deck before painting will save you from having to restore the entire deck with 2 coats of paint. Remember that primer is cheaper than paint.
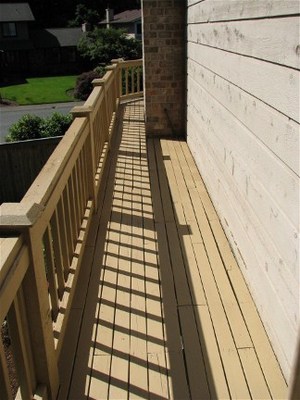
See before and after pictures of the author’s deck restoration.
References:
Inventive Home Improvement: Refurbishing My Old Deck.


