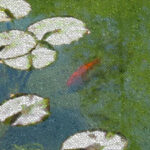
In this tutorial, you will learn how to pixelate images using Adobe Photoshop. A pixelated images is basically having blocks on the image to give it a mosaic effect. This is one of my favorite photo manipulating techniques, and almost anyone can do it, beginning users to advanced users, it is that easy (because it is in 4 steps total)! Plus, it is great if you just want to spice up your images or photos to give them a more creative or unique feeling. And they are especially awesome for: printing out and framing, web graphics, web images, wall papers, t-shirt designs, banners, sigs, and much more. There are a lot of similar tutorials out there that will claim that they give a similar effect, however, this is untrue. I have searched many pixelating tutorials tutorials, and most of them come out with unusable images, which is definitely what no one wants. It took me quite a while to come up with this one and I guarentee this tutorial will not be like the others. Your image will be usable in all of the previously listed situations!
Now, as always, you will need a good photo to work with. The great thing about this photo effect is that it will work on just about any photo; landscapes, portraits, sport scenes, macro shots, nature, anything! So to begin with, you will need to open up the image or photo document in Adobe Photoshop as its own canvas. If you do not have a photo to work with, you can always find and choose and image to work with from a free stock photo site, such as www.sxc.hu. This is the site where I always get my stock photos. The size is spectacular and quality is just amazing!
Step 1) Open up your document as previously mentioned. Make sure the layers are all flattened (especially if you are copying and pasting from a site). Layers> Flatten. Also, go to Image> Adjustments> Auto Contrast to sort of any errors in color and contrast.
Step 2) Duplicate the image by going to Layer> Duplicate Layer. This will prepare you for a later step in the tutorial.
Step 3) Now go to Fliter> Pixelate Mosaic. It will allow you to choose the cell size (the cell size is just the size of the blocks). For this tutorial, you want the image to have large blocks while still having the image or photo outline. A good cell size would be between 60-80. You can always make it smaller or larger.
Step 4) Next, change the Blending Mode of this new pixelated later to just Overlay. You can find this by going to the layer palette located in the Photoshop window, usually floating in the lower right hand corner, right clicking the top layer, going to blending mode, and then selecting the Overlay option. This will give your image a neat, glossy feel.
And then you are done. If you are more of an advanced user, you can also use vector images. Now you have a great image that is both web and print ready!


