Create unique crafts with salt and chalk. These crafts are more time consuming and for older kids, and they require a lot of imagination.
Sand Art(pictured)
This version of sand art is a bit harder and will take some practice. Using this version omits using glue (and waiting for it to dry) and requires the child to plan how they want their picture to look. It also teaches skill and a steady hand. The best part about this version of sand art is that you don’t have to worry about the salt getting mixed in with the other colors while you’re waiting for the glue to dry.
What you need:
Chalk, all colors
Salt
Bowls to put colored salt in
Paper plate
Full sheet or large size mailing labels (for printer use)
Xacto knife Cutting board
Pencil
Straight pin
What to do:
Pour some salt onto a paper plate. Rub chalk over the salt until you get the color you want. Pour the salt into a bowl and set aside. Do this for all the colors you want for your picture.
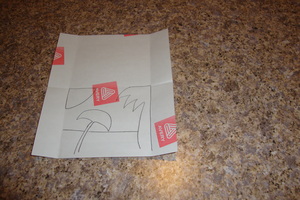
On a full sheet mailing label (or you can use any large mailing label size), turn over and draw a picture of what you want to create on the back. Don’t worry about any brand labels. You will eventually cut those away and they won’t be seen. The first picture shown was drawn on a large mailing label to show details.
Use a xacto knife to gently cut on the lines of your picture. I recommend practicing this before you cut your picture. You don’t need to press real hard, just enough to cut the backing of the mailing label. If you can hear the paper cutting, you’re doing fine. You don’t want to press too hard or you will cut all the way through your picture.
If you need to, label each section of what color you want it to be. Starting with the darkest color first, and working your way to the lighter colors (white will always be the last color you do), use a straight pin to lift the sections off to expose the sticky part of the mailing label. Only lift the sections for the same color. Add the colored salt and use your finger to rub it down. Once all the sections for that color are done, knock off the extra salt and continue until all the sections are covered in colored salt.
Tip: Put packing tape on the back of your picture for added stability when cutting. Once your picture is done, you can glue it on a piece of construction paper or card stock to make it a little stronger.
Got some extra “sand”? Make a Sand Art Jar (pictured)
Grab a plain jar of any kind with a lid.
Add the colored “sand” to create designs in the jar. You can use a pencil to push down into the sand and create points and spikes between the colored layers. Be sure to fill the salt all the way to the very top so the colored salt doesn’t shift and ruin your design.