Throughout the years, I’ve managed to learn more about candles than any sane person should know. I was a manager for Yankee Candle Company for a few years, and during that time, I was extensively trained on how to properly burn any and every type of candle. A lot of people don’t understand the correct way to burn a particular candle, and perhaps the most misunderstood of all is the pillar candle.
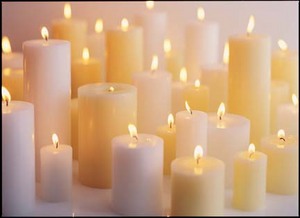
A pillar candle is any candle that is designed to be burned without a holder. Unlike jar candles, which are cased in glass, or votive candles which require a holder, pillar candles are ”stand alone.” Before we talk about how to properly burn a pillar candle, however, it is helpful to first understand how pillar candles are made.
To manufacture a pillar candle, companies use giant machines called extruders. The best example of an extruder would be those little machines that come in Play-Doh play sets–you put a lump of clay in, push down a lever, and the clay is forced out of a small hole to create a snake-like tube. Candle-making extruders work the same way–soft, warm wax is pressed through a small opening, creating a long tube of wax. The tube is cut into individual pieces, creating the core of the pillar candle.
Once this core cools, the wax is submerged in a pool of melted paraffin, which serves two very important purposes. First, this creates a hard outer edge for the candle which will prevent wax from spilling over the sides of the pillar when it is burning. It also creates a slight bowl-shaped depression at the top of the candle which will further help contain the melted wax. After this step, a small hole is drilled through the pillar and a wick is inserted from the bottom. After a quick polish, the pillar is finished and is ready to be sold.
When you go to burn your pillar candle for the first time, you’ll want to take a pair of scissors and trim the wick to about 1/8 of an inch (as you would with any candle). Although pillars are designed to burn down inside of themselves, it is a good idea to put your pillar on a plate or trivet just in case it gets bumped and some wax spills over the side. When you do light it, make sure to let it burn long enough so that the way melts almost to the edge of the candle–a good rule of thumb is to let the candle burn for 1 hour for every inch of diameter. So if your candle is 4 inches across, you’ll need to let it burn for at least 4 hours for the wax pool to reach the edge of the pillar. This will help insure that your pillar burns evenly and that the wick won’t “drown” in melted wax next time you light it.
As I mentioned earlier, pillars are designed to burn down through the middle of the candle while leaving an outer wax shell. A lot of people like the ”glowing from within” effect created by pillar candles, while others just see a lot of wasted wax. I prefer to just let the pillar burn down inside of itself, but if the excess wax bothers you, you can solve the problem by ”hugging” your pillar. The ”hugging” process simply involves rolling the sides of the pillar inward and downward with your thumbs while the wax is warm. Just make sure to use gentle, even pressure. After the pillar has been lit for a while, the wax will be soft enough to allow you to mold it to your desired shape.
Finally, stop burning your pillar when it is about an inch tall. It may be tempting to want to squeeze the last little bit of burn time from your candle, but all you’ll do is create a fire hazard and a mess. If you follow these simple steps, your pillar candle will stay looking and smelling great for a long time to come! (Also, if you like to burn jar candles, be sure to check out my previous article called “How to Properly Burn a Large Jar Candle.”)


