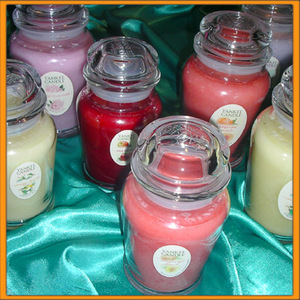
Jar candles are very popular in America today and many retailers offer their own jar candles, including Bath & Body Works, Yankee Candle Company, Pier 1, Target, and even Wal-Mart. People love the fragrance and ambiance that large jar candles provide for their homes. Unfortunately, many people run into problems when they burn these candles. Luckily, by following a few easy steps, you can avoid these mishaps and keep your candles looking great for a long time to come.
I worked as a Manager for Yankee Candle Company for several years, and during that time I accepted tons of customer returns. There are two main problems that people tend to encounter when burning jar candles–soot and “tunneling.” Black soot is produced when the wick of the candle burns, and sometimes this soot can collect on the glass near the top of the jar (which can make a pretty candle look ugly in no time). “Tunneling” is when the wick burns straight down the middle of the candle, leaving lots of excess wax on the sides. Here are some easy steps you can follow to avoid soot and tunneling:
Step 1: Trim the wick. The biggest cause of soot on jar candles is wicks that are not properly trimmed. For the best performance, you should keep the candle wick trimmed to between 1/8 and ¼ of an inch at all times. You should definitely trim the wick when you first get the candle, because most manufacturers don’t take the time to trim the wick to the proper length. Take out a ruler and look at the little lines–most people don’t realize just how short 1/8″ really is. The flame may start out small at first, but it will get larger quickly as the candle continues to burn.
As the candle burns, keep an eye on the wick. As the wax level lowers, the wick will get longer. If at any point the flame starts to “flicker” and jump a lot, or if you see a small stream of smoke coming from the flame, you need to blow the candle out and trim the wick. Usually you can just use a pair of long scissors to trim the wick, although candle stores sell tools called “wick snippers” that are specially designed for this task.
Step 2: Let your candle burn for several hours. Many people like to light a candle for an hour or two, and then extinguish the flame. That is no problem with smaller candles, but not letting a large jar burn for long enough can ruin your jar candle. Let me explain: the pool of melted wax needs to reach the edge of the jar before you blow the candle out. If the melted wax does not reach the edge of the jar, it will create a “ring” in the wax, and the next time you burn the candle the wax will only melt as far as that ring. After a few cycles of this, the wick begins to “tunnel” down the middle of the candle and eventually gets “buried” so the candle is unusable.
So, as I stated before, you need to let the wax melt all the way to the edge of the jar. For most large candles, this means that you need to let the candle burn for at least 4-6 hours. A good rule of thumb is to let the candle burn for one hour per inch of diameter. A Yankee Candle large jar is 6 inches across, so 6 hours is a good estimate of how long it will take the wax to melt to the edge. If you can’t let your candle burn for at least several hours, don’t light it–otherwise, you’ll end up running your jar candle.
Step 3: Put a lid on it (your candle, that is)! Another accessory commonly available at candle retailers is a metal or ceramic “lid” that sits on top of your jar candle while it burns. I would highly recommend picking up one of these inexpensive items. The lids serve two purposes. First, soot will collect on the underside of the lid, instead of on the glass of the jar candle, so it will keep your candle looking very clean. Also, the lid serves to “trap” some of the heat generated by the burning candle and redirect it back to the jar, which means that the candle will melt quicker, generating more fragrance and allowing for shorter burning times.
Another great thing about these lids is that they seem to “fix” candles that have been messed up by improper burning in the past. They won’t take away black soot that is already on the glass, but if you have a candle that has “tunneled” and has a lot of excess wax on the sides, burning the candle with one of these lids for a few hours could fix the problem and make it look brand new again.
Step 4: Practice good candle hygiene. There are a few other things you can do to keep your candles looking their best. First, keep the candle wax free of and wick clippings or other debris. I’ve seen people light a candle with a match and just drop the matchstick into the candl–not only is this ugly, it is a major fire hazard. Next, if you do get any soot that collects on the glass jar, you can usually just wipe it off with a paper towel moistened with some Windex. Soot comes off easier when the glass is warm, so you may want to try cleaning the soot after you have burned the candle for awhile.
Finally, despite your best efforts, some wax will probably be left over on the sides of the jar and your candle may start to tunnel slightly. If this happens, you can simply push the wax down when it is warm, working your way around the entire perimeter of the jar, using either your finger or some other tool. This procedure is known as “hugging” your candle.
This may sound like a lot of work, but I think it is worth it. Premium jar candles can cost a lot of money ($20 or $30 or even more), but by following the simple steps outlined above, you can protect your candle investment and keep your house looking and smelling its best!