Here is a step by step process on how to make small flash cards. These flash cards measure 2½” by 1 ½”. These are ¼ the size of a regular flash card (3″x5″). The flash cards are small so you can put them in your pocket without bulging or bending the cards. Take a look at this slideshow: How to Make Small Flash Cards Tutorial
Here are the materials you will need:
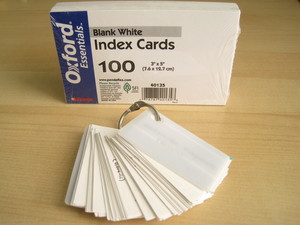
1. Blank or Ruled White Index Cards. Most stores sell them in packs of 100 for less than $1.
2. Metal Book Rings
3. Rubber Band
4. Cardboard or thin plastic (optional)
Step by Step Directions:
Step 1
Go to your local store and buy a pack of index cards. I personally prefer blank index cards but it depends on your personal preference. Since most index cards come pretty cheap go ahead and get enough to last you for the entire school year or semester. You can never have enough flash cards. They always come in handy. I keep 2-3 packs in the office.
Step 2
Use a black pen and create a template by dividing it into four sections. Make marks at 2 ½ inches and at 1 ½ “inches. This will be your template for all the other flash cards.
Step 3
Next use a pencil and repeat the step by making ten or more templates. Simply align a blank flash card next to the template and make a dot where the lines are. It’s a good idea to make more templates so you don’t have to repeat this process during the middle of the semester.
Step 4
Take five blank flash cards and put them under a pencil template. Now you should have a stack of six flash cards. Use paper clips and attach them on the four sections to keep the flash cards from moving. This keeps the flash cards straight when you cut them with a scissor.
Step 5
Remove the paper clips and put the four stacks of flash cards aside. On a side note, you might want to shuffle the cards later to mix them that way they seem more uniform when you put them all together. They tend to be off by a few millimeters. It’s not a big deal.
Step 6
Repeat step 4 until you have a good number of small flash cards. If you put the time and effort into this project you can make close to 400 smaller flash cards out of one pack of 100. This saves you a little money and you don’t have to go to the store and buy them as often. I would recommend doing this before the beginning of the school year or when you have some free time.
Step 7
Use a hole puncher and make holes on the right hand corner of the flash cards. I take about five at a time but it really depends on the type of hole puncher you have. Make sure the placement of the hole is consistent with the others. Again, you don’t have to do this step. It’s optional.
Step 8
Get a metal book ring. You can get them at any school supply section. The ring keeps the cards together when you turn them and you don’t have to worry about losing them.
Step 9
I made covers for my flash cards, this keeps them form bending and getting dirty. Find some sturdy material like card board or thin plastic. I use old notebook covers. The plastic covers are perfect and some already have holes punched in the left hand corner. Just trace one of the small flash cards and cut it out. Make two of them for the front and back.
Step 10
Put all the parts together. Now you have flash cards that are ¼ the size of regular flash cards. All you need now is a rubber band to keep them together.
Final Thoughts
Making small flash cards may seem time consuming. I agree it takes time and effort to make them but the time and effort you put into them is worth it. Keep in mind that making flash cards is about the attitude and mindset you have towards learning. If you really want to improve your studying habits, try this method and you’ll see the results for yourself. I would recommend that you take the flash cards everywhere and study them as often as you can.