If you are going to engage in this ancient craft, I highly recommend you do not go to the local craft store and start buying up candle crafting products. Not only are they obscenely overpriced and tacky, they are quite toxic. No laws have yet been made to ensure the safety of consumers who buy regular petroleum candles. Candle wax is made from petroleum paraffin – a derivative of petroleum gas. It is toxic when burned and causes respiratory problems. Imagine running your car inside of your house.
Regular store-bought candles also contain lead inside their wicks which burns off when the candle is burned and is released into the air. This lead is inhaled into the lungs as you breathe and makes contact with your skin when it settles on floors and furniture. Safe candles to buy are soy wax, coconut palm oil, and beeswax candles with lead-free wicks. If it does not say “lead-free” don’t buy it. A good way to check to make sure the wicks are lead-free is to look at the wick. Leaded wicks have what looks like a thin piece of black or silver wire in the center of the wick. If you can’t see a wire, trim a little of the wick off and look again.
Making your own candles is lots of fun and highly rewarding. Because handmade candles need lots of work, they make great gifts that let the receiver know you care enough to put time and effort into your creation. Poured candles are most common, but hand-dipped candles are much more beautiful and burn longer. You can also make an easy candle with rolled beeswax. This is much easier and even children can take part. These candles also burn very quickly, so don’t expect them to last a long time like the regular beeswax candles.
Beeswax does not need to be scented. When burned, it smells like warm honey and lends a beautiful old-fashioned smell to the home. Beeswax candles are the cleanest burning candles in the world and will burn longer than any other candle. Also, because beeswax is a fairly hard wax, it is the least likely to drip. To prevent your beeswax candles from dripping, keep the wicks trimmed to 1/4 inch and keep them away from drafts when burning. Beeswax comes in a variety of natural colors including white, yellow, gold, brown, tan, and green.
Making the Wicks
To make your wicks, you will need to buy some natural, undyed cotton cord. It should be thicker than thread but thinner than yarn – like kite string. Try to get unbleached string if you can. Be sure it is 100% cotton. Any other materials will ruin your candle. Measure out three strings all the same length and twice as long as you want your finished wick to be. If you are going to make dipped candles, cut the string four times longer than you want the finished candle to be. Tie them together at one end and hang them over something. I usually hang them on a drawer pull, a thumbtack in the wall, or hold the end in my teeth. Braid the three strings together fairly tightly until you get to the end and tie them off. Now you have a finished wick ready for dipping. Prepare the wicks for dipping or pouring by coating them in a couple of layers of melted beeswax. Pull them straight and let them hang dry until hard (about 5 minutes).
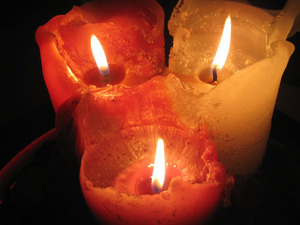
Rolled Beeswax Candles
For rolled beeswax candles (above), you will need some sheets of beeswax honeycomb. These can be purchased from craft stores and bee supply companies. The wax is very soft and should be easy to roll. If you are having trouble rolling it, warm it a little by placing it in warm water for a few seconds. Lay your wick on the edge of the wax and roll it into the candle. If the string keeps coming out, you can melt the inside edge by dipping it in hot water and pressing the wick into it. Roll it up to about 3/4 inch thickness and cut off the edge.
Poured Beeswax Candles
Poured candles can be made with molds purchased at a craft store. If you can’t afford those fancy molds, try making them in miniature paper Dixie cups. You can also pour the melted wax directly into a small glass votive cup. Jar candles also make great gifts and you don’t have to use a mold – the jar is the mold! Just be sure to put in enough wicks for a large candle and don’t put them close to the sides of the jar. The wide-mouthed short mason jars are my favorite for this. Begin by melting your wax in a pan on the stove on the lowest heat possible. Once all the wax is melted, pour it into your mold. Let it sit a moment until it begins to harden. Then, quickly stuff your wick into the center of your candle. Hold it firmly in place if it will not stand up on its own. Once the candle has cooled (about two hours), you can remove it from the mold, trim the wick, and burn it.
Hand-Dipped Candles
Hand-dipped beeswax candles are a little more difficult to make because they take a bit longer and they require a larger initial investment of beeswax. You can dip short candles in a regular pan, medium candles in a larger pan, or you can dip your candles in a special boiler-dipper available at candle supply stores. I was about seven when I first learned to dip candles. My class went on a trip to a reenactment museum and we saw a woman there making candles. She leaned over a huge cauldron that must have held at least fifty gallons of hot melted tallow. Her tallow was made from pig fat, but the process will work the same for any kind of wax, including beeswax.
First, melt all of your wax on low heat. Don’t let it get too hot or leave it unattended. Wax will catch on fire if it gets too hot. Double-boilers work wonderful as the wax does not have contact with the bottom of the pan where it is hottest. I have also heard of melting the wax on top of very hot – NOT boiling – water. The melted wax will float and you can dip your candles into it. Lay your waxed wick over two fingers at the middle and lower both ends into the melted wax. Pull them out and slide a finger between the two wicks to separate them if they are stuck together. Let the wax on the wicks cool before dipping them again.
Do this over and over again until the candles are as thick as you want them. One benefit of making these candles is you can make them as thick as you need, so they will fit any type of candle holder you want to put them in. To make dipped birthday candles, do the same, but only use wicks made from one piece of string instead of three. Save your leftover wax after burning candles and remelt it to use it again.
You may also be interested in this article on How to Make Treasure Candles.


