Installing a soap dispenser is an easy DIY home improvement project that will gives you more space to do dishes, and add a touch of convenience. The project itself takes a very short amount of time, and is relatively inexpensive, but makes the sink area appear a lot nicer. This article will look at step-by-step directions for installing a soap or lotion dispenser in a bathroom or kitchen (the installation process is virtually the same).
Time needed for project:
30 minutes
Materials needed:
Soap dispenser bottle-can be purchased at almost any home improvement or hardware store
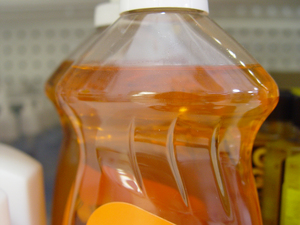
Soap- your preference on which brand
Soap bottle pump- variety of styles can purchased, but most sinks with a soap dispenser outlet comes with one.
Plumber’s putty
Step-by-step directions on installing a built in soap dispenser
1. Check to see if your sink has a spot open for the soap dispenser set up. The opening will be on the opposite side of the kitchen sink sprayer and may be covered up with a plug. In order to do this project the sink basin must have this opening; if you do not have an opening you can replace the entire sink area with a new unit, but that is inexpensive and inefficient for this project. You can also drill out a hole for the soap dispenser when remodeling your kitchen; this is relatively easy if it is done during the remodeling phase.
2. Pop the cap out
If there is a plug that is blocking the empty hole, you will need to remove it. Chances are if the sink basin has a built in spot for a soap dispenser you will find this cap, but if you made the hole yourself then it will not be there. You can use a flat tip screwdriver to pry this piece out.
3. Install the pump
The soap dispenser pump sits on top of a built in ring that keeps the unit in place. The ring mold, or flange should come with the faucet set up that you purchase or can be purchased separately at a home improvement store with a pump set up. Place plumbers putty needs to be applied to the flange in order to keep it secure, excess putty needs to be wiped away from the area once the flange is in place.
4. Installing the soap container
Fill the soap container to about ¾ full. Once the container is full, you can crawl underneath the sink area to where the pump hose can be found. The soap dispenser and pump area should be threaded, which makes for very easy installation. Simply screw the soap dispenser and bottle together, and you have finished the project.
5. Tips
Finding soap dispenser bottles can be difficult, so I recommend bringing your set up with measurement when shopping, so that the home improvement professionals can help you find the right parts. I used to work in a home improvement store and found it very easy to help customers with this project if I knew measurements and had physical pieces to work with.
Personal experience
http://www.youtube.com/watch?v=81d_TDhTJ58


