OK we live in a mobile home so space is a big issue. I have two daughters that share a bedroom . I was getting over ran with toys so I got rid of my desktop, bought a laptop and decided the computer room is now going to be a playroom.
OK now first step is to decide on a theme, If you want one make sure its something that they they wont grow out of in the next year. We went with a theme Little Mermaid. Now I am not an artist so I enlisted the help of my cousin Teresa and her boyfriend they both are very talented . And if you enlist the aid of family its cheaper too.
The Carpet in the room was in horrible condition so we had no choice but to replace it, but if you can keep the carpet that you have and then buy some throw or area rugs that match your theme or paint then its a big money saver. But if you are like me and have to replace the carpet go to a discount carpet store and take a look at the remnants. Most times you can find a piece the size you need or if you can find a couple different pieces of carpet, you can border the room in one color and put another one in the middle for a really neat look. Plus with remnants you can negotiate on the price. I always try and find the best deals possible when redecorating.
We found a remnant in a Berber style in blueish- grey. Berber style carpet is easy to clean which is a must have with kids. Now next is the pad for under the carpet I would suggest that you splurge for this. The pad is not too expensive and it makes the carpet softer and helps absorb moisture. We made a deal with the carpet salesman and got a great price on some left over pad that we pieced together ourselves. Luckily my husband can install carpet so we did not have to pay someone to install it, but if you don’t personally know a handyman, ask around at the carpet place alot of times if you talk directly to an employee you can hire them to do it on their own time as a side job, giving them more money and saving yourself some as well.
OK next is getting the paint ready for your “theme”. We bought a little mermaid story book, and picked out a page with all the characters on it and used that as a guide. Now for the paint here is where things can get quite costly. We went on line first and printed off a color chart for paint, which tells you how many parts of each color to mix to achieve desired color. This is a very handy tool and very easy to find on line. Then we went ahead and bought a tinted primer in Grey. A primer is a must because it holds color, and your paint will last longer.
Next we bought the paint by the gallon we bought red, blue, white and yellow. Then we bought pints of black and metallic red( for the little mermaids hair). Out of those paints we were able to mix and create all the colors we needed for the “scene”. We used paper bowls Popsicle sticks to mix the colors.
So the first step after getting all the paint and carpet supplies together and patting yourself on the back for the great deals you got, you need to go ahead and cover the walls with your primer I would suggest two coats to really get good coverage. And I would keep the room well ventilated while painting and maybe even wear a mask, just read the instructions on the can carefully.
OK so next we wanted to make our walls look like the ocean so we took a blue paint and covered the walls again using two coats. Then we took an aqua color that we mixed using that color chart, and used a sponge and dipped it into the paint and pressed it to the wall in short jabs each smudge about 2 inches apart, then when it was almost dry we took a dry paintbrush and brushed down on the wall giving it a blended look. So then we had our ocean background Sponging is a great way to give an effect that will draw compliments, and you can buy the sponges at any hardware store they are cheap and easy to use.
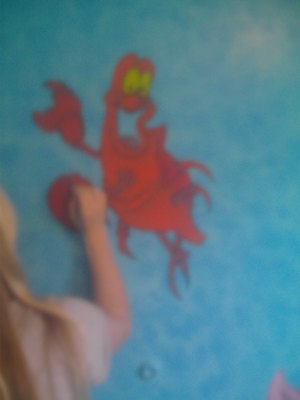
Then it was time for the paintings, we wanted to hand paint Ariel and friends on the wall , and this is where my talented family members come into play, If you are as illiterate as I am when it comes to drawing and you don’t have anyone to help that can draw then you can use stencils, wall border you can cut the figures out of wall border and paste them to your wall, a projector, and trace paper. But luckily for me my family members were able to hand draw all the figures in the scene that I wanted to use. After the painting was done and we felt like we were walking into a mystical ocean, we wanted to add the finishing touches before installing the carpet.
I went and bought some fabric with fishes on it and made my own curtains, believe me its alot cheaper than buying already made ones, I just sewed a seam at the top for the rod and a seam at the bottom, nothing fancy but they looked great. Then We bought one rug that was shaped like a fish bowel and had a fish on it. It was on clearance I think it was actually “Nemo” but it fit with our theme perfectly. I took a table and chairs that had been Dora the explorer and covered it with the same fabric that I had used for my curtains, its amazing what can be done with a glue gun.
We had storage bins already so we just painted them ocean blue and used them for the toys. Then for the final effect we found some ceramic glitter sea life on clearance at t drug store that we placed around the room for a 3-d effect. I think for everything including the carpet we spent around 220.00 Not bad for a redecorated playroom.


