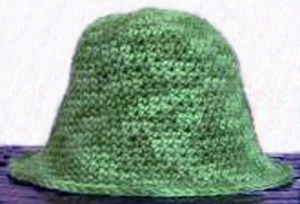
Bucket hats have a wide brim or bottom edge that slopes outward providing protection from the wind and rain. The hat is form fitting but loose enough to prevent flattening your hair when worn. The outward slope of the hat creates a look that is sophisticated yet practical. A crocheted bucket hat is an easy beginners project for those new to crocheting. This particular project is one that I have taught to my grand-daughter at the age of 10. She has been crocheting for about a year and was very happy with her first crocheted hat.
Make a heavy, winter bucket hat using 7 ounces of chunky yarn and a size I/9/5.5mm crochet hook. Follow the same instructions to use other weights of yarn. Add more rows at the end to achieve the desired length. Continue to add additional stitches to each row by repeating row 17 in the instructions below.
Row 2 – Chain 1 stitch. Single crochet in the same stitch as the slipstitch. Single crochet twice in each stitch around for a total of 16 stitches. Join the last stitch to the first stitch in this row and each row hereafter.
Row 3 – Chain 1 stitch. Single crochet in the same stitch as the slipstitch. Complete two single crochets in the following stitch then single crochet once in the next three stitches – repeat the pattern around for a total of 20 stitches. Join.
Row 4 – Repeat row 3 for a total of 25 stitches. Join.
Row 5 – Chain 1 stitch. Single crochet in the same stitch as the slipstitch. Complete two single crochet stitches in the following stitch then single crochet once in the next four stitches – repeat the pattern around for a total of 30 stitches. Join.
Row 6 – Repeat row 5 for a total of 36 stitches. Join.
Row 7 – Repeat row 5 for a total of 42 stitches. Join.
Row 8 – Repeat row 5 for a total of 48 stitches. Join.
Row 9 – Chain 1 stitch. Single crochet in each stitch around and join.
Row 10 – Chain 1 stitch. Single crochet in the next 10 stitches. Complete two single crochet stitches in the next stitch then single crochet once in each of the next 11 stitches. Single crochet twice in the last stitch for a total of 52 stitches. Join.
Row 11 – Chain 1 stitch. Single crochet in each stitch around and join.
Row 12 – Chain 1 stitch. Single crochet in the next five stitches. Complete two single crochet stitches in the next stitch then single crochet once in the next six stitches – repeat the pattern around. Single crochet twice in the last stitch for a total of 56 stitches. Join.
Row 14 -16 – Chain 1 stitch. Single crochet in each stitch around. Join.
Row 17 – Chain 1 stitch. Single crochet in the next five stitches. Complete two single crochet stitches in the next stitch and one single crochet in the next five stitches – repeat around for a total of 66 stitches. Single crochet in the last stitch. Join.
Row 18 – Chain 1 stitch. Repeat row 17 for a total of 71 stitches. Join.
Row 19 – Chain 1 stitch. Repeat row 17 for a total of 76 stitches. Join.
Row 20 – Chain 1 stitch. Repeat row 17 for a total of 81 stitches. Join.
Row 21 – Chain 1 stitch. Repeat row 17 for a total of 86 stitches. Join.
Continue to repeat the pattern at this point to make the hat larger.
Finish Row – Chain 1 stitch. Complete one single crochet in each stitch around working from the back to the front of the stitch. Join.
Note: The finish row is worked from the back of the stitch to the front. Working the single crochet stitches from the back of the stitch to the front provides a finished looking edge that will not roll.