Tying a tie – a time-tested tradition that fathers teach their sons. But what should you do if your dad never wore a tie or if you spent your childhood avoiding your father for various reasons? Relax, that’s why I am here. I’m happy to show you an easy way to tie a tie.
Now, don’t worry about fancy maneuvers or English sounding words. The way I’m going to describe is easy and you will end up with a knot that is suitable for both professional and more casual outings. It is one-stop shopping here when I show you how to tie a tie.
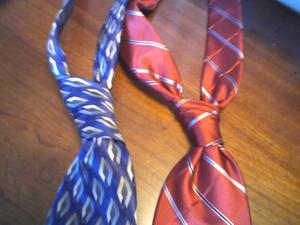
First, convince yourself that you will have a great looking knot in just two or three tries. Second, button your shirt and grab your tie. The only thing you need to know in advance is how to tell one end of the tie from the other. Quite simply we have the “fat end” and the “skinny end” of the tie. If you can understand that difference, we are all set to start tying our tie.
Now, once your shirt is buttoned take the fat end of your tie in your left hand and the skinny end in your right hand and drape around your neck. Lift the collar of your shirt so that the collar points upwards and slip the tie around the recently exposed portion of your shirt’s neckline. Hold the tie so that the label (found near the bottom of the fat end) is facing your body.
Now, here comes the part where we have to guess, at least on first try. Use the buttons on your shirt as a guideline as to where the skinny end of the tie should come to an end. Where you start depends on: a) how long your torso is; b) how big your belly is and c) how big or skinny you want your knot to be.
Start off with the skinny end of your tie ending at the button two buttons up from where your shirt tucks into your pants. If after you tie your tie the first time your tie ends up too long, simply start over and extend the skinny end down one button. On the flip side, if your tie is too short, move up the skinny end one button.
Once you have the tie positioned around your neck, cross the fat end over the skinny end. Hold the back of the skinny end with your left thumb and the front of the fat end with the first two fingers of your left hand. The skinny end of the tie should be straight while the fat end should be roughly at a 30 degree angle. But don’t get hung up on math. Just make sure the fat end extends past the skinny end.
Take the fat end and tuck it underneath the skinny end and then loop it back on top of the skinny end. Begin to loop it underneath again but this time come up by your chin and feed the fat end thru the loop you just created. This action creates the knot of your tie.
Gently pull the fat end down until it goes no further. Then pull down on the skinny end while pushing up with your knot. You can adjust the size of your knot with how hard you pull on either end of the tie. This is purely a personal preference. I like my knots to be smaller, so I pull hard. You can keep a larger knot by exerting less force when you pull.
Tuck the skinny end of the tie inside the label. This helps the tie lay right and gives a more finished appearance. Fold your collar back down and you are ready to go. Once you know how to position your tie at the start of the process (remember your buttons!) using this method to tie your tie should take you mere seconds.
One thing that is not up for personal preference is how the tie lays when you are finished. The fat end of the tie must be longer than the skinny end and the fat end should reach your belt buckle while standing. If the bottom of the tie does not reach the belt buckle, you look like a fat slob. If the bottom extends past the belt buckle you look like a dweeb.
Don’t expect your tie to be the perfect length the first time you tie it! You have to experiment a time or two to get it positioned right when you start and to learn how much force to achieve the desired knot size.
This is the Four In Hand method to tie a tie. Once you master this, you can move on to other styles, like the Windsor or Half Windsor. And if you are related to Orville Redenbacher or the late senator Paul Simon you can even advance to a bow tie.