It’s time to face the facts; you’re never going to use those old patterns from the 70’s to make yourself new clothes. That’s why you should just get rid of the patterns themselves and use the envelopes to make a new organizer for your sewing room or a crafting area. The envelopes make great pockets for holding scissors, bobbins and thread, tape measure, markers, and more. Whether you’ve been sewing for years, or you’re just learning, you’ll whip right through this project to end up with a handy sewing room organizer.
Decide where you want to hang the pattern envelope pockets. It’s up to you if you’ll hang them on a wall or dangle them from the side of a table. Just measure the area and decide how many pattern envelopes you will need when you use the envelopes, side-by-side.
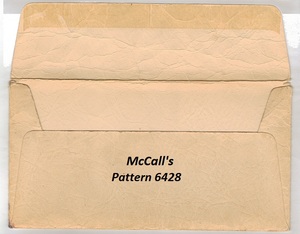
Cut the top flap off of each pattern and cut a tiny sliver off the bottom so that the bottom will be open. Lay one pattern envelope in front of you so that the back of the envelope is facing upwards. Measure, mark and cut right down the center. Lay the envelope out flat.
Use clear contact paper to stiffen the pattern envelopes. Lay out a piece of the clear contact paper so that the sticky side is up. Lay your envelope on it, then cover with a second piece, so that you trap the pattern envelope between the two pieces of contact paper. Trim off any excess contact paper. Cover all the pattern envelopes in this manner.
Lay one of the envelopes in front of you so that the backside is facing upwards. Fold the sides into the center so that pattern takes on its original shape. Take one of the cut edges and fold it over to the side; do the same to the opposite side.
Choose something to be the backing for your new organizer. This can be the instruction sheet from one of the patterns, or a different type of paper – or cloth. For this guide, we’ll use an instruction sheet from the pattern. Lay it out flat.
You’ll be aligning the envelopes, side-by-side, along the length of the instruction sheet. First, lay one envelope on the sheet, then sew down the sides of the pattern paper. These sides were originally the cut made down the middle of the backside of the pattern envelope. After sewing the sides, lay the next one in place, and sew the sides, and continue to do this until all of the envelopes are in place.
Sew straight across the bottoms of the patterns to secure each one and to close them. It can be helpful to tape them in place before sewing. Trim away any excess instruction sheet from the sides and the bottom of the organizer. You might need to trim across the top, too, but that depends on the type of organizer you need. If you’ll be using the excess paper at the top to hang the arrangement, you can leave the excess in place. But if you’ll be tacking the organizer to a wall, you can cut off the excess.
If you want to label the pockets use the flaps cut from the pattern envelopes. Just tape or glue them to the excess area of the top of the organizer – one flap above each envelope – and write what you want on each flap. this organizer can hold sewing room supplies, craft supplies, and much more.
Sewing Pattern Organizer


