When using Adobe Photoshop, there are a ton of different things to do. Even if you are just a beginner to the program, Photoshop already has pre-programmed tricks and features for you to try out to make your learning experience easier. In this tutorial, you are going to learn how to use one of my favorite pre-programmed features: Auto Shapes. The reason why I love Auto Shapes is because I don’t have the steadiest hand to create my own shape in Photoshop. Plus, with Auto Shapes, Photoshop will give you flawless outlines or filled in shapes that you can use for virtually everything. Even if you use one of the shapes already in this digital editing program, you can always add your own flare to it, so do not feel like it’s limiting you to anything. And again, of course, you can create your own shapes, but it’s difficult and not entirely necessary, especially for beginners.
To start with, what can you use Auto Shapes for? I said basically anything, but here are some specific examples:
-Logos
-Brushes
-Stickers
-Borders
-Craft projects
-and more…
So let’s begin to learn how to use these amazing Auto Shapes!
1) As always, you’ll need to open up a new document in Adobe Photoshop and make it a good size. We’ll start off small, so choose 500×500. Once you feel comfortable, you can always choose a bigger size and more shapes to work with, but start out with 500×500 now.
2) Now to location these Auto Shapes, which can be tricky to find on your own. You need to go over to your main tool bar, and click on the first option below the text tool. The button is located on the right column, 9th row. Depending on what’s already selected there, just hold down your mouse and click the blob-looking tool that says “Custom Shape Tool.”
3) Next, locate your horizontal menu bar at the very top of the screen. There will be a sub-menu that says “Shape.” Click this and you’ll automatically see another drop-down menu full of your Auto Shapes, pre-made for you.
4) You can choose any shape to work with. I chose one of the dialog bubbles, but you can choose anything.
5) Once you have your shape chosen, you will see that it isn’t like a brush once you put your cursor over the canvas. Instead, it looks like a plus sign. This is because you’ll get to choose how big, long, and wide you want to make your shape. Start at one corner and drag the plus sign cursor to the opposite corner. See the shape you’re making? Good!
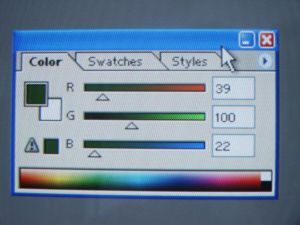
6) So right now your shape seems boring. Spice it up by adding text or even more shapes on the canvas. The default color will be black too, so you can also change that to any color you like using the color tool bar on one of the free floating menus.
And then you’re done! Now you know how to use Auto Shapes in Photoshop!
