Getting and installing
Version installed, tested and working:
Zenoss Core 2.2.3 – 32-bit
Debian native package – stack version
http://downloads.sourceforge.net/zenoss/zenoss-stack_2.2.3_i386.deb
Hardware Recommendation:
Pentium 4;
1GB of memory.
(Currently he runs a virtual machine allocating 1GB of RAM, installed in VMWare Server for Linux, with good performance)
Should be taken into consideration that your Etch is updated. If you need some help, I recommend the tutorial:
http://www.howtoforge.com/perfect_setup_debian_etch
The installation was tested with basic system installed and updated the following sources:
stable main deb http://ftp.br.debian.org/debian/
deb http://security.debian.org/ stable / updates ian.org / stable / updates main
stable main deb http://ftp.debian.org/debian/
deb-src http://ftp.debian.org/debian/ etch main
deb http://security.debian.org/ etch / updates main contrib
deb-src http://security.debian.org/ etch / updates main contrib
deb ftp://ftp.br.debian.org/debian/ etch main contrib non-free
deb http://linorg.usp.br/debian/ etch main contrib non-free
Note: Do not forget to setar network settings and set fixed IP for the hostname correctly. Give a FQDN for the server and make the pointer in your DNS.
Install the packages:
# Apt-get install binutils cpp flex gcc libarchive-zip-perl libc6-dev libcompress-zlib-perl libdb4.3-dev libpcre3-dev libpopt linux-kernel-headers lynx m4 make nmap openssl perl perl-modules unzip zip zlib1g-dev libtool autoconf automake1.9 autotools-dev g + +
Download the Debian package native pro:
# Wget http://downloads.sourceforge.net/zenoss/zenoss-stack_2.2.3_i386.deb
Install the package:
# Dpkg-i zenoss-stack_2.2.3_i386.deb
The Zenoss is already installed in / usr / local / zenoss!
Your service can now be started:
# / Etc / init.d / zenoss-stack start
Note: The installation automatically creates the user “zenoss” to your home directory. Any specific zenoss command must be run with this user. However, the need to execute commands is Monin.
Access it at:
http://seu_servidor:8080/zport/dmd
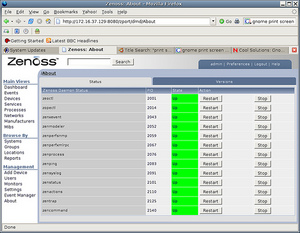
Should see a page like this:
User and password standards:
admin
zenoss
Configuring SNMP – Monitoring Linux and Windows servers
Before adding any server, SNMP configuration setadas should be on servers that are monitored.
Note: Enable your firewall to release the door 161 to the internal network.
Install the same NET_SNMP the zenoss server and will be monitored.
# Apt-get install snmp snmpd
Set the permissions of SNMP.
Note: The number of the option may change, but always follow the written option:
# Snmpconf
Enter 1: snmpd.conf
Enter: 2: / etc / snmp / snmpd.conf
Please: 3: Access Control Setup
Load: 3: a SNMPv1/SNMPv2c read-only access community name
Put the name of the community, can use public by default.
The community name to add read-only access for: public
The hostname or network address to accept this community name from [RETURN for all]: Give ENTER
The OID that this community should be restricted to [RETURN for no-restriction]: Give ENTER
Enter f and enter
Enter f and enter a new
Enter q to exit and enter
Configure the following files, changing the lines to be as follows:
# Vi / etc / snmp / snmpd.conf
# sec.name source community
# com2sec paranoid default public
com2sec readonly default public
# com2sec readwrite default private
syslocation
syscontact
Save and exit.
# Vi / etc / default / snmpd
Delete the local ip (127.0.0.1) the end of the line to make it like this:
SNMPDOPTS = ‘-LSD-Lf / dev / null-u snmp-I-smux-p / var / run / snmpd.pid’
Restart the SNMP service.
Your Linux server is ready to be monitored.
To test whether the SNMP is properly configured, run:
# Snmpwalk-c public-v1 IP_DESTINO
We need the Windows CD.
Install the SNMP service. To do this, go to Start -> Run -> appwiz.cpl and run.
Go into add / remove components of Windows, go in option management and monitoring tools and check the SNMP (Simple Network Management Protocol).
After installation, go to Start -> Run -> services.msc and run. Look for the SNMP service and set as follows:
In the security tab, check:
– Send authentication trap;
Add the public community as READ ONLY;
You can arrange to accept packets from any host (remembering qa port 161 is open only to internal network);
Start the SNMP service and SNMP trap.
We must now install SNMP Informant for Windows:
http://www.snmp-informant.com/
No additional configuration needs to be done there.
Your Windows server is now ready to be tracked!
NOTE: For Windows can monitor many other services, setting the zenwin, which is developed by the guys in Zenoss, but does not address your installation here.
Tuning of Zenoss and adding the devices in Zenoss
Tuning of Zenoss
Before adding servers, we improve the Zenoss with some plugins. We will lower the ZENPACKS in:
http://www.zenoss.com/community/projects/zenpacks/
In my case, only these were interesting:
ImprovedLinux
Squid
ZenPacks.zenoss.ApacheMonitor
ZenPacks.zenoss.LDAPMonitor
Subsequently, we can also install the plugins from nagios or cacti. I will not address in this article, because it not tested.
For the installation of zenpacks, go to Settings, click the menu hidden next to the title “Zen Packs Loaded” and “Install Pack Zen.” Select the file and wait.
Adding devices in Zenoss
We include the devices (servers, routers, etc).
In the left menu, go to DEVICES, click on the hidden menu, go into DEVICE MANAGER and ADD.
Put the ip of your device.
Put your class (it is very important because the treatment makes Zenoss to monitor the different classes. If you put in wrong category will be monitored with fewer services and receive various error messages).
SNMP.
Public community (or the name you put in snmp server settings).
Port 161.
Give OK for the Zenoss scaneie your device to search for features that will be captured. If in the middle of the scan appears to MSG “the snmp settings are correct”, correct the snmp configs of the server.
The device will be loaded and displayed. A blue event (information) is logged in Event CONSOLE.
Note: If items appear along the heartbeats of messages, configure the host, and DNS server’s FQDN of Zenoss and to be monitored. These messages can be cleaned by:
EVENT MANAGER
MENU —> CLEAR ALL HEARTBEATS.
Configuring the service for sending e-mails and alerts
No use anything to monitor the structure in real time if we look at the day the event console.
We need him to tell of course.
To setup SMTP (that is with you, each has his) going on:
SETTINGS
Set the host.
Set username and password (if required for internal relay).
Save.
Come on USERS:
Configure ADMIN (change the default password of course).
Put your e-mail.
In the “Map Network Object Start” recommend that you place your firewall, because when you enter the network map, almost all load on your network topology.
Save.
Done! Have a good fun!


