This program is a part of Microsoft Office that many people overlook. It creates digital slide presentations that users draw upon for many different purposes.
For Work, School, and Home
Microsoft’s PowerPoint is a versatile slideshow presentation creator. Businesses use it for many functions, such as pitching new projects and for trade show presentations. Many college classes require PowerPoint presentations, especially as group presentations. At home, you can create slide show presentations for birthdays, holidays, family reunions, and more.
Wandering Through PowerPoint’s Help Labyrinth
Clicking on the question mark in the tiny blue button in the upper right corner of the homepage takes the user to a page with a confusing list of topics. I created this tutorial as a quick “get started” guide. After you have mastered the basics of PowerPoint, Microsoft’s help topics will help you create more complicated presentations.
Let’s Get Started!
There are 3 ways to view your work. At the bottom, right side of your screen, there are three icons grouped on the status bar. The first looks like a picture within a picture. This the normal screen where you create and edit your slides. The seconds looks like four pictures. This is the Slide Sorter screen that shows all of your slides. This view is helpful for moving and deleting slides. The third icon is the Slide Show view. This displays your page, as it will appear in the presentation. PowerPoint opens in the Normal view but it is useful to switch between the three of them as you create your PowerPoint presentation.
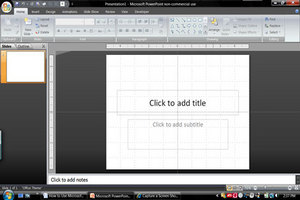
If you are familiar with other Microsoft Office programs, you will recognize many of the tools at the top of the screen in the ribbon bar. Here on the home page, under the “Slides” group, you add new slides. PowerPoint starts with the default Title page, but you can use a different one, if you choose. Click the small down-arrow on “New Slide” button to preview how each slide is set up. Click on a slide to select it. Notice thumbnail images of your slides are in the “Slide/Outline Pane” (to the extreme left). This strip displays the slides in the order that they will appear in the slide show. Clicking on one of the slides brings it into the work area.
To change a slide to a different layout, select the unwanted slide, and while it is in work area, c
lick on “Layout” in the “Slides” group. Choose the layout you want and click on it. It will replace the unwanted slide. If you are unhappy with the new selection, you can undo this by clicking the blue “undo” arrow at the top right side of your screen.
To delete a slide, select it in the “Slide/Outline Pane” (which will bring it to the work area) and click on “X Delete” in the “Slides” group box. This action can be undone by clicking the blue “undo” arrow.
Pick a Theme
Click on the “Design” group ribbon tab near the top of your screen. Notice in the second grouping that Microsoft has several preset designs. Themes are a set of colors, fonts, graphics, and background. To the right of these thumbnail pictures is a scroll-down bar. Click the bottom arrow and you will find more themes. Try out a couple different themes. When you click on a theme, it automatically changes each slide to that theme. There are more themes available online.
Using the title slide, click in the title box and type your title. In the Office theme, the title is black Calibri font, the subtitle is gray Calibri font, and the background is white. Switch to the Verve theme and the title is Century Gothic in bright pink on a variegated gray background with a bright pink triangle in the lower right corner. If you like Verve’s colors, but want a more feminine font, you can change it on this slide. (Changes to the font will not change the font on all slides). Select the writing you want to change, and, while it is highlighted, go to the “home” tab on the ribbon bar. Select a different font using the drop down menu (small arrow at right of font name).
Another thing to consider when you are choosing a theme is that the slide layouts are different in each theme. One may have a better layout for your project than another one. Take your time while choosing the theme. If, however, you like a color scheme, but not the picture and written information placements, you can change them.
Fun Stuff — Adding Your Graphic Content
I like to start laying my photos and clip art in first. There are two ways to add pictures or clip art to your presentation. First, under the “Insert” tab on the ribbon bar, there is the “Illustrations” group. These are elements that you can add to your PowerPoint slides. This is like other Microsoft Office programs, except that PowerPoint has the option to add photo albums. Since this is a simple tutorial, I will do photo albums in another article. Click on the “Clip Art” to insert a practice piece. For this tutorial, type in “apple” in the search box and select one of the images. I chose the apple/globe.
Notice that the clip art inserts itself in the middle of the slide. Move your cursor over the middle of it and the cursor turns into a “move object” cursor. Grab the picture and move it around. Odds are that it is larger than you wanted so let’s resize it. This is the same as in other Office programs. The round circles preserve the object’s proportions and the square ones will distort them. For some graphics, such as portraits, you do not want the proportions to change. For others, like landscapes, it isn’t as critical if it mildly distorts the picture. The green dot at the top is the rotation button. When your cursor is a curved arrow, you can rotate the picture. Tilted pictures can add interest to otherwise ordinary slides.
The second way to add graphics is on the slides that have “content placeholders” in the center. These little icons are shortcuts. Mouse over the different icons and screen tips will appear. Choose the “clip art” icon and click on it. Notice that the search pane appeared just like using the clip art in the “Illustrations” group.
Click on the “Insert picture from file” and it will open your “Pictures” file. Select a picture and click (or double click, depending upon your settings) to insert it. This time the picture goes directly to where the placeholder was. The preset slides that have these “content placeholders” make it very easy to build attractive slides. The inserted objects will line up perfectly. Notice that your picture has the squares, circles, and rotation button for customizing your look.
Adding Your Text Content
Under the “insert” tab is a “text” group. Click the first one: “Text Box.” Your cursor turns to an upside-down cross. Use this to draw a box. At this point, you control the length of the box. The text size (up to 96 points) and the number of lines of text in the box set the height of the text box.
If you are adding text within the preset text boxes, you simply place your cursor within the box and start typing. You can change the preset text size by selecting it with your cursor and while it is highlighted, go to the “home” tab on the ribbon bar. Select a different font size using the drop down menu (small arrow at right of font size).
You can change “content placeholders” into text boxes by typing within the box.
Save, Save, Save!
From personal experience, I advise you to save your work after you finish each slide. It is disheartening and unproductive to have your work disappear! Save your work frequently. You can change the frequency of PowerPoint’s internal save settings. Open the Microsoft button in the top left corner, and at the bottom, select “PowerPoint Options.” In the Options box, select “Save.” The default is 10 minutes, but I can lose a lot of work in 10 minutes so I halve it to “5.” Choose your best option.
Saving Options
When working with others, it is best to know their version of PowerPoint. I have 2007, but several of my classmates have 2003. When I am working with them, I save mine as PowerPoint Presentation 97-2003 so they can open and use my work. It helps to know the version that anyone receiving your presentation is using. If your presentation has lots of “bells and whistles,” saving in 97-2003 can disable some of them. For creating a simple presentation as I have outlined in this tutorial, your presentation will look fine as a 97-2003 and a 2007 presentation.
Saving as a PowerPoint Presentation lets viewers see it as you created it. (It is a little like seeing the cameras while they film a movie.) Saving as a PowerPoint Show lets viewers see only the slide show (like watching the movie). Each has its advantages. For family functions, like birthday parties, I use the slide show. For my college classes, I use the presentation setting until we are ready to present it to the class, and then my final save is the “show” version. For business, I have used both, but for trade shows, the “show” version is best.
Have Fun! Experiment! Play!
One of the best things about making a digital presentation is that no pictures and other materials are ruined in the process. If you make a mistake, it is easy to undo. If you don’t like a theme, switch to another. None of your content will disappear. It may change, but it is easy to fix. Practice making a couple of slide shows. Having Microsoft PowerPoint skills can help you get better grades, boost your career, and entertain your family and friends. Have fun with it!
Sources:
Microsoft PowerPoint Help
Personal Experience