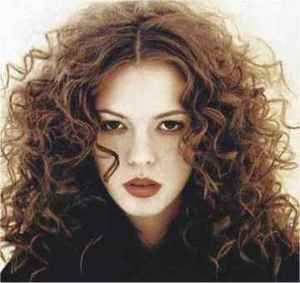
If you have hair like mine – straight on top, wavy in the middle, and curly on the bottom – then you know what an uphill battle it can be to tame it into a lovely, manageable coiffure. Especially in the summertime, when heat and humidity are at an all-time high, your hair thinks it can take the season off. But it’s not as hard to overcome as might be expected, and it can be done in under an hour. All you need are a few common hair staples and a little patience.
Step 1: Even though my beautician recommends I wash it every other day, I wash every day anyway because I can’t stand the slightest bit of grease. So I already have one strike against me when I try to tame static-y, frizzy hair. But if you follow his advice, you’ll be one step better off. However, this technique only works when hair is wet, so your first step is hair washing. I use Tresemme Vitamin B12 and Gelatin Anti-Breakage European Shampoo, and the conditioner by the same name. Both of these come in large quantities for a small price, and I find it works for drier-than-normal hair. I’ve found it works well to wash first, and then condition, leaving the conditioner to sit on hair for about five minutes before rinsing. When hair is thoroughly rinsed, towel-dry hair medium-well.
Step 2: Run through hair using a medium-sized pick comb to loosen the tangles. Using small hair claws, hairpieces, or bobby pins, partition hair into at least four sections: section off the hair on the crown of the head into one, then run your hands under the hair just above the ears and follow to the back of the head, meeting in the middle. Split down the middle, bring each side up and close in separate claws. Part remaining hair down the middle of the neck, and work with one section at a time. To keep down the frizzies, I recommend using Tresemme Volumizing Mousse Mega Hold hair mousse. Shake the bottle well and smear a little bit on your hands, working it through one of the loose sections of hair.
Step 3: Using a roller brush, with a preferable diameter of 1½ inches or more, roll gently through hair while blow-drying on a medium heat setting. The roller brush will help you straighten hair while you blow dry, so it’s not all left to the flatiron later. A paddle brush can also be used to achieve the same look; your preference will dictate which you use. Repeat this process with each section of hair, except for the crown of hair on top.
Step 4: Secure dry hair loosely in a claw behind head; take remaining wet hair and comb through until smooth. Bring hair to the front of your face (some of it might cover your eyes, depending on the length). Beginning at the roots, blow dry on a low setting and work your way with the roller brush to the ends of the hair, brushing continually to work out kinks and waves. Flip hair back when dry and brush lightly so as not to flatten out the volume.
Step 5: Once hair is dry, you’ll section off hair – yes, again – into three sections; top, middle, and bottom. Using a ceramic flatiron, found at a beauty supply store like Sally, not the junky kind from Wal-Mart, take small sections of hair. Beginning at the roots, slowly slide the flatiron down hair, layer by layer. This shouldn’t be too difficult now, because you’ve already straightened most of the hair with the blow dryer. But the flatiron will smooth out fuzzy-looking ends. Add texture by flat ironing hair upwards on one layer, and downwards on the next. And if you give the flatiron a little flick of the wrist at the end of the section of hair, you can get miniscule, yet intentional, curls out of your hair. All-in-all, the roller brush/paddle brush and flatiron will be your friend if your goal is to score smooth, straight hair out of curly waves.