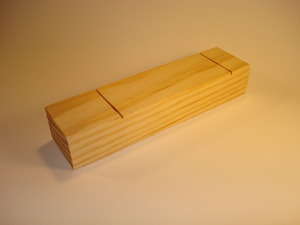
Applying stain to pine is a real challenge due to the high absorbency of this wood. Stain applied to pine can come out blotchy. Pine absorbs too much stain in some places and not enough in others, causing a splotched look. There are a few things that can be done to give pine a smooth stain finish.
When applying stain to any wood, the surface must be evenly sanded.
Mars, notches and knots in the wood will cause different variances in stain absorption, causing a less than professional appearance. Be especially careful in sanding pine.
When sanding pine in order to stain it, a rough surface is the goal.
The trick is to make the roughness even so that the stain goes on evenly. My source recommended a 320 grit garnet sandpaper for this job. Using an orbit sander gave the best results.
Once the pine has been sanded, remove the wood dust with a shop vacuum.
Remaining dust can be removed using a tack cloth. A tack cloth is a sticky cloth available in hardware and craft stores. It’s very inexpensive and does a great job at picking up those last bits of dust before you stain the pine.
Prior to applying the stain, it’s best to condition the pine.
This will also help considerably with even distribution of the stain. Wood conditioner is a common item found wherever paint and stain are sold. Applying conditioner to pine takes only about 15 minutes and is well worth the extra effort.
Another way to precondition pine is with plain water.
Just apply water with a cloth, prior to applying the stain. There is no need to dry the pine before staining. The water absorbs into the pine, allowing the stain quicker and more even absorption through blending with the water in the pine.
Be certain the stain has been stirred thoroughly.
This rule applies to all woods, not just pine. The ingredients in the stain must be mixed well in order to provide an even finish. The best stain for pine is water-based stain.
Use a scrap piece of pine to test the stain for the proper color and coverage.
Diluting the stain with water will allow gradual coats to the pine. This method prevents the over-staining that is common with pine. Let each coat dry about 15 minutes before applying the next.
Stain is applied to pine and other woods with a soft cloth in a circular motion.
The stain is then worked in by stroking gently in the direction of the wood grain. Lighten stain by adding water. Darken stain by adding stain or coats of stain.
Once the stain is dry, the pine may be finished according to taste.
Be sure to protect the stain with a waterproof seal, whether intended for outdoor use or not. This will preserve the wood longer. After sealing, coat with a choice of gloss or matte finish. These are available in spray or brush on forms.
Sources:
Sankey
More from Jaipi:
Easy Step Garden Space Savers from Found Items
Building Pallet Projects for the Garden
Nix Salt Damage on Hardwood Floors


