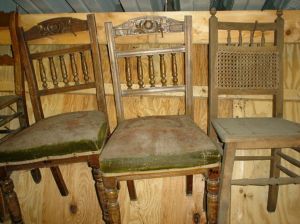
Garage sale and flea market hunting used to be one of my favorite pastimes. I loved seeing what treasures I could find hiding under the coats of paint, damaged wood and warped exterior of furniture others had thrown out or were selling for a few bucks. I’d bring my treasure home, sand it down, refinish it, add a few touches, and instantly had a gorgeous antique I could easily sell for several hundred dollars. Sometimes, people just don’t know what they have!
Refinishing antique furniture takes patience and time, but I used to enjoy it as a hobby, and did it in my leisure time. I was in no hurry, so I was able to read about pieces, take my time refinishing them, and for some antique pieces, even restore them to their original glory.
Start By Stripping
The first thing you need to do to refinish a piece is to remove all metal and affixed things, such and knobs, handles, hinges, etc. If you’re removing hinges, this usually means doors will have to be removed and refinished separately.
Cleaning Fixtures and Soaking Metal Pieces
A lot of antique furniture used copper, silver or otherwise tarnishable metal pieces for adornment. If the fixtures are tarnished, you can soak them in chemicals made to remove tarnish and bring them back to life again. After you have soaked them, but sure to use a toothbrush or other soft bristled brush to scrub and clean away any markings or debris that might have gotten into carvings or designs or crevices in the metal.
While you can replace the screws and such that hold the fixtures onto antique furniture, it’s always best to try to use the original fixtures. If, however, the original fixtures are missing or beyond repair, you can either buy new ‘antique’ styled fixtures that fit the look of the piece, or you can look for other pieces that are beyond repair and borrow the fixtures from them.
Refinishing Antique Furniture by Sanding
One of the reasons I like refinishing antique furniture is because things were simply built better years ago. Solid wood was used instead of fiberboard and the fittings and joints of the pieces are often created using the wood, instead of cheap pins and holes. The good news about using real, solid wood is that once you sand down the top, you’re left with gorgeous, healthy wood underneath.
I prefer to hand sand most of the antique furniture I’ve worked with, because it’s more accurate and less likely to cause damage to the surface. However, if you are refinishing a tables or a bench or a large dresser with long flat surfaces, using an electric hand sander can make the work go faster. Just be careful not to sand too fast or remove too much of the surface. You only want to sand down below the ‘finish’ and get back to the natural, healthy wood underneath.
When sanding, pay special attention to any carving or molding designs in the wood, and use very fine sandpaper to work on these areas so as to not destroy the natural beauty of the designs.
Refinishing Antique Furniture with Stains and Glazes
Your local hardware store can help you out with the right stains and glazes for the type of wood and piece you are using. A dark stain can help hide some wood rotting or water damage that can’t be sanded away, and a glaze can add some shine and luster back into the wood.
When using stains, glazes and shellacs on real wood, you should always use a hair-bristled brush for painting on the stain (never use a sponge-style brush or you’ll get air bubbles in the finish), and you should always brush the strokes along the direction of the grain of the wood. Let each coat set before adding the next coat.
Refinishing Antique Furniture with Paint
If a dark stain and a glaze won’t cover up damage to the wood that sanding couldn’t remove, but the piece is still worthy of being saved, you can consider painting the wood. You would want to put a good flat finish on it before painting, and then use a nice flat paint. While you can use satins to finish an antique piece, satins tend to peel from the wood after use or with ordinary wear, and flats to adhere to the wood better and last longer.
Restoring Antiques to Glory
When you’re finished with the painting and the staining you can always put a protective painted sealant over the wood or the paint to make it last as long as possible. The next step is to put all the disassembled pieces back together again, reattach the fixtures you’ve cleaned and prepared, and find that perfect spot in your home for your ‘new’ antique.
Quality pieces of furniture made out of heavy real wood never go out of style. Taking a little time and putting a little TLC into an antique piece can make it a showroom piece in your home you can be proud to say you refinished yourself.