Replacing a bathroom vanity or sink is easily accomplished in a couple of hours or less. Yet in that short period of time you can help update your bathroom and give it a whole new look.
Measure your old vanity before you go shopping. It will make life much simpler if you replace your old vanity with one of the same size. If you are determine to try for a larger vanity, be sure to measure the total area available for a vanity. Keep in mind that you may have to cut baseboards to allow for a larger vanity.
Once you have your new vanity, begin your project by cutting off the water supply to the sink. Hopefully you have cut off valves underneath the sink top. If not, now might be a good time to install those because you will probably have to turn the main water supply off.
Once the water is turned off, open the faucet up and allow any excess water to drain out. Now you need to remove the faucet. Begin by disconnecting the water supply lines underneath the sink. The easiest way to do this is to remove the flexible line that connects the faucet to the the pvc or copper water line completely. You will have to loosen the connection just below the faucet and also where it connects to the main water line. Once that is removed, unscrew the large plastic or metal washers or locknuts holding the faucet to the sink. These can usually be removed by hand. If not, carefully use a set of pliers to loosen them.
The faucet should now easily come off. If the plastic gasket did not come off with the faucet, use a flat screwdriver to carefully pry it up. If you are reusing your faucet, you will need to clean this gasket before re-installing it.
Now remove the drain line. Near the curve in the drain should be a large plastic washer or locknut. This should also turn by hand. Unscrew the drain. Your sink top should be disconnected. However, before attempting to lift it off the vanity, check to make sure no caulking has been applied between the sink back and the wall. If there is caulking, cut it with a utility knife.
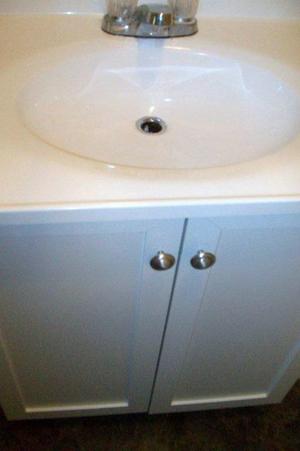
Remove the sink top. Check the vanity for screws securing it to the wall. Remove any screws found. Check around the bottom of the vanity for any caulking or trim. Remove any if found. The vanity should now be free.
Carefully lift it up and over the water lines and drain lines. You may need an extra set of hands to do this. Set it out of the way. You’re now ready to install your new vanity.
Before you go any further, check your water lines and drain lines. Do they come up through the floor or come out of the wall? If they come out of the wall, you’re probably ready to install the vanity. If they come up out of the floor, you will need to cut an opening in the bottom of the vanity to allow the drain and water lines to come up into the vanity.
Measure carefully and cut out an opening for the lines. If the vanity is very large you may need help lifting it up and down over the lines carefully. Once it is in the correct position, use a level and ensure that it is level. If it is not, use small wedges to get it level. Secure it to the wall using screws. Be sure to attach it to at least one or two studs.
Install your faucet on the sink top before placing it on the vanity. Be sure to use a new gasket or clean the old one thoroughly. Use a thin bead of plumber’s putty around the gasket. Tighten the large plastic washers or locknuts underneath the sink top. Hand tight is usually good. Connect one end of the flexible water supply lines to the threaded ends of the faucet. Be sure to apply teflon tape to the threads on the bottom of the faucet. Use a wrench to tighten, but do not over tighten.
Place the sink top on the vanity. Ensure it it seated correctly. Reconnect your water supply lines to the main supply lines.
You are now ready to install the drain assembly. Using plumber’s putty, apply a thin coat around the opening in the bottom of the sink. Insert the drain assembly through the opening, pressing it down into the plumber’s putty. Be sure to align the opening in the drain assembly for the overfill with the opening in the lip of the sink. The tailpiece of the drain assembly should fit into the drain line. Hand tighten it with the locknut.
Check any other locknuts on the drain to ensure they are tight. Turn your water back on and check for any leaks. Your new vanity is now ready for use.