When I was planning my wedding, years ago, I made my own wedding veil. The reason that I decided to make my own veil is a story itself.
I had won a trip to England for a sales contest for a company that I worked for at the time, which was a wonderful thing. Since I was already in the area, I decided that it would be really cool to go to France and purchase my wedding dress, if at all possible. So, I added some vacation days to my trip and went to Paris on my own. Shopping in Paris was a real adventure, but that’s a different story. The end result was that I was able to purchase a beautiful gown. A very chic little hat with a short veil over the eyes seemed to complement the gown beautifully in the store.
The gown required some minor alterations, which were completed in two days. I was able to stuff the gown in a large suitcase and was on my way. The luggage, with the gown got lost for a while, but that is also another story. Suffice it to say, the gown arrived at my doorstep after a few anxiety producing days.
Once home, I proudly showed off the gown to my future mother in law. My mother-in-law was a trained tailor, who had actually taught tailoring for a time. Naturally, she admired my beautiful gown with it’s yards and yards of soft lace. She admired the gown, but decided that it needed further alterations to bring it up to her standards of perfection. She and one of her close friends, who was a sewing buddy, actually took the bodice apart and put it back together.
While we were spending a pleasurable afternoon with the gown, I mentioned that I wasn’t sure about my choice of hat. We agreed that a traditional veil would complete the bridal look.
I went to a couple of bridal shops and was shocked at the price of simple veils. When I mentioned this to “my tailors” they agreed that I could easily make my own veil. They assured me that it was ultra easy to make a wedding veil and even I could do it. They gave me a pattern and I was on my way.
So, that is the story of why I made my own wedding veil. You can see here that failure was not an option.
Making a wedding veil turned out to be so easy that I couldn’t believe that everyone doesn’t do it. Of course, they don’t because they don’t know how easy it is. Naturally, it is important to get it right for the big day, but tulle is very forgiving as it forms a romantic cloud around your head.
The tulle used to make the bridal veil is inexpensive enough that even if you get it wrong the first time, you can start all over again and still be ahead price wise compared to purchasing one in a bridal shop,
When planning to make your wedding veil, the first step is to decide what style and length of veil you want. There are different lengths of veil. You might want to visit a bridal store and try a few veils on to decide what length is best for you. The disadvantage of this is that unless you bring your wedding dress with you (I didn’t), you have to use your imagination to visualize the result. Again, if you get it wrong the first time, it is still inexpensive to do it over.
Lengths of veils are:
Blusher: Shoulder
Waist length
Fingertip length
Chapel: touching the floor
Cathedral: dragging on the floor
By now visions of the Julie Andrews movie, “Sound of Music” filled my head. In the movie’s elegant wedding scene she had a train that went on forever. My dress only had a short train. I decided on a shortened version of the cathedral veil so that I would have a veil that spread out behind me at the altar.
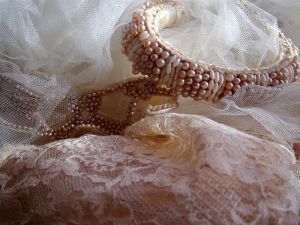
A veil can be attached to a headband or comb. I purchased a crown at a well known fabric store in Evanston, Illinois, by the name of Vogue Fabrics. If you live in the Chicago area, Vogue is an excellent store with a large variety of fabrics, many at excellent prices. Vogue had a bridal section with pre-made combs, or crowns. I selected one of the more elaborate crowns for $55, but could have gotten a less expensive one. This was several years ago, so I am sure that the prices are higher now.
There are wedding veil combs at most fabric stores, I have seen them at fabric and craft stores for under $10. You can also just use a plain, unadorned comb and you can stick into your hair for under a $1. The crowns obviously vary in price, just like anything else you purchase, At any rate, I loved my pretty crown with pearls and crystals surrounding my head.
After deciding what length veil you want, you can purchase your tulle. Amazingly, once you start looking at tulle, you may find, as I did, that not all tulle is created equal. It is important to compare the tulle to the wedding dress fabric so that shades are as close as possible. It is amazing how many shades of white there are. In order to compare the tulle to the dress, you can purchase a yard, or ask for a swatch. Purchasing a yard will give you a better idea of how it will look with your dress. Once you have selected the tulle, purchase all you will need at one time. If you have to purchase more later, you risk getting fabric from a different lot, and the shade may be slightly different.
I have seen tulle for less than $1 a yard, but the better quality tulle is more expensive. The more expensive tulle is softer so it is less scratchy. Some tulles have a soft sheen, which I really liked. I selected the soft tulle, which I loved. I purchased 6 yards of tulle, which gave me 18 feet of fabric for about $12 (on sale).
You will need a workspace large enough to lay the fabric out flat. and cut it. If your table isn’t large enough, clear out a space on your clean floor. I used a pattern, but even if you don’t use a pattern the veil is easy to make. In the pattern that I used the shape of the fabric was basically a large oval. You can also just fold the tulle over lengthwise, pin it together so it doesn’t shift, and cut the bottom end, rounding off the corners. You can leave the sides straight, with just the bottom rounded, leaving the top end squared. The squared end will be the top of the veil that still can be gathered on the comb.
If you want a double layer veil, so that you have veil covering your face, cut a smaller rounded veil.
After cutting the tulle, you can gather the tulle by using a gathering stitch on the straight edge of the fabric and bunching the tulle together. The tulle is now ready to attach to the comb.
You can either attach the veil directly to your crown, or to a separate 4 inch comb. The advantage of attaching it to a comb is that you can take off the veil at the reception, while leaving the headpiece on. If you use a comb, it should be big and heavy enough to hold the veil.
Sew the gathered veil directly onto the comb or crown and and it is ready to stick in into your hair.
I chose to leave the tulle edge unfinished for a wispy look. You can finish the edge, by rolling it and sewing it (like a scarf). To me finishing the edge seems like unnecessary work.
You can also choose to decorate the body of the veil by sewing of gluing small pearls, crystals or rhinestones on the veil. I chose the simplicity of the simple veil, allowing the beauty of the soft tulle to shine through.
My wedding veil turned out just beautifully and I doubt that anyone knew that it was homemade, unless someone told them. I had attached the veil directly to the crown, which is the only thing I might do differently. If I had attached it to a big comb and put on the crown separately so I could have kept the crown on while taking the veil off. I planned to take the veil off for the reception, but when I told a friend that I didn’t really want to take it off but didn’t know what else to do with it, she solved the problem. She creatively gathered up the long veil and tied it in a loopy knot at my waist. Impulsively done, this loopy knot looked great and I kept the veil on for the entire reception.
If you are planning a wedding and are considering making your own veil, I encourage you to go ahead. It is easy to create a beautiful veil. You can enjoy the feeling of accomplishment you get from creating a beautiful veil for your own wedding. If you are not experienced at this, I suggest getting a pattern. The pattern I used had directions for every length of veil. Even though it is easy to make a veil without a pattern, using one will give you a confidence that you might not have otherwise.
Make your own veil and you can customize it to to get exactly the look that you want, at great savings.