From the 1940s through the 1960s, decals were pretty standard on children’s nursery items. These tiny pieces of whimsical art were found on everything from safety pin containers to high chairs, cribs, headboards, and more. Most nursery furniture items had baby animals, such as bunnies, chicks, or puppies. Table and chair sets were decorated a little more festively, with balloons or clowns, Disney characters or even cowboys.
When we restored a vintage furniture set for our daughter, we decided to replicate some of these period decals. It’s a simple project and one that can be done in a few hours.
A word of caution: exchanging existing decals with modern replicas on a period piece will lower the value. You should only consider adding decals on furniture items that are being refinished.
Where to find vintage prints
The toughest part of the project is finding vintage prints that will work. Dover publications offer a wide range of clip art books that are full of copyright free color artwork. Dover books cover a wide range of topics, and run anywhere from $5 for a basic book to $19.95 for a color book with CD-rom. Their on-line site even offers free samples.
If the decals are just for personal use, check out your local thrift store. These stores are filled with old children’s books, magazines, and nursery room artwork that are perfect for this project. Once the artwork has been assembled, the next step is turning them into decals.
Making the decals
To make decals, you’ll need access to both a scanner and a laser jet printer that prints in color. Laser jet printers fuse the ink directly to the paper, and are basically color permanent. Ink jet printers merely lay the ink on the surface which will smear when wet. If you have a scanner and a laser jet printer at home, you are 95% of the way there! Scan your image, crop it down to size, and print it on quality laser paper. But if you don’t, merely take your print to your local copy and print shop. For a few dollars, they can make a color copy of your image in any size.
Once the print has been copied, cut away the excess paper, using either a sharp scissors or an exacto knife. Vintage decals typically had a 1/8″ border around the edges; using an exacto knife will allow you to get right up to the edge of the print if you prefer that look.
Applying the decals
Decals can be applied directly to furniture using 3M photo mount spray adhesive, which is available in photo stores or art supply stores. This is a tacky, professional grade adhesive that works extremely well on surfaces such as high quality card stock, Plexiglas, plastic, glass, metal, and smooth surface foam core. We’ve used it successfully on wood surfaces that have a top coat of clear sealant or polyurethane.
To use spray adhesive, place the decal upside down in a cardboard box and spray from 6-8 inches away. Gently pick up the decal from the edge and position on the item. Once in place, it can not be lifted and repositioned.
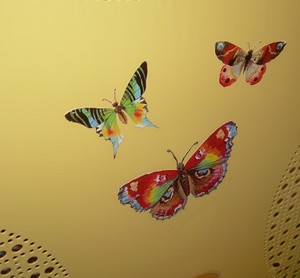
If the decals are for a dresser or headboard which won’t see a lot of surface use, they can can be left as is (see picture #2). When your child is tired of the print, the decals can be simply peeled off, and the adhesive removed with rubber cement thinner.
Making the decals permanent
If you are restoring a vintage piece of furniture or using the decals on chairs or tables, the decal will have to be protected. This can be done by brushing clear polyurethane over the surface of the decal and beyond the edges for at least a quarter inch, which will encapsulate the decal (see picture #3). Polyurethane is what I have on hand; however, there are many other products available that will do the same job. Once encapsulated with polyurethane, the decals are permanent and can only be removed with a stripping agent.
If you don’t mind more of a folksy look, decoupage medium works extremely well. Decoupage medium is available at any craft store and is ideal for small projects such as this. Decoupage goes on white and dries clear; unlike polyurethane, it is not self leveling and will show brush strokes.
Do allow the sealant to dry overnight before putting the furniture item to use.
Decals are a quick and easy way to turn a set of mismatched thrift store items into a coordinated collection of vintage furniture. Whether you prefer Victorian prints or vintage cartoon characters, decals can bring excitement and interest to even the dullest piece of furniture.