Shop for chocolate ice cream cake for any occasion and you will find very impressive cakes that are loaded with fudge and various types of candy, but the prices are anything but impressive. When purchased from a frozen treat retailer, these cakes are way overpriced. Forget about buying one from a shop for an upcoming party or holiday celebration. Make an easy chocolate ice cream cake using the following simple instructions. You will never buy one again!
Necessary Supplies and Ingredients
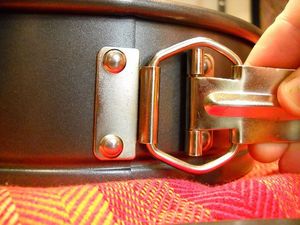
To make easy chocolate ice cream cake you will need a springform pan. They are typically used to make cheesecake, but they are ideal for making ice cream cake. The sides easily release, and this type of pan provides a perfect way to form frozen cakes like those sold in stores. You will also need one or more varieties of chocolate ice cream, a small jar of thick chocolate fudge topping, one pound of chocolate cookies with white filling, canned whipped cream, a rubber spatula, and a tube of chocolate decorator’s icing for creating text and/or other designs. A frosting design tool, sprinkles and hard confectionaries are optional. The tool can be used to create even ridges on top of the cake.
Preparation and Decorating Instructions
When planning to make chocolate ice cream cake, allow the ice cream to soften on the counter for about thirty minutes. It must be spreadable but not runny or melted.
Crush the chocolate cookies into very small pieces while the ice cream is softening. Have all of the ingredients, toppings and supplies within easy reach while assembling the cake. It is important to work fast to avoid a meltdown.
Once the ice cream is soft and the cookies are broken, spread the first cake layer into the bottom half of the springform pan. Top it with the entire jar of chocolate fudge topping. Spread the chocolate fudge, and top it with one-quarter of the package of crushed cookies. This completes the first cake layer.
Next, carefully top the first layer with the second layer of ice cream. This layer should just about fill the entire pan. If desired, use a frosting design tool to create ridges around the top of the cake. Simply go around it while using light pressure. Otherwise, use a plastic scraper or spatula to smooth the top.
Place the chocolate ice cream cake in the freezer for at least two hours. It must be completely frozen before attempting to remove the springform sides from the pan. For easier removal, place warm hands around the sides of the pan. This will melt the ice cream just enough to remove the sides without destroying the chocolate cake.
Once the sides of the pan have been removed, lightly press the crushed cookies and optional sprinkles around the sides of the chocolate cake. Go around the outer top edge with whipped cream in a can. Follow product label directions for best results. If desired, create fancy whipped cream spheres around the edge instead of making a complete ring.
Top the center with ready-made hard sugar decorations, and use a tube of chocolate decorator’s icing to write sentiments on the cake. It will look as good as or better than an expensive store-bought ice cream cake, and for a fraction of the cost.