My kids – who are now all teenagers – used to have their Halloween costumes planned out months in advance, so I usually had plenty of time to prepare. There have been occasions, however, when my oldest daughter changes her mind at the last minute. What’s a mom to do? Torn between the pleading eyes of my angelic blond child and my own desire to not spend any more money on costumes, I’ve created several costumes from items we have around the house. The most successful of these – by a wide margin! – was the Sleeping Beauty costume.
What You Need
1 pink (or blue) long-sleeved T-shirt
3-5 pieces of white felt
2 pieces of light gold or yellow felt (for crown)
Sewing machine
Thread to match your T-Shirt
Hot Glue Gun
Glue sticks
Beads, ribbons and anything else to embellish your creation
Fabric Marker
Scissors
Putting your Costume Together
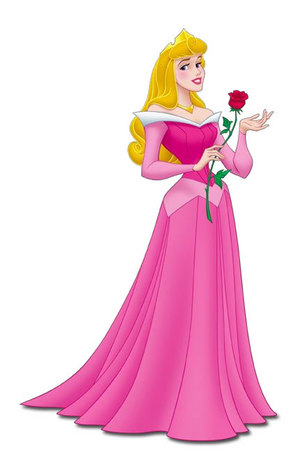
Disney’s Sleeping Beauty had both a blue and a pink gown, so you can choose either color for your costume. Try it on your own little “Sleeping Beauty” and make sure that the bottom is long enough to look like a dress.
Mark the sleeves at your child’s wrist with a fabric marker. Take the shirt off your child, and cut off the sleeves at the marked area.
Turn the shirt inside out and sew the sides of the shirt slightly smaller. I like to do these in large, loose parenthesis shapes so they nip in slightly at the waist, and so the “skirt” looks a bit more like a skirt. Try it on your child to make sure it fits, and then cut off any excess fabric, leaving it to the side.
Lay the newly-formed “dress” on a flat surface. Get your felt and hold it up to the neck area of the dress. With the fabric marker, free hand a white collar for the dress. Cut it out and put it to the side.
Cut several strips of the felt into one to two-inch strips, making sure that one edge is in a scallop shape. This will act as the ruffle on the bottom of your dress.
With the hot glue gun, glue on the ruffle and the collar. This is when it’s time to get creative! You can continue adding details in white felt, or any other color – I added cuffs to the sleeves, an dropped-waist bodice, and heart on the sleeves. I also used the leftover fabric from the sides of the T-shirt as a belt, which I sewed neatly and tied around her waist.
Sleeping Beauty isn’t just about the dress, though. Every little princess needs a crown! Use the gold or light yellow felt and wrap it around the circumference of your child’s head. Mark with a fabric marker. Cut out the back and sides of the crown in at least a 2-inch strip, and make the front something special. I’ve had much luck with an upside-down “V” shape, which allows for plenty of height and room for decoration!
You aren’t done, though – most little girls (and moms!) will want to put some “bling” on their costume. Use sparkly beads to outline the color and add finesse to your ruffle, or use ribbon as a belt (instead of the t-shirt fabric). Every crown needs to be encrusted with jewels, so have your little one help you. With a little effort and a lot of fun teamwork, you will soon create the costume of your child’s dreams!
