Growing your plants indoors may seem old-fashioned. After all, they are being sold on every street corner and grocery store. But growing your own seedlings gives you several advantages.
1) Buying your seeds at your local discount or grocery stores is a haphazard proposition at best. All of those tiny seeds may not sprout into the plants that you desire. In fact, you may not get any seedlings at all!
2) Even though you were told that the last freeze has come and gone, Mother Nature does have a way of getting one more cold front in before the spring growing season has really gotten started. This could mean a quick end to your own growing season.
3) Your bedding plants will be a lot healthier. Many of the seedlings that you might purchase at a store are weak due to their trip to their destination and some may not have been watered for long periods of time.
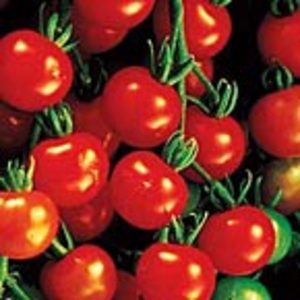
4) Then there is the hybrid versus non-hybrid question. Going back to the non-hybrid type, such as tomatoes, have grown in popularity. Simply put, they taste better. Stores sell hybrids mainly because they are easier to mass-produce. They have been developed to grow larger but they also have little or no taste when they reach their full-grown status.
This may sound complicated, but it really is not. There is no need to rush out and spend a vast amount of money by building your own greenhouse.
Here is what you need to begin growing seeds into tasty vegetables:
Seeds: Decide what you want to grow and do a little research. Make certain that particular vegetable can be grown in your region. There are countless plants that can only be grown in certain areas of the country. Also, there are numerous mail-order houses that sell a wide variety of seeds. But be certain to order in time for planting season!
Containers: Keep it simple and don’t go out to buy hundreds of dollars in decorative pots! Seedlings can be grown in anything from planting trays called flats to yogurt cups or cardboard milk cartons. Just keep in mind that whatever you use should be at least 3″ deep and you should be able to remove the plants easily for outdoor planting later on.
If you use that old reliable milk carton or juice can, make certain that you have cleaned them out with warm water and little bit of bleach. Poke a few small holes in the bottom for water drainage and you might want to use those margarine container lids as plant saucers for water that will seep from the bottom of the pots.
Potting Soil Mix: Seeds do better in a soil mix that is prepared with nutrients and is simple for water to drain. This will keep unwanted fungi and bacteria from creating diseases in your seedlings therefore a planting mix would work to your advantage.
Signs, signs and more signs: Small signs or labels on each of your containers will be necessary if you are growing more than one vegetable. Even something as simple as masking tape and a permanent marker can help you tell your seedlings apart! Of course there are other methods to indicating what you are growing. Recycle cleaned popsicles sticks, cut plastic milk jugs or bleach containers into strips and even purchase nursery labels to mark your indoor garden would help in identifying your vegetables.
Lights (optional): It may be spring but in some parts of the country that doesn’t mean bright sunshiny days for everyone. A light helps the to help your seedlings mature at a reasonable and steady rate. You can spend money on a ‘grow’ light but the point here is to save money not spend anymore than you have to. A cheap fluorescent tube and a light from a local discount store will do the trick.
Cool white light bulbs at about 40 watts give off enough light for sunshine-like warmth without burning them. Aim the light over the pots to provide the appropriate amount of warmth and light. You may also hang light fixtures from a chain over them at about 1″ above the plant’s tops.
Warmth: Seeds need a warm and draft free place to grow or germinate. Make certain that they don’t get too warm or they will grow too fast. If they grow slowly at a low temperature, they will have a chance to become strong. And strong seedlings become strong producing adult vegetables! But, if the temperature is too low (or none at all), the seeds will not germinate at all. Make certain the area where you plan to set up your vegetables is warmer than 75 degrees.
To Plant Or Not To Plant: Now all you need to do is a little research as to when to plant your seedlings into your garden! Whether you use the Farmer’s Almanac or your county’s extension office, find out the date for your last expected area frost. You’ll want to start the seeds of your more slow-growing plants, such as lettuce or tomatoes, at least a month and a half before that date. Your faster growing seeds, like cucumbers or pumpkins, will need to be started about a month before. It’s usually better to have your seeds sprouting too late in the season than too early. That could leave to drying out or even getting root bound before you have the chance to transplant them.
After gathering all of your supplies and finding out when the last frost will arrive, it is then time to start planting your seeds:
- Fill each container with mix to about ¼” to the top. Press the soil down gently to get it firm without making too solid. Put only a few seeds per container. Use tweezers with the small seeds if they have a tendency to stick to your fingers and won’t stay in the soil.
- Large seeds need to be covered twice their width. Small seeds, just push gently into soil. This way they aren’t buried too deeply where they won’t be able to grow. It’s preferable to water the seeds with a spray bottle so you do not wash the seeds away. If you are using a recycled spray bottle, make certain that it has been cleaned thoroughly with a little bleach. This way, it prevents your seedlings from getting poisoned with chemicals and never being able to grow.
- Make sure that the soil doesn’t dry out but do not over moisten it either. Water the pots daily but don’t let it get too soggy. Remember that different types of seeds are on different time schedules when it comes to germinating. When the green sprouts push through the soil, place your light upon them. But make sure to turn it off at night to give the plants a rest.
- When your plants have at least 4-5 true leaves, they are ready to be thinned to a plant per pot. Don’t pull them apart or you may destroy the delicate root system. For weaker plants, use a small pair of scissors to snip them out. Water less often which will give the soil a chance to dry out between watering. A good way to test the soil is to gently push your forefinger into the soil to check for moisture. Do this away from any seedlings so that you don’t destroy any delicate roots.
After they have 4-5 true leaves, it’s time for transplanting into bigger pots. All plants will need transplanting if they’ve come too big for their pots or too many seedlings are beginning to overtake its containers. This will stimulate the root system plus give them more nutrients with potting mix. More nutrients mean bigger and stronger plants when they are transplanted outdoors.
When you transplant a seedling, water it completely first. Then, take a flat knife and run it around the edge of the container. This will loosen up the root system. Hold the container in one hand while slowly turning it upside down into the other. If you’ve planted in plastic planting trays or even cardboard containers (milk cartons, yogurt cups, etc), take a pair of scissors and cut the bottom off and transplant as is.
Add enough potting soil to bury the stem up to its first leaves. Press the soil firmly around the roots and then water again. Don’t worry if they droop, they will spring into action within a few days.
The Great Outdoors
The time has come to move your seedlings outdoors. Abrupt moves can be a shock to a plant’s system. ‘Hardening off’ is a method in which you can introduce your plants to the outside world one step at a time. A week before transplant time, place the seedling outside in a shaded area that is out of the wind. If the nights are a bit too chilly for them, bring them back inside before sunset. Even though you are introducing them to the benefits of the full sun, make certain that they don’t dry out in the process.
Cool weather plants can be moved out as soon as you have your garden tilled and prepared while the more warm weather ones (such as tomatoes) should stay inside until the threats of any frost weather has gone.
What About Next Year?
If you didn’t plant all your seeds, don’t be alarmed because they are useable next year. In fact, some can be used over a period of several years. Just keep them in a cool and dry place, possibly in a container of some type to eliminate moisture.
But a good gardener is always thinking about next year even while nursing this year’s seedlings. You might want to save seeds from several of the plants that you are growing now. The exception will be hybrids, which cannot be grown from seeds that you harvest. You can, however, save seeds from what is produced this year such as melons or squash.
Make certain that the plants you grow this year did not accidentally cross breed with their neighbor plants. For instance, if your tomatoes mingled with your watermelon, this would not be good to harvest from for the next year.
Growing your own vegetables from seeds gives you a sense of satisfaction and accomplishment. And don’t they just taste better coming from your own garden?