I love to bake. I used to bake much more often than I currently do. Nonetheless, I always find myself baking brownies or a cake for a friend’s birthday. Growing up, my mother used to bake myself and each of my siblings’ favorite cake for our birthdays. Mine was a yellow cake with a creamy peanut butter center and chocolate whipped frosting. Two layers of moist yellow cake, creamy peanut butter center… mmm.
I’ve baked quite a few cakes in these past years and I keep to the standard style of my mother. A round, two layer cake, with some sort of filling or frosting in the center, and frosted all over and around.
I have recently discovered that many people are unaware as to how to accomplish this seemingly easy task. I, for one, had tried many ways to complete a cake only to not be fully satisfied with the result. Either too many crumbs were evident in the frosting, the cake seemed lopsided, or worse, both travesties occurred. Through my many attempts to perfect the double-layer round cake, I have found the perfect solution for a perfectly frosted cake with some kind of yummy center.
Bake your desired cake as per the directions using two circle 8 inch pans. Let the cakes cool completely (about a half hour or so) before you begin. Take a butter knife and slide it between the cake and the pan to remove the cake from its hold inside the pan. Be sure to dip it in towards the bottom of the pan to loosen the cake. Place your hand on the top of the cake and flip over the pan, releasing it into the palm of your hand. Place the cake on a plate or flat tray, or whatever it is you’d like to frost the cake on. I have found that a revolving cake tray or a lazy susan works the best.
Here is where the most important step comes in. Using a long serrated knife, cut into the cake horizontally where the ridge of the cake begins to cone upward. When a cake is baked, the center usually has a high point, that tapers down into the edge of the cake. Take the knife and slowly cut horizontally and around the rim of the cake to remove the muffin-top part of the cake. If you fear doing this unevenly, an easier method I have found is to unravel a long piece of dental floss (or fishing line), make a small cut into the ridge of the cake furthest from your body, then place the floss into the cut leaving plenty of slack on both sides for both of your hands. In a sawing motion, shimmy the floss back and forth in a straight line through the cake as you pull the floss toward your body. This should cut a level layer right off the top of the cake.
Remove the muffin-top of the cake and discard (or set aside for the kids to munch). To avoid frosting directly onto the moist/crummy part of the cake, flip this bottom layer upside down onto your tray. Choose your filling and, using a specifically designed frosting spatula, frost as generously as you wish onto the top of your bottom layer of the cake (i.e.: the original bottom of the cake which is a golden brown). After you have completed this, repeat the steps to remove the second layer of cake from the other 8 inch pan. Place this second layer on top of the frosted first layer of cake, dome shape facing upward. Using your frosting spatula, apply frosting to the center of the cake and frost in a circular motion from the center to the edge of the cake.
Once the top is frosted, use the spatula to apply frosting the outer rim of the cake. It is best to get enough frosting on the spatula so that you can hold the spatula to the side of the cake and maneuver the tray in a circle so the frosting spreads itself onto the rim of the cake. Repeat this step until the entire rim is frosted and all hints of cake are covered. You may also wish to apply a tad more frosting to the small gap between the layers of the cake to even it out. It is in my experience also that trying to get the frosting completely smooth is unnecessary and pointless. The cake looks much better when the frosting has a bit of texture and flow.
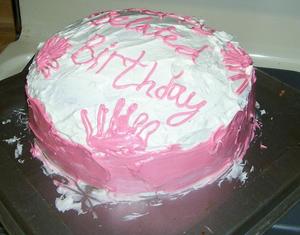
Decorate as you wish and VOILA, you are done.
I hope this helps all of my Betty Crocker wannabe buddies! Happy Frosting!