The Remington 870 Pump shotgun is a wonderful gun. Treat it/he/she right, and she/he/it will serve you well for many, many years.
Disassemble the Gun Completely
A disassembled gun is easier to work with, and a safe gun. Give yourself some work space. If cleaning more than one gun, make sure you have enough room to keep the parts separate. Some parts of 870 shotguns are interchangeable with other 870s, and some are not. Preferably you have an Owners Manual. If not, consider obtaining one from Remington Arms. The Owners Manual is particularly useful for identifying parts. NOTE: I am learning (sometimes the hard way) to take pictures with my digital camera when I take things apart. While I may think I’ll surely remember how everything goes back together, I actually end up often forgetting. Being able to quickly scroll back through some digital pics sure can help.
BARREL
1. Press the Slide Release (Action Bar Lock button) and pull the Slide (Forearm Assembly) partially back.
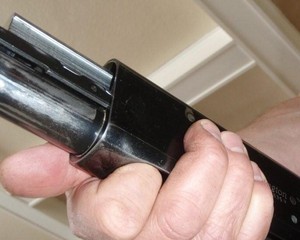
2. Unscrew the magazine cap.
3. Pull Barrel out and away from Receiver Assembly.
FOREARM AND BREECH BOLT
4. Using one hand on Forearm Assembly and the other with thumb coming up under Carrier (shiny `flipper’ thing on the underside of the Receiver) just enough to depress Left Shell Latch (press against left wall of Receiver) pull the Forearm Assembly forward and disconnect from Receiver. It may also be necessary to also depress the Right Shell Latch. Slide the whole assembly with Breech Bolt out over Magazine (tube). Note: the Bolt and Slide Assembly (thing the Bolt sits on) is now free to `fall off’ arms of the Forearm Assembly.
TRIGGER ASSEMBLY
5. Punch the Trigger Plate Pins (2: one large and one small) through, using a golf tee, or similar (something of small enough diameter, and long enough, yet won’t scratch the Receiver).
6. Gently remove Trigger Assembly. You may need to rock it a bit, forward and back or side to side. Generally I recommend NOT taking apart the Trigger Assembly itself. I have done it, and regretted it. It can be cleaned adequately without itself being disassembled.
MAGAZINE RETAINNER, SPRING, PLUG, AND FOLLOWER
I don’t do this every time, but, if you are serious about cleaning, or if the gun is particularly dirty, then remove the Retainer at the far end of the Magazine.
7. Depending on the make, this will require prying with a screw driver or pliers, or rotating with a screw driver. Note: the Retainer will be under pressure from the Magazine Spring, so, when you have by whatever means loosened the Retainer sufficiently, it will want to `fly’ out of the Magazine. Note: not all Magazines may have a (Magazine) Plug. This plug is generally of wood or plastic, 6 inches or so long, (long) enough to restrict the Magazine capacity to 2 shells.
8. (If Spring and Plug haven’t removed themselves already, remove them from Magazine.) With a nudge the Follower (`end plug’ at the near end) should follow on out (with Magazine perhaps pointed a bit downward).
Cleaning (and Lubricating)
I generally think of cleaning and lubricating together, since I often do them together, either one right after the other, or in the same motion.
BARREL
9. The barrel, must be cleaned of moisture and dirt on the outside, and lead, powder residue, and other stuff on the inside. Residue of lead, powder and other stuff must be cleaned from the bore (inside) and Chamber area with a gun solvent. I prefer to use a wire brush fitting on a cleaning rod, covered with a piece of cloth with solvent on it. Run the fitting/brush/cloth from Chamber end to muzzle end. Be careful of a `spray’ of solvent as the cloth or brush reaches the other end. Use as many cloths and passes through the bore as necessary to remove all fouling and residue.
10. After a lot of shooting there may be a particular buildup at the Chamber end (causing increased resistance to `chambering’ shells). Clean this with a cloth and solvent or wire or small brush and solvent.
11. Clean bore and Chamber area with a clean, dry cloth to remove excess solvent.
12. Lubricate bore with cleaning rod with slotted end or other attachment that can be used to run cloth through the bore. Use a `gun oil’.
13. Lubricate Chamber area end of barrel / bore.
14. Clean (as needed) and lubricate outer surfaces of barrel.
Note: cleaning and lubricating the bore can also be accomplished using a `bore snake’. A bore snake is a rope (basically) that has a cloth end with embedded wire brushes, and clean stretch of cloth. Solvent is added to the wire brush region; and gun oil to the end of the clean stretch. When pulled through the bore the snake cleans and lubricates all in one motion. After the snake gets pretty `yucky’ it can be thrown in the washing machine (NOT with your wife’s nylons) and cleaned. Add new doses of solvent and gun oil, and ready for more `snaking’.
BREECH BOLT AND SLIDE ASSEMBLY
15. Clean the Breech Bolt and Slide Assembly (the thing the Breech Bolt rests on) with solvent as needed and then lubricate.
FOREARM ASSEMBLY
16. Clean and lubricate the Forearm Assembly including the `wands’ that carry the Slide Assembly. The inside (tube) may be cleaned in a fashion similar to the bore of the gun.
RECEIVER
17. The Receiver is now basically `empty’ with Breach Bolt, Slide Assembly, and Trigger Assembly removed. It can be cleaned and lubricated by hand with solvent and cloth, then clean dry cloth, and then oily cloth, with perhaps the aid of a soft brush, OR, it can be `spray’ cleaned and lubed with a dual-purpose gun cleaning spray. I tend to like the spray method as it can be used to get hard to reach corners and other places. Be generous and do over rags, to-be-disposed-of newspapers, or something that can receive the `stuff’ dripping off and out of the Receiver.
18. Clean and lubricate the outside of the Receiver.
TRIGGER ASSEMBLY
19. Use the dual purpose gun cleaning spray for the (whole) Trigger Assembly also. Be generous; use enough to basically `wash’ everything clean. (And don’t forget to clean up your drippings mess.) Note: the Safety should be on during the cleaning process. While cleaning the Trigger Assembly, however, you may wish to take the Safety off, and, with thumb on the Hammer, slowly release the Hammer forward to get behind it good and clean also. The Hammer must be returned to the cocked position before reassembly, AND THE SAFETY BACK ON. (Accidental release of the Hammer during assembly may damage the gun.)
STOCK
20. Clean the stock with warm, soapy water, if necessary. Wipe dry.
Reassembly
21. Reassemble the gun in generally the reverse order of assembly. With Hammer cocked and Safety on, insert the Trigger Assembly into the Receiver. It may take some rocking to get it in and holes aligned for the Trigger Plate Pins. It may take a tiny bit of banging to get the Pins in, but do so with something that will not mark the exterior of the Receiver. Now, place the Breech bolt on the Slide Assembly and balance it in its place on the `wands’ of the Forearm Assembly. (This is the part that gets some getting-the-hang-of-it.) Slide all of this back over the Magazine toward the Receiver. As it engages the Receiver the Shell Latches must be depressed, first the one on the right, and then the one on the left, with forefinger and thumb, as you continue to slide the assembly into the Receiver. This can be very cumbersome until you get the hang of it. No doubt you’ll drop the Breech Bolt a few times, so don’t be doing this over your best clothes. Depress the Slide Release and bring the Slide (Forearm) part way back. Install Barrel, screw on Magazine Cap. I guess I left out putting the Magazine Spring, Plug, Retainer, and End Plug back in. Obviously you would need to do this before screwing on the Magazine Cap. And obviously putting the parts back in as they were oriented before you took them out. Work the actions several times; enjoy your accomplishment. Clean up.
So, I may have left some stuff out; if so, please comment or message me. Or, if I mis-labeled something; let me know. If you take good care of your 870, you will be rewarded year after year. After some outings I may omit some of the steps above, or maybe not. Clean guns work better, especially in the cold. Clean guns feel and sound nice, also. Clean is wonderful.
References
Steps in Cleaning the Remington 870 Shotgun (Slideshow), Jeff Filler, Associated Content.
Remington Arms Company, P.O. Box 700, Madison, NC 27025


