This is a basic guide to preparing a room before painting by applying tape to trim and windows. Often skipped, taping off a room can make the difference between an amateur and a professional paint job. This will also help you speed up the process of painting and cleanup since you won’t have to slow down to edge areas that you want to protect.
Preparing the service before applying masking tape
Remove all electrical outlet and light switch covers. Remove heat vents or any other easily removable objects that are in the painting area. Be sure to wipe down the trim with a damp cloth to be sure there isn’t any dust built up that will keep the tape from sticking properly. Let it fully dry before applying the tape. Put everything you remove in a common place and put screws in a bag.
How to select the type of painters or masking tape you will use
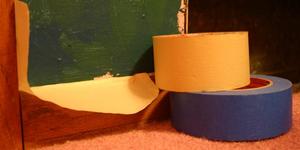
There are many kinds of tape out there you can use for painters tape. The most common and cheapest is masking tape. This does the job well, but don’t leave it on for more than a day or two because it could be difficult to remove. Masking tape also doesn’t work as well if you have surfaces that are fragile or tend to peel. I’ve done a lot of painting and I mostly use regular masking tape since it’s cheaper. I also tend to use a wider tape to give maximum protection from splatter. You can purchase a painters tape that is specifically designed to have less adhesion as masking tape. This allows you to leave it on your trim for a longer period of time and is a must for windows. (If you used regular tape and now can’t get it off, check out my article on removing tape from glass) If you plan on doing multiple coats of paint including primer over a few days or weeks, the painters tape is probably the way you want to go. It should peel off easier and make cleanup faster. If you will be working in a sunny area, you will want to minimize the amount of time any tape is attached any surface. The sun coming through can bake on tape in a hurry and make it difficult to remove.
Where and how you to apply tape for maximum protection
Apply tape to all trim work that you wish to protect. Apply tape over light switches and the electrical outlets, light fixtures, etc. When applying tape to trim remember to press firmly where the trim meets the surface that will be painted, this will minimize the amount of paint that bleeds through onto the trim. For floor trim, keep the tape as parallel to the ground as possible. Basically, some of the tape will be on the trim and the other side of the tape will be floating out over the floor. This will help reduce the potential of paint hitting the tape and running down into the trim. You also want to keep a continuous line of tape going. If you have a 10 foot section, try to avoid using a bunch of 2 foot sections. It’s best to even go around corners with the same continuous piece of tape. This will help avoid bleeding as well. Finally once everything is taped off, it may help to lightly edge the area with a brush before rolling.
With a little prep work before the painting job, you will save yourself a lot of time, effort and pain because you avoided getting too much paint on trim or windows. It will also give your room a cleaner and more professional look.