What is Counted Cross Stitch?
Counted Cross Stitch is one type of embroidery technique. The embroidery is created by a regular series of X’s stitched between the threads of an even-weave fabric. Patterns can be very simple or extremely elaborate and vary in size from large fabric paintings to small miniature ornaments. Though you use most of the same materials as regular embroidery, there are some differences. (For information on basic embroidery materials, see Embroidery Tutorial: A Beginner’s Embroidery Kit)
The Fabrics
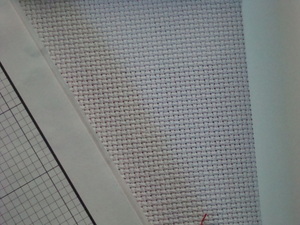
The fabric used for Counted Cross Stitch is always an even-weave fabric. Even-weave means there are an equal number of threads running horizontally (the weft or woof) and vertically (the warp) in the fabric. Because of this, the spaces between the threads (holes) form perfect little squares. Specific fabrics for Counted Cross Stitch are Aida or Monk fabric, though linen is also a popular choice for advanced counted cross-stitch embroiderers.
When you buy cross stitch fabric you will also see a count number. For instance, you might see Aida 14, Monk 18 or Linen 28. The smaller the number, the fewer threads per inch and the larger your stitches will be. With linen, you must half the number you see to get an equivalent to Aida or Monk fabric because when using linen, you stitch over two threads at a time. Thus, linen 28 would be the same as Aida 14.
This number indicates how many stitches per inch you will have to work your pattern on. Naturally a pattern that has a straight line of 10 X’s (cross stitches) will be larger on Aida 10 (having 10 stitches per inch and therefore one inch of stitches) than on Linen 28 (having 14 stitches per inch). Your ten stitches on Linen 28 would take up just over ½ inch. By altering the different thread count of your fabric you can take the same pattern and enlarge or shrink the resulting counted cross-stitch project.
The Needles
The needle for Counted Cross Stitch work is also different than a regular embroidery needle. The counted cross-stitch needle will have a dull, rounded point instead of a sharp point. Because you stitch in the holes of the fabric instead of piercing the fabric as you do in regular embroidery, you need your needle to slip into the holes easily. When looking for the needles in the store, the package will list the needles as Counted Cross Stitch needles.
The Patterns
Because the stitch is always the same in Counted Cross Stitch, the patterns are a bit different from those of regular embroidery. Counted Cross Stitch patterns will have different symbols within the squares of what appears to be graph paper. Each square in the graph is equal to one complete cross-stitch. The symbols in the graph squares will correspond to a particular color of thread instead of a different stitch as you see in regular embroidery. When working a counted cross-stitch pattern the only other stitches you might see used is the outline stitch and on rare occasions a French knot. The pattern will generally give you instructions for each of the stitches used.
The Threads
The thread used for Counted Cross Stitch is the same thread used in regular embroidery. The majority of time you will use skeins of regular 6 strand cotton embroidery floss, which you will need to divide into 2 or 3 threads. Your pattern will give you the number of strands you need but as a general rule use 2 threads for fine fabrics with a count of 12 or higher and 3 threads for anything lower then 12 threads per inch.
For information on separating embroidery floss into various threads, and for hiding the start and ending threads of your stitches, see “Embroidery Tutorial: Getting Started”.
Following the pattern and where to start your counted cross-stitch
Patterns for Counted Cross-stitch will usually have a little arrow on both the top and the side of the pattern. This is to show you where the exact center of the pattern is. If you start at that point, matching the center of your pattern with the center of your embroidery fabric, it will be easier to be certain you have your pattern lined up properly on your fabric.
– One tendency some beginners and even some advanced individuals will have is to try and forego the hoop, stitching their project just by holding the material in their hands. Though this is tempting and can seem easier, you will never maintain perfectly even tension without using a hoop. Improper tension will show in the finished work as tiny puckers or slight differences in the size of the stitches. Use a hoop for best results.
– Put the exact center of your fabric in the exact center of the hoop and stretch it so it is nice and taut. Some individuals count the rows in their fabric, using a contrasting thread to mark a matching spot on the top and side of their fabric in case they lose their place.
– Thread your needle with your 2 or 3 strands of floss.
– Somewhere just inside the edge of your hoop (I am right handed so I usually do this at the very top left; reverse if you are left handed) push your needle through a hole from the right side of the fabric (the fabric facing you) to the backside of the fabric as discussed in the article “Embroidery Tutorial: Getting Started.
– Then start your first cross-stitch in the center of the hoop.
Well executed Cross-stitches
A counted cross-stitch is made in two motions. There is an under-side of the X and an over-side of the X. When you create a row of Counted Cross Stitches, work the bottom portion (the under-side) of the stitches in the row. When you reach the end of the row or get to the edge of your hoop, return back through that row in the opposite direction, making the top portion (the over-side) of the stitches in that same row.
Another thing you will notice about really well done counted cross-stitch projects is the consistency of all the stitching. A nice piece of Counted Cross Stitching will have all the stitches running in the same direction. This means the slant of the under-side of the X’s will all be the same. For example, the entire project will have them all running like / / / / / or they will all be like . What you will not see is a mish-mash of directions like / / /. The latter usually happens when people try to make a complete X for each stitch before moving on to the next one, forgetting which direction they are stitching in.
Tips for Ease in Cross-stitching
-Embroidery in a well-lit location. You will be amazed at the difference good lighting can make when you embroidery. Not only does this affect the way you see colors but it also makes it easier to see the holes in the fabric.
-When you look at your fabric, instead of looking for threads, look for a square made by the holes between the threads, just as if you were looking at graph paper. Each square of holes helps you form the X when you stitch it properly. As you get used to your stitching, the holes really will seem to just jump out automatically.
Basic Stitch Instructions
(These instructions are for right handed people. For left-handers, simply reverse the direction.)
– Looking at the square formed by the holes, start your stitch in the lower left hole of the square (think of the X you are going to make). You will bring the thread up through the hole coming from the backside of the fabric at that lower left point of the X.
– Then from the right side of the fabric, you will push the needle down through the upper right hole of the square (again thinking of the X). You should now have a diagonal stitch that looks like this: /
– Continue this pattern of ½ X’s across the row, counting the number of X’s in that color in your pattern and matching it to the number of ½ X’s you are stitching.
– When you get to the end of the row, start your return by bringing your thread up from the backside into the lower right of the square (again, think of the X you are making).
– Cross over the previous stitch you made and push the needle to the backside of the fabric by placing it down through the upper left side of the square. You should now have a complete cross-stitch that looks like this: X
Practice Session
If you wish to practice your stitching before trying a pattern, try Aida 10 or Aida 11 with three strands of floss. Start on the left side of your fabric and make a long series of half cross-stitches ( / ). When you get to the end of the row, repeat the process in reverse ( ) crossing over your previous stitches until you have an entire row of cross stitches ( X ).
When you get to back to the beginning of the row you started, try moving up or down one row. Looking for the holes that make up the squares you’ll be stitching in. Remember that the holes at the top of your finished row of cross-stitches will share with the row above it. These holes at the top of your finished row will actually be the bottom holes of the row above it.
If moving down a row, reverse that thinking. The bottom holes of your finished row are shared with the row just below it. The bottom holes of the stitches will be the top holes of the row below it.
You can also practice starting and ending your threads neatly by running the threads neatly under your stitched rows.
Suggested Patterns for Beginners
When first learning counted cross-stitch, unless you are an experienced embroiderer, start with a pattern designed for a larger thread count. Aida 11 or even 10 is great. Pick a simple pattern with only a few colors and has colors distinctly different from each other. For example: red and blue, not rose and pink; Purple and yellow, not gold and beige.
If the colors are clearly separated, it will be easier for you to count your stitches and keep them separate. The more colors, particularly those with close hues, the harder it will be to follow your pattern and the more you will have to concentrate.
Some patterns have the graph actually color coded to the threads. These are great because you don’t have to decipher the symbols while you are trying to count the stitches in the pattern, count the stitches in your fabric and keep the colors straight too. Keep it simple and enjoy the practice. You’ll be stitching the larger projects in no time!


