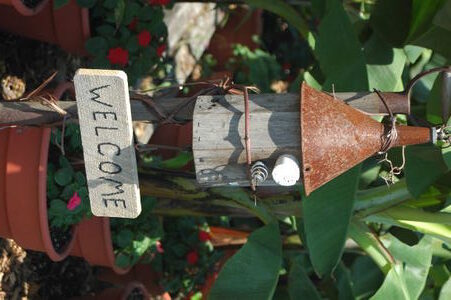
If you’re looking for easy crafts that will dress up your yard or garden, consider making wood garden signs. Garden signs are a wood craft that virtually anyone can put together, and decorating and painting them are a lot of fun. Make wood garden signs to welcome friends to your home, fruit and vegetable garden plaques, seasonal and holiday signs, and much more.
There are several different wood craft ideas for making wood garden signs. To make these easy crafts, you’ll simply need the following supplies:
Flat piece of solid wood (do not use plywood)
Sand paper
Exterior paint
Acrylic paint
Paint brush
Acrylic top coat
Optional supplies:
Electric drill
Screws
Dowel rods
Wood glue
Wire
Raffia
How to make wood garden signs:
STEP 1 – Sand the wood down so that it’s smooth. Wipe with a damp cloth.
STEP 2 – Paint the entire sign with a coat of exterior paint (color of your choice). Allow it to dry completely.
STEP 3 – Decorate your sign with acrylic paint. Some ideas for crafts are very simple, and this is one of them. Paint a design of your choice, or simply write out a phrase, word, your address, family name, etc. If you’re making the signs for the garden, write out the name of the crop or flower you’re growing, and draw a small picture to go with it.
** If you’re short on time, you can also purchase pre-made unfinished wood signs from your local craft store. Then, you’ll merely need to decorate the sign to your liking.
Choosing how to display your new wood craft:
Once your wood garden signs are sanded, painted and decorated, you can choose how you would like to display them in the garden. You have two options here. You can hang them or stake them in the ground.
Stake – If you’d like to have the sign standing in the yard, you can add a stake to the back of your sign. To do this, generously squeeze wood glue onto the back of the sign and firmly press a thick dowel rod against it. (Don’t forget to paint the dowel rod beforehand) Then, use a drill to screw two screws into the sign to hold it to the dowel rod. Using a dowel rod, instead of another piece of wood, makes the sign easier to push into the ground.
Hanging – If you’d prefer to have wood garden signs that can be hung, simply use a drill to screw two screws into the back of the sign. Drill each screw roughly ¼” from both sides of the sign. Then, string wire around each screw so that the sign ca hang evenly. Cover the wire with raffia.
Protect your new wood craft:
Once your sign is completely painted, decorated and assembled, you’ll want to apply a protective coat of acrylic spray. I recommend using Krylon Crystal Clear Acrylic Spray Gloss because it works great for wood craft projects. After the first coat is applied, wait for it to dry completely and then give it a second coat.
More from Jennifer Wagner:
How to Prepare a Gourd for Crafts
How to Make a Gourd Birdhouse
How to Make a Cactus Garden
Source:
Personal knowledge and experience


