As part of remodeling my old house myself, I discovered the easiest way to replace door casings with modern ones. I did not yet master the technique of mitering corners for molding and casing installation, and replacing my old door casings with wider, profiled ones seemed a difficult project to master. And then, I stumbled upon an easy way to replace door casings. The cost was only slightly higher than doing all the work myself, and the time-saving made it well worth it. Here’s how you too can use the easiest way to replace door casings yourself.
#1. Buy Pre-cut Door Casing Sets
At your home improvement store go to the molding aisle. Amid the casing and molding you’ll find door casings that come in a set of two long side sections and a top section. The corners of pre-cut door casing are already mitered for you. The length of the side pieces is 80 inches, which will likely fit your current doors or need a little trimming below. The easiest way to replace door casings yourself is not to have to mess with miter cuts if you’ve never done them before, and such a set makes it possible.
#2. Buy the Same Door Casing for All Your Doors
Remember that when you replace door casings you need to replace them on both sides of the door. In addition, replace the casing on all the doors in your home to create an even, professional look.
#3. Remove the Old Door Casing
Slip a thin knife blade or flathead screw driver along the old casing to gently pry it away from the door lintel and wall. Keep the knife flat to avoid scaring the doorjamb or the drywall to the side of the door casing. If the nails come out of the old door casing, take care not to cut yourself. The nails may be rusty. If nails remain stuck in the door frame, pry them loose with plyers.
#4. Fit the New Door Casing
Make it really easy to replace door casing by first resting the casing over the door frame. Hold the two sides in place with your feet, then position the top portion of the casing atop them. You’ll be able to see if your side sections are too long and get an overall idea of how the new casing will look.
#5. Replace the Door Casing
Begin installing the door casing with the top piece. Position it in a way that will leave some of the door lintel exposed. Next see if the side sections need to be shortened, and if so shorten them with a straight cut on the bottom. Use a nail gun with headless nails that will be buried in the door casing.
#6. Add Cosmetic Beauty to Your Door Casing
Conceal any holes left by the nails with wood putty or caulking. Fill the cracks at the mitered corners with caulking also. Then paint the new door casing and old door frame and doorjamb all in the same color.
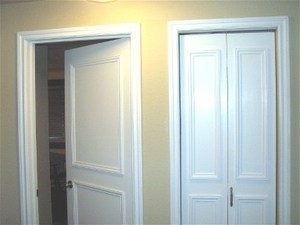
Discover how to make door panels for old, flat doors like the one’s in the picture accompanying this article, and for your pet, see how to build a pet patio door.