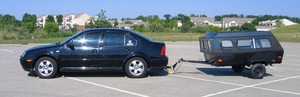
A light camping trailer that is homemade can be designed to be towed by small compact cars. With a little bit of guidance and some Coroplast or corrugated plastic, like what is used for making signs, a small camping trailer can easily be built. By utilizing an aluminum utility trailer that is lightweight to begin with a small camping trailer can be designed to provide a comfortable area for 2 people to sleep in while camping.
There are a few things you’ll need for this project. To begin with you need a 5 foot by 8 foot wood floored aluminum utility trailer, four 4 feet long by 3 inch diameter PVC pipes, two 8 feet long by 3 inch diameter PVC pipes, and two 5 feet long by 3 inch diameter PVC pipes. The next series of materials that you will need are four 3 point PVC pipe corner connectors, some synthetic resin glue, a 5 feet wide by 8 feet long ½ inch thick Coroplast piece, two 4 feet wide by 8 feet long ½ inch thick Coroplast pieces, two 5 feet wide by 4 feet long ½ inch thick Coroplast pieces, and a 5 feet wide by 6 feet long foam mattress. For the camper’s door hardware you will need two door hinges, two door latches with a lock receiver that goes through the latch, and a master lock with key. The tools needed to put the camping trailer are a drill, 2 ½ inch long self tapping deck screws, a screwdriver bit for the drill, a 3 inch circular cutting drill bit, a ½ inch drill bit, a jig saw, some rubber weather stripping, some waterproof caulk, a caulk gun, a tape measure and a pen. With these tools and materials in hand, the construction of your own lightweight camping trailer can be done in the course of about three or four days.
First, bore a 3 inch diameter hole into the trailer’s floor in each of the trailer’s corners. Do this by utilizing the drill and 3 inch circular cutting drill bit.
Next, position vertically a 4 feet long 3 inch diameter PVC pipe into each of the trailer’s corners. Fasten them into position by gluing each one into the holes that you made in the previous step. Use the synthetic resin glue to accomplish this. This positions the corner posts for the rectangular support box that will make the camping trailer’s accommodations.
Now you need to position a 3 point PVC pipe corner connector one each 4 feet long 3 inch diameter PVC pipe’s top. These must be placed so that a 90 degree angle is on each pipe’s top with each of the angle’s ends pointed at each pipe in the trailer’s corners. This is needed to make a rectangle suspended over the trailer’s floor as the other pipes are put into position. Fasten these into position with the synthetic resin glue.
Following this attach the two 5 feet long PVC pipes into the 90 degree angle of the PVC pipe corner connectors in a way that the 5 feet pipes line up parallel with the trailer floor’s front and rear side. This positions the rectangular support box’s front and rear ends. Secure these into position by gluing them in place with the synthetic resin glue.
The next step involves attaching the two 8 feet long PVC pipes into the 90 degree angle PVC pipe corner connectors positioning the 8 feet pipes in a position that is parallel with the trailer floor’s left and right sides. This makes the sides of the rectangular box frame. Now a rectangular PVC box is suspended over the trailer’s floor. After the Coroplast sheets are in position the outside of the trailer will be completed.
Now, fasten the 5 feet wide by 4 feet long ½ inch thick Coroplast pieces to the rectangular PVC pipe support frame on the trailer’s front and rear ends. Exploit the drill, screwdriver bit, and 2 1/2 inch long screws to accomplish this task. This encloses the camping trailer’s front and rear sides.
Now, attach a 4 feet wide by 8 feet long ½ inch thick Coroplast piece to the left and right sides of the rectangular PVC pipe support frame by screwing the 4 feet long sides of the Coroplast pieces into each corner piece of the support frame. Now on the 8 feet long side that is along the top side fasten the Coroplast pieces to the 8 feet long top of the support frame. Utilize the drill, screwdriver bit and 2 1/2 inch long screws to accomplish this task. This encloses the right and left sides of the camping trailer.
Then you need to position the 5 feet wide by 8 feet long ½ inch thick Coroplast sheet on the support frame’s top. Then fasten it to the top of the support frame by utilizing the 2 ½ inch screws. The outside of the camping trailer is now completed.
The next thing to do is to place the waterproof caulk in the caulk gun. Then open the waterproof caulk tube’s end. Now put a bead of waterproof caulk into every one of the seams on the camping trailer’s exterior. This seals up the camping trailer making it weatherproof. The project’s next section explains how to make the door in the side of the camping trailer and attaching the door’s latches and hinges and latches. Finally the foam mattress will be put into place to give the people camping a comfortable place to sleep.
In order to place the matress in the camper and make the door begin by utilizing the tape measure and pen to mark and measure a 4 feet long horizontal line 6 inches below the camping trailer’s top on one of the trailer’s sides at a point directly behind the trailer’s wheel well.
Next, use the tape measure and pen to mark and measure a 4 feet long horizontal line 6 inches above the camping trailer’s bottom directly behind the trailer’s wheel well on the trailer’s same side where you made the line in the first step. Be certain to position this line parallel to the line drawn in the first step.
Now, join the lines made in the previous steps with parallel lines that are 4 feet apart from one another. This makes a rectangular drawing that measures 4 feet wide by 3 feet high on the camping trailer’s side. This creates the trailer’s door.
Then you will need to bore a ½ inch hole at one corner of the rectangular drawing that is on the trailer’s side. Employ the ½ inch drill bit to accomplish this step.
Following the above step you need to position the jigsaw’s blade into hole you cut in the previous step. Now cut along the rectangular drawing’s lines removing a 4 feet wide by 3 feet high rectangular piece from the trailer’s side.. Hold on to this piece and do not throw it away because you will later use this piece to make the trailer’s door.
Now, attach the rubber weather stripping along each edge of the 4 feet wide by 3 feet high hole in the trailer’s side. This has to be done in order to create a watertight door.
Then you need to attach the door hinges to the 4 feet wide by 3 feet hole’s right side. Now secure the door hinges to the door that you held onto. Accomplish this step by attaching the door hinges on one of door’s 3 feet long sides. This is required to make the door fit snugly when it is closed.
You will now need to fasten a door latch to the door’s inside. Now position a lock receiver to the trailer’s wall on the inside. Make certain that the lock receiver is in line with the door latch. This is necessary to lock the door when it is shut. To lock the door on the inside, place the master lock through the lock receiver after the latch has been slid over the lock receiver.
The next thing to do is to attach a door latch to the door’s outside. Now position a lock receiver to the trailer’s wall on the outside. Make certain that the lock receiver is in line with the door latch. This is necessary to lock the door when it is shut and no one is in the trailer. To lock the door from the outside, position the master lock through the lock receiver after the outside latch has been slid over the lock receiver.
The next process involves putting the foam mattress on the trailer’s floor. Position the 5 feet wide side up next to the rear wall. Place the 6 feet length of the mattress flat on the floor. The 2 feet space that is left over at the front of the trailer is the place to pack your camping equipment.
The last thing to do is to shut the door. Then slide the outside latch of the door into position over the outside lock receiver. Secure the master lock in the outside lock receiver. The door is now locked. This is needed in order to keep the trailer’s door secure during travel. Now the camping trailer is completed and ready for camping.
Sources
Tiny Tears: Building a Teardrop Sleeper Trailer
Tiny Tears: Lightweight Trailer for Week-End Vacations
Tom Swenson: Teardrop Trailer Project
John’s Coroplast Page: Coroplast Primer


