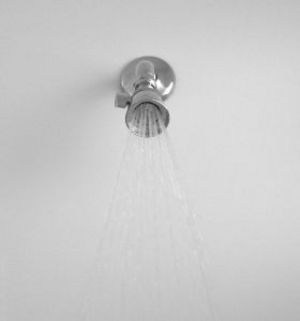
Having been a single mom for most of my life, learning how to do simple repair and upgrade jobs around the home was essential. Some I learned to do easily (like simple plumbing repair) and some I wouldn’t ever attempt (I won’t touch electrical projects). Learning how to replace a shower head is one of the easiest plumbing jobs I’ve ever attempted, and you, too, can learn how to replace a shower head quickly and easily.
First, if you want to see video of how to replace a shower head, simply search online for videos, then you can print out this article, watch the video so you have it in your head, and then take the knowledge and printed article into the bathroom shower to get started.
Tools Needed to Replace a Shower Head
You will need to buy a replacement shower head. Aerated or low-flow shower heads that put the water under pressure can help save on your water bills without disrupting the feel of the flow of water you’re used to in the shower. There’s no need to worry too much about what type of shower head you purchase, since you should be able to connect any conventional shower head you buy in a hardware store or section to your plumbing fixtures at home.
Check the box or packaging (some come in hard-plastic bubbled packages) for a list of tools necessary for replacing the shower head. At minimum, you will likely need a wrench. It’s also possible you will need to buy some adapters or fittings and you might also need to buy some waterproof sealant or thread tape. Some shower head replacement kits come with all the necessary items and some list what you need to buy, so be sure to read before you leave the store, or like me, you’ll have to drive back and pick up something you forget.
How to Replace a Shower Head Step #1
Turn off the water to your home. While this isn’t absolutely necessary, it’s better safe than sorry to turn off the water at the main shutoff valve to your home. If you live in an apartment or share water inlets to the building, you might only be able to turn off water to the shower itself.
How to Replace a Shower Head Step #2
Remove the existing shower head. This will usually only require unscrewing a nut that screws unto the threaded shower pipe coming out of the wall. Do NOT bang the nut to loosen it, but rather use a wrench to break the seal on it if you need to. The pipe behind that nut and the threads are all necessary to put the new shower head on, and if you damage them, you’ll have to replace piping too.
How to Replace a Shower Head Step #3
Essentially, you put the new shower head on the same way you took the old one off, so pay attention to how the old one comes off and you’ll figure it out. However, you should follow the specific instructions found in the shower head replacement kit you purchased. If the instructions are missing, you will most likely want to coat the threading with the waterproof sealant, place the plastic washer that comes with your shower head kit inside the screw cap. Follow the instructions on the sealant for how long (if at all) to let it set before screwing the shower head onto the pipe. If you’re using thread tape instead of sealant, you shouldn’t have to wait to move on to the next step.
How to Replace a Shower Head Step #4
Following the shower head kit replacement instructions, be sure to tighten the nut that attaches the shower head with the wrench tight enough the sealant can seal completely. Do not over tighten the connections, or you can mess up the threads and cause your shower faucet to leak.
How to Replace a Shower Head Step #5
Once your sealant (if you used a sealant) you can turn the water to the house or the shower back on and take your new shower head for a test run. If water comes out at good pressure and doesn’t spray all over the room, you have just successfully replaced your shower head! If you have leaks or low pressure, you’ll need to take it apart and start over again.