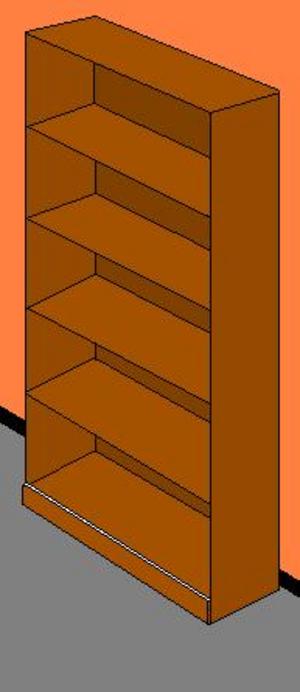
A custom bookcase is a great touch to any room in your home. There are so many ways to design one that I could write a series of books just on designing bookcases. The custom bookcase I would like to share with you is very easy to make. Before making your custom bookcase there are a few things you need to take into respect in the design of it. The first of these is how wide of an area are you going to want to cover with this bookcase. Secondly, how high can it be so that you can still reach the items on the top of it. The third is determining how deep you want it to be. The fourth item to think about is just as important, and really is the overall reason for building it. This is the reason for building the bookcase. Are you going to just put books on it? Will magazines be part of the items on the bookcase? Are there going to be knick-knacks on it? How much of these items – books, magazines, etc. – are you storing on your custom bookcase?
Wait! That’s not all! Are you going to paint or stain it? Do you want the shelves adjustable? Are you going to want to put stenciled designs on it? You see, there are many things to determine in the design of a custom bookcase. This is how you determine what your needs are when building a custom bookcase.
Going on with the customer bookcase I have in mind you will need a few tools. The general custom bookcase I will guide you through will require these tools:
Claw hammer (16 oz)
Box of 1 1/2″ long finished nails (4d)
Box of 3/4″ nails
A nail setter
Crosscut saw
Square (“L” shaped device for making straight lines)
Tape measure.
These are the materials you will need:
4 1″ x 12″ x 6′ length of wood
1 1″ x 4″ x 2′ length of wood
1 3/16″ of masonite board cut to two feet wide by 5′-4″ tall
Sandpaper – a mixed set
Either two cans of flat or glossy white paint or one pint of brush on paint will do.
Wood putty
Plastic drop cloth or old newspaper
Pencil
The first thing you are going to do is to cut two of the six foot boards into lengths of 5′-4″ tall. Yes, you can have the masonite board cut 1/6″ shorter in width and length if you want so it is not as visible on the sides and top. After you cut the boards, sand the edges well and the surfaces just enough to make them smooth. Go ahead and spray paint them white on one side to dry. Hopefully you are doing this outside, so paint doesn’t get on anything inside your home.
The next thing you will do is to cut off a piece of wood from one of the other two remaining boards that are still six feet in length. You will cut this piece to be exactly two feet in length. With slightly less than four feet left, cut off another board exactly 1′-10 1/2″ long.
Why? Well, hopefully your wood that is supposed to be one inch thick is really 3/4″ thick. That means if multiplied by two the total in 1 1/2″, which means that this second board is that much shorter than two feet. Got it? Sand the edges of each board well, and sand the surfaces smooth. Now you can paint these two boards.
When these four boards are painted on both sides, take the two sides and lay them down as if you are looking at the bookcase laying on the ground. This means they should be on their edges. Take the two foot long board to one end of those boards, lay it on it’s edge, and nail it to the end of those two boards. Now you have your top piece in place.
Take the shorter board you cut and painted, place it between the side panels, and use your 1″ x 4″ board as a guide so you know exactly how far up on the sides you need the shelf. Only nail the upper part in place on both sides. Using the square, align the shelf to be level across the side panels so that you can mark and nail in the other side of the bottom shelf.
You are getting so close to being done. Holding the 1″ x 4″ board in place, see if it is going to fit well. Lightly sand it down and paint it. Once both sides have been painted and dried, nail it into place. This piece should not fit between the side panels because it is what keeps the bookcase from tipping over. Therefore, it is nailed onto the front at the bottom of the bookcase.
Now all you have left are the other shelves and the back panel.
There are two ways to determine where your shelves should be located. One is to divide the inner dimension, 4′-11 1/4″, by the number of openings you want for books, and taking into account the width of the shelves. I’m thinking five spaces which means four shelves. That’s what you have left in material.
Four shelves will be 3″ thick. Three inches from 4′-11 1/4″ is 4′-8 1/4″. Converting that measurement for each space will end up with 11 1/4″. This is where your square will come in handy. Stand up the bookcase and make a mark at 11 1/4″ up from the bottom shelf. After that mark up 3/4″. Repeat this step three more times and you are done marking on that one side. Do the same to the other side. Use your square to draw a straight line over from each mark. This is your guide as to where to place the shelves for nailing them in place.
Go ahead and cut your shelves from the remaining wood making certain they are the same length of the bottom piece, 1′-10 1/2″. Sand and paint these pieces. When they are dry you can nail them in place.
Paint the masonite on the smooth side, and use the smaller nails to tack it onto the back. Take the nail setter and carefully set the nails on the sides, front and top about a 1/16″ of an inch at most. Use the putty to fill in the holes and allow to dry. Sand down the putty smooth with the sides, front and top. Just spray on enough paint to cover the putty. A few light coats allowed to dry in between will make it look professional.
You may not want white, which is okay by me, but like I said it’s all in what you want. This project will take almost a day since you do need to allow the paint to dry. Quick drying paint will reduce the time you spend on this project.