Green beans from your garden (or a local farmer’s market) are one of the garden vegetables that can be blanched, frozen and enjoyed all winter long. Since they are so easy to put up, green beans are one of the vegetables that you don’t have to worry about planting too many in the spring. Whatever you can’t eat you can blanch and freeze for later use.
Green beans are one of most prolific vegetable plants in my garden, year after year. Once the plants start producing, they’ll keep producing green beans all season long. The pole bean varieties will continue growing and actually increase their production over time as the plant continues to get bigger and bigger. With just six pole bean plants in my garden, I am picking them at least two days out of three and getting more than my wife and I can eat each time we pick.
Lengthen the Green Bean Growing Season
Don’t plant more than you can keep pick on a regular basis, though. If you leave the beans on the vine too long they’ll stop producing. As the beans themselves start to get bigger and mature, they trigger the plant to stop producing new blossoms and therefore new green beans. The key to enjoying plentiful fresh green beans into the fall is to make sure you pick them when they are relatively small. You’ll get beans that are more tender and flavorful by picking them young as well.
Preparing Green Beans for Blanching
Blanching green beans stops enzymatic action that would break down the beans and cause them to lose flavor and nutritional content, even in the freezer. It is an essential step before freezing. First, though, green beans should be rinsed off in cold running water. I put them in a colander and use the kitchen sink sprayer to give them a thorough rinsing whether I’m cooking them immediately or preparing them for freezing. The next step is to string the green beans. They’re not called string beans for nothing, after all.
Stringing the Beans
Along the top and bottom seam of each green bean, there’s a tough, fibrous string that should be unzipped from the bean before cooking or preserving. I simply snap one end of the bean upward and gently pull it back along the length of the bean; the top string should peel off with it. Then, I snap the other end downward and repeat in the opposite direction to remove the bottom string. It takes a little practice, but once you get the hang of it, it’s quick and easy. Stringing green beans is one of those basic preparation steps that often trips up the amateur cooks you always see on those reality TV cooking shows.
Once the green beans have been strung, you can either chop them into shorter lengths, or leave them as is. When I’m preparing them right away, I leave them longer because the whole bean lends itself to a better plate presentation than chopped beans. When I’m freezing them, on the other hand, I chop them to a length of about 1.5 inches. This helps me pack more in a smaller space. If I’m planning a gourmet meal, I don’t use frozen vegetables as a rule, so I’m not as worried about presentation when using preserved vegetables.
Blanching Green Beans
Blanching is a key step to preserving the flavor of green beans while they sit in the freezer. You’ll need a large bowl or pot half full of ice water with enough capacity to hold the batch of beans you are preparing. If you have a large yield that day, just blanch them in several batches. Using another pot, bring water to a full boil, again making sure that it’s big enough for the green beans in addition to the water. When the water is boiling, add the green beans. Leave the green beans in for three minutes. Use a kitchen timer; if you leave them in too long, you’ll overcook them.
As every good cook knows, when you remove an item from the heat, it continues to cook from the residual heat. To prevent this after blanching green beans, they should be immediately immersed in the ice water you have prepared when they are scooped out of the boiling water. The ice water will absorb the left-over heat and prevent them from continuing to cook. Leave them in the ice water for a good ten minutes so they can cool all the way through.
Freezing Green Beans
To remove excess water from the beans you should pat them dry with a clean kitchen towel. Then, place them in an air-tight container or freezer bag. Remember that there will be some expansion as the water in the beans freezes, so don’t fill the freezer container all the way up or it may burst exposing the green beans to freezer burn.
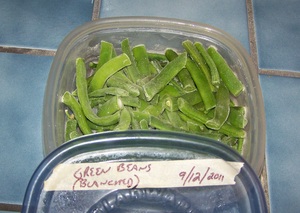
Every container that goes into the freezer should be labeled with the date that they were frozen and the contents (if they are not clearly visible through the container), “Green Beans, September 15th, 2011″ for example. How long will green beans last in the freezer? Once blanched and frozen, green beans will retain optimum flavor for about a year according to the National Center for Home Food Preservation, but will remain edible with diminishing flavor and texture almost indefinitely, as long as they remain at zero degrees Fahrenheit or less.