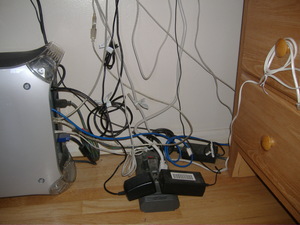
In many ways, computers make our lives more organized. They make all sorts of tasks, from paying bills to doing research, a lot quicker and easier. But while keeping files organized on a computer may be a lot easier than searching through mountains of paper, controlling the mess under the computer is another story. To make all those files usable, we may have to hook up our computers to a whole mass of peripherals-monitor, printer, speakers, modem, and who knows what else. Each one of these devices has a cable to link it to the computer, and sometimes a separate power cord as well. Consequently, the space under the desk can easily turn into a rats’ nest of wires that we just do our best to keep hidden.
There are all sorts of products on the market for taming this cable chaos, from simple baskets that corral all the wires on the underside of the desk to the $20 WireMate (As Seen On TV!), which bundles them up in a little plastic case. However, aside from their cost, these products are mostly limited to routing cables from point A to point B as neatly as possible. Most computers, though, have cords running not just from A to B, but from B to C, C to D, B to D, and so on. Fortunately, there is a simple way to organize all your computer cables with a couple of basic items that you may already have lying around the house. (And if you don’t, you can pick them up for just a couple of dollars total.)
You will need:
a length of foam pipe insulation (sold at home stores)
several wire twist ties (the kind found on bags of bread or produce)
blank white address labels
a pen
Steps:
1. First, shut down your computer and start sorting through all the wires currently attached to it. Trace each one from end to end and figure out what it connects to what.
2. As you identify each cord, label it. Write the name of the item that connects to that cable on one end of a blank address label. Then attach the label to the cord near the point where it plugs into the computer or the power strip. (Or, if the cord ends in a big “wall wart”-style plug, you can stick the label directly to that.)
3. Start sorting cables into groups based on where they start and end. For instance, all cables that run from computer to the monitor and other peripherals that sit close together on your desk form one set. Those that run directly from the peripherals to a power strip form a second group. (You may need to unplug the wires to untangle them and group them together, which is why labeling them first is a good idea.)
4. Bundle each group of wires together with twist ties, secured at several points along its length.
5. You’ll probably have two main bundles at this point: computer-to-peripherals and peripherals-to-power strip, with perhaps a couple of extra cables leading in different directions. Measure the length of each bundle. Cut a piece of pipe insulation to that length and tuck the whole bundle of wires snugly inside it.
6. What about the power cord that connects your computer to the power strip? You can leave this one separate, or you can bundle it with the others by running it up one side and down the other. Tuck the cable inside the bundle that runs from the computer to the desktop, then feed it back through the second bundle that leads from desktop to power strip.
Bundled inside the pipe insulation, your cables are neat, controlled, and vaguely industrial-looking. The result may not be exactly polished, but it’s tidy, inexpensive, and easy.
Sources:
Adam Pash, “Corral Your Cables With Pipe Insulation.” Lifehacker.
Murray Anderson, “Organizing Cords and Cables.” DoItYourself.com.


