A while back, my family decided that we wanted to create a recipe book that would hold all of our favorite family recipes. This would minimize those last minute calls for that recipe needed for some special event. Instead of the family recipe book, we created a blog for family recipes through Blogger, which is free. This has established online access for all of us from anywhere. It is now easy to retrieve the ingredients and directions to make our favorite recipes whenever we need them without bothering one another. It also provides a way for us to regularly keep in touch through blog notifications of new recipes. To view my Family’s blog, click here.
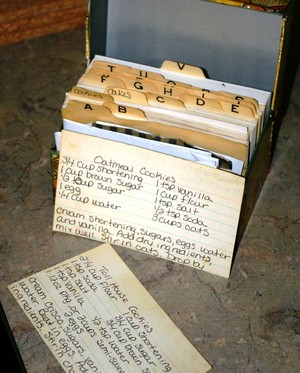
All families have recipe favorites. Recipes that get handed down from one generation to another or are developed as their families grow. As new members join the family, the recipe box grows even further. Cousins and children contact each other to get this recipe or that, accumulating a stack of copied recipes stuffed into recipe boxes. Over the years those little 3×5 cards or cookbook pages become frayed, yellowed and covered in assorted ingredients. If you, too, think creating a blog for your family’s recipes is a good idea, here’s how you can do it:
Setting up a Family Recipe Blog
One computer-savvy member of the family should be the blog administrator, who will create the blog for your family recipes. Let’s assume that person is you. Here’s a guide to navigating the Blogger Publishing Tool, section by section.
*Sign up – If this is your first time creating a blog, sign up with Blogger. (Blogger’s publishing tool is free.)
*Create Blog – On Blogger’s start page, just click on the “Create a Blog” button and follow instructions.
*Pick Names – As administrator, you will pick an administrator name and a Blog Title. The Blog title is the name that everyone will see at the top of the blog and deserves the most consideration. Blogger will ask for the URL name too, so the blog title and URL can be the same. If your preferred title is already taken, pick a variation for the URL and the one you wanted as your blog title.
Creating a blog in Blogger is fairly easy, but does takes some time, especially if you haven’t done it before. Here are the five steps to creating your blog and a guide to the different components of each step.
1. Pick a Family Recipe Blog Template
The blog template determines the aesthetic look of your blog. Blogger offers a selection of templates. You can pick one now and change it later without having to re-create your blog.
2. Complete Blog Settings Tab
The settings tab is where you’ll handle many things that set up your blog. There are several sections in the settings Tab. Here’s what you need to do on each page:
Basic – Here you can add a description that will appear right below your Blog Title. The rest of the items can be left at the default settings if you are not sure what they mean.
Publishing – Unless you have a private website domain name, skip the items on this page.
Formatting – In this section be sure to 1) pick your time zone, and 2) create a “Post template”. The post template will open each time a new recipe is created. Creating a blog for family recipes will necessitate allowing multiple users to enter recipes, so create a post template. This will ensure that everyone enters recipes in a similar format. Type in the box something like this:
By: (for the recipe owners name)
Ingredients:
Directions:
Tips (if needed):
Comments – This section is fairly straight forward. It determines the rules for blog comments. If you’re not sure of an item, keep the default setting, as they can be changed later.
Archiving – Leave the archiving at the default setting so that all posts will be archived under the month they were entered. Recipes can be easily retrieved in several ways from the blog, and this makes room for more recipe posts. Be sure to keep “enable post pages” set to yes, which will allow each recipe to be opened as its own page which is best for printing.
Site Feed – Skip
Email and Mobile – To automatically email participating family members when a new recipe is posted to the family blog, add their email addresses separated by a comma. (Limit is 20). If more than 20 family members want to be emailed, they can sign up for an RSS feed. (It is best to add email addresses once you’re done setting up the blog.)
Open ID – Skp
Permissions – This is an important section. Here you’ll add the email addresses of the individuals you want to invite to contribute to your recipe blog. Also, if you want to restrict who can see your blog, you can do it under the “Blog Readers” section. It is best to add these email address after you’ve gotten the blog set up.
3. Complete Blog Layout Tab
Page Elements – In this section, you’ll be able to add different visual items to your blog. By clicking on “Add a Gadget” a box will open that gives you descriptions of various gadgets you can add to the sidebar of your blog. If you want to add a family picture, add the picture gadget, if you want to type some family history, add the text gadget. You can play with the choices to see how they will look and if you don’t like it, remove it. You can rearrange the gadget placement by dragging them up or down.
Here are my suggestions for the minimum gadgets to add to your family recipe blog:
*Picture – One for each family or family member or a family crest, etc.
*Text: – For a short blog intro.
*Search this Blog – Used to search for a specific recipe (this gadget is added automatically)
*Labels – Each recipe post can be “labeled”. My family’s blogs has labels on each post such as Main Dishes, Side Dishes, Crockpot, Jan’s Recipes, Christmas, etc. By having this label gadget, everyone will be able to see the labels and choose a category to find a recipe.
(Tip: When typing the label, type it the way you want it to show on the blog. Also, the heading “Label” can be changed to “Recipe Category” or “Pick Your Meal” or whatever.)
*Blog Archive – This is where everyone can see the recipe posts from the previous months.
*Followers – This is added automatically and allows anyone to sign up to receive notification of a new post.
There are lots of other optional gadgets, which you can play with. If you want to track visitors to your site you’ll need to add the HTML/Java Script gadget. You can get the HTML code for the tracker at a site such as Statcounter.com, which you’ll paste in the gadget box.
Fonts and Colors – Adjust the color scheme or font here if desired.
Edit HTML – Skip unless you are a programmer!
Pick New Template – If the template isn’t working, change it here.
4. Complete Blog Monetize Tab
Unless you’d like to add Google ads to your Recipe Blog, skip this. If you do, click on “AdSense Reports” and start your journey. This takes some effort, so it is best to put this off to some other day.
Toggling Between Administration and Blog View
At any point along the blog’s creation, you can click on “view blog” to see how it looks. When you want to make changes click on customize from the blog screen.
Adding recipes to Your Family Recipe Blog
Once the blog looks the way you want, you can start adding recipes, which is a “post”. I’d advise adding several recipes of your own before inviting anyone else to add theirs. This will ensure your template looks right, and a few labels will be available for others to use. You can do this easily right from the blog screen by clicking on “New Post” on the top navigation bar. Pictures can be adding to each recipe post, but that’s not necessary and will take up space. After entering a recipe, click on “preview” from the post box.
If you want to make adjustments to your blog, you can click on “customize” from the blog screen and make changes. Usually the section you’ll want to go into again will be the layout section’s page elements.
The End and the Beginning!
At this point, your hard work is done, and the fun begins. Go back to the blog settings section and in the permissions box add the email addresses of the family members you want to contribute to the blog. This will send them an invitation email. You can check the status of your invitations in this section and send a reminder invitation, if needed.
That’s it! An afternoon gone, but definitely not wasted. Your blog to preserve those invaluable family recipes has been completed, and now the fun begins. Get out your recipe box, start typing, and watch as the family recipes start rolling in!