Castile soap is named for the Castile region of Spain, an area of the country well known for making olive oil. If a soap contains at least 40% olive oil, it can officially be dubbed Castile soap.
This is a wonderful soap to lather onto your skin, and leaves you feeling clean without drying your skin. Because of the vegetable based ingredient, olive oil, that dominates this soap, it is an especially mild product (particularly if left unscented) and can be used on both children and adults. Of course, be careful not to get any of the soap into the little one’s eyes as this is not a tear free product. The unscented variety is also makes a great vegetable wash and has dozens of uses around the house as a multipurpose soap.
So how do you make Castile soap? Making Castile soap is a simple process involving only a few common ingredients, and a bit of your time.
You will need:
3 cups olive oil
3 cups cold water
3/4 cup lye granules (use caution when working with lye)
10-20 drops of essential oils (optional)
Steps to making your Castile soap:
1. Heat the olive oil on the stove, slowly bringing the temperature of the oil to about 85 degrees Fahrenheit (29 degrees Celsius). Turn the heat off, and let the olive oil cool to about 75 degrees Fahrenheit (23 degrees Celsius).
2. In a bowl, dissolve the lye granules in the cold water.
3. Pour the lye solution, in a slow and steady stream, into the olive oil. Make sure that you stir constantly as you pour the lye mixture into the olive oil. Continue stirring until the product begins to thicken into a honey-like texture. This should take about 15-20 minutes. If you want a scented soap, this is the point when you would add about 10-20 drops of essential oil to your mixture, depending on how heavily scented you want your Castile soap bars.
Too thin: If 30 minutes have passed and the soap is still not thickening, and has a greasy surface layer, chances are your soap mixture is too warm. To remedy this, you’ll need to take the pan off of the stove, and set it in sink full of cold water. Keep stirring, making sure to scrape the sides of the pan, until your Castile soap reaches the desired consistency.
Too thick: If your soap is too thick, difficult to stir, and lumpy, you’ll need to warm the mixture as you stir. Do not use the heat from the stove to reheat the mixture. Simply place the pan in a sink full of hot water and continue stirring as the mixture warms. Don’t panic! The soap may be lumpy now, but with enough stirring and a bit of warming, the lumps will disappear and you soap will take on the texture of honey.
4. Pour the Castile soap into molds. I use wood frames that I made from scrap lumber found in the garage. Each soap mold is about 12″ X 9″ X 1 3/4″ and is a basic rectangle with 4 sides and a bottom. My friend, on the other hand, chooses to use a 9″ x 13″ pan from her kitchen as her soap mold, and plans of purchasing a few commercially made soap molds from a local supplier later this year. Whichever method you choose, pouring the soap into one, large rectangle will allow you some flexibility in how you shape the soap after it sets.
5. After you have poured the soap into the mold, cover it, and keep it warm for 24-48 hours. Wrapping the soap mold in old towels or blankets, and keeping it warm and undisturbed, allows the saponification process to develop slowly in the soap, and keeps you Castile bars from separating. Trust me, as much as you’ll want to check out your new soapy beauties, try to resist the temptation to disturb them until at least 24 hours have passed!
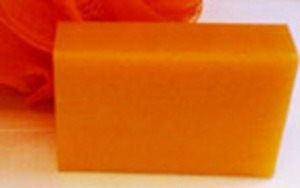
6. After the soap has set, remove the Castile soap from the mold and either cut into bars, or use a cookie cutter to cut your bars into shapes. I like the old fashioned look of traditional, rectangular bars, whereas my friend will often make heart shaped soaps for Valentine’s Day and Pumpkin shaped soaps for autumn. This is especially effective if you add scent to the soap.
7. Set the cut soap aside and allow it to age for another 2 weeks before using it. I like to place the cut soap back into the mold and cover it with a towel or blanket. This keeps the soap from getting dusty, and allows it to age evenly. You should be able to get anywhere from 10-18 Castile soap bars/shapes depending on how you cut your soap, the thickness of the mold, size of your cookie cutters, etc.
TROUBLESHOOTING:
Help! It has been 2 weeks and my soap is greasy and crumbles when I try to use it. This may seem like a sudsy disaster, but rest assured, your soap can easily be saved! Take all of your soap and chop it up into fine pieces. Then put the soap in a pan, add 3 cups of water, and stir until the soap pieces have become smooth and blended.
Turn up the heat and bring the soap to a boil. Keep boiling until the soap mixture has thickened.
Then, simply follow steps #4-#7 again, and you will have fantastic bars of Castile soap ready to use or give as gifts.