What could be worse than tearing up the grotesque, earthworm-hued carpet in your basement, only to find concrete? This was my dilemma recently, when I lifted the carpet in the finished basement in our new house. What did I expect to find-glowing, blonde hardwood floors? I shouldn’t have been surprised. However, I have precious little experience (okay, none) with remodeling.
I had no intention of leaving the bland, cruel carpet, and there was no way I was going to spring for new flooring. Hoping the concrete was smooth, and maybe even attractive, in a rustic way, I took up all the carpet. No such luck.
So, remembering some really amazing painted concrete floors at a former-warehouse-turned-coffeehouse I once admired, I began searching the internet for ideas. I found all kinds of huge stencils, fancy designs, special paints, instructions. All seemed far too expensive and generally too much of an investment for my aims. I decided to take a chance and develop my own design, using readily available paint, craft supplies, and sealant from Lowe’s and Michael’s.
It went smoothly, with no problems along the way. And, the painted floor is now a year old, has had a steady stream of traffic from my family and friends, including my 14 year old son and his crew, who have even used it for skateboarding!
The design and effect I chose for my floor is a bit eccentric, so if you would like a more subdued or plainer effect, you can adjust the technique by omitting the glitter, painted floral (or other) design, or both. Below are the instructions.
Supplies you will need
High gloss interior wall paint
Small can(s) acrylic paint
Loose Glitter
Epoxy Concrete sealant
Various painting supplies: rollers, extension handle, foam brushes, paint trays, paint tape, masks, etc.
A note on amounts: I purposely have not specified amounts of paint and glitter needed, because that is going to depend on the size of the floor. To give an example though, I used about ¾ of a gallon wall paint, and half a gallon of sealant for my 300 sq.ft. basement. I overestimated the amount of glitter I would need. I purchased 2 large jars of it, and ended up only using about ¼ of one jar, and returning the other one, unopened. It seems a little goes a long way.
Step 1
Begin by thoroughly sweeping and cleaning the bare concrete floor. Note that if you have just removed carpet or other flooring, this is going to be quite an undertaking. Take your time, and get it as clean as possible. Also note that any sponge-type mop you use may be ruined, not only because of the excessive dirt, but the floor’s rougher texture. My concrete floor was far from smooth. A cotton, wringable mop is probably the best choice. Make sure the floor is completely dry before painting.
Paint the floor in small sections, using your chosen interior wall paint color. Paint the floor in the same manner you would paint a wall, using paint tape against the bottom of the wall to leave clean lines, and using a brush or other implement against the edges. You can either choose to do this preparation all at once, or do it in sections, as you paint.
Remember to start at the opposite side of the room’s exit, so you don’t get trapped by wet paint!
A note here: don’t worry about getting the paint perfectly even and thick. I actually ended up leaving patches of very thin paint, and even left some areas a little ‘bare’, as the paint on the roller became scarce-to let some of the natural discolored features of the concrete showing through. The result is a pleasing rustic patina.
Use an extension handle for the roller to paint the floor-it’s much easier than stooping and bending over with a regular short handle.
After each small section is painted, sprinkle some glitter evenly over the wet paint. You can do this with your fingers, or from a shaker, or whatever method works best with the type of container you have, or your own preference.
Keep in mind you’ll want to paint in small enough sections, so that sprinkling the entire painted area can be accomplished from where you stand. Also, as you progress, make sure that you move the paint and glitter around with you.
Don’t worry too much about getting the glitter sprinkled on perfectly even-I actually ended up laying it on quite think in some places to create patches with more sparkle. It’s a very forgiving medium, so don’t stress too much about making mistakes. Continue this process, of painting and applying glitter, until the entire floor is treated.
Let the floor dry completely. The time this will take varies, and depends on humidity, paint thickness, and other factors. I allowed mine to dry for a full 24 hours.
Step 2
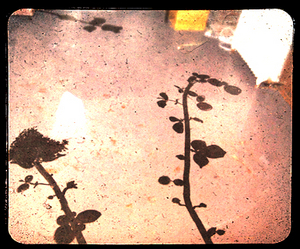
Paint your design using acrylic, floor, or another color of wall paint(s). I chose a floral design-I was inspired by a photo of flower-created shadows that I came across on Flickr. In the right light, my floor-flowers really do look like gigantic shadows, too! It was easy, because I only had to use one color of paint (black) and I didn’t have to worry about painting details.
The acrylic/craft paint I used went on like a dream with smaller foam brushes. These brushes are found cheaply in dollar stores-you can get a bag of them with several different widths for a buck. I found the acrylic paint in a small can at Big Lots for $3.
If desired, sprinkle glitter over your design. I chose to let the flowers seem like they were layered over the painted background, so I didn’t sprinkle glitter over my design.
Let the design dry completely. Again, the time frame will vary. Mine was dry in a few hours.
Step 3
Apply a clear epoxy concrete sealant. Use a clean, dry roller brush for this step, attached to an extension handle. Don’t worry if it goes on a little opaque-it dries completely clear and shiny. Keep track of where you’ve been (it’s not as obvious since there’s no color) working your way from the far points of the room, to the exit.
Let the floor dry completely.
That’s it! The effect is so profound and cool, that you might want to keep your progress secret, not letting anyone look-for a final reveal. Guaranteed freak-out!
Some notes about choosing colors and designs
There are so many color schemes and design options to consider, and it’s half the fun. If your room is a basement or rec room, why not make it at least a little outrageous? There are all kinds of non-traditional wall colors now, including neons, metallics, chromes, and the like.
If you don’t trust yourself with a freehand design, there are all kinds of larger stencils available on the internet, and at craft stores. You can even make your own large stencils, by cutting out designs in posterboard. If you know how to decoupage, you could cut out larger designs from posters.
You could use huge letter stencils (your own design, or store bought) could spell out some favorite quotes, names, or anything. If you are especially artistic, you could even paint some kind of mural. Or, you could have children paint flowers, constellations, stars, an interpretation of the Mona Lisa-anything!
Make sure you do have somewhat of a plan though, perhaps modeling it out small scale with paper and pencil first. But know that mistakes can be covered easily. Simply allow the design mistake to dry, and cover with the wall paint, applying glitter as necessary. I did this more than once, over the black craft paint, and there is no trace of the mistake. Good luck!