Each fall prior to the first winter freeze, it becomes necessary to winterize outdoor sprinkler systems, especially for those who live in colder climates where the frost level penetrates to the depth of the irrigation system piping. Any water left in the sprinkler system can freeze which can result in the excessive expansion and bursting of the polyethylene or PVC piping and/or the associated fittings typically used for sprinkler systems. Proper winterization techniques will prevent freeze damage to sprinkler systems and avoid the necessity of expensive repairs in the spring. There are three primary methods of removing residual water from sprinkler systems. They can be manually drained, automatically drained or can be flushed with compressed air.
Manually Drain
In some sprinkler systems, manually drain valves are installed at the end and low points of the system piping when the irrigation system is installed. For such systems, shut off the water supply valve then locate and open all manual drain valves. Depending on the type of sprinklers installed, it may be necessary to pull up on the sprinkler heads to permit water trapped in sprinklers that have check valves, to drain from the body of the sprinkler. After all residual water has been drained from the irrigation piping; the drain cock on any back-flow device installed in the system should be opened to drain to eliminate any water present between the water supply valve and the back-flow device. Once all the water has been drained, shut off all the manual drain valves.
Automatic Drain
Instead of manual drain valves, some sprinkler systems have automatic drain valves installed at the end and low points of the system piping. Automatic drain valves open automatically and allow water to drain from the system whenever the water pressure drops to a low pressure, typically under 10 psi (pounds per square inch). For systems with automatic drain valves, shut off the water supply valve and turn the system controller (or timer) to the on position to relieve system pressure. This will activate the automatic drains. Again for sprinklers which have check valves, it will be necessary to pull up on the sprinkler heads to permit water trapped in sprinklers that have check valves to drain from the body of the sprinkler. After all residual water has been drained from the irrigation piping; the drain cock on any back-flow device installed in the system should be opened to drain to eliminate any water present between the water supply valve and the back-flow device. Sometimes both manual drains and automatic drains are installed in a system and it will be necessary to also open any manual drain valves while draining the system piping which should be shut off once the entire system has been drained.
Flushing with Compressed Air
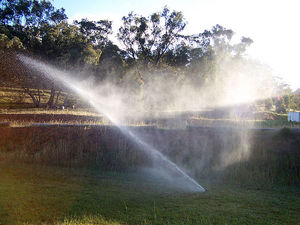
Flushing the sprinkler system with compressed air is a very effective means of preparing a system for winter but there are some important safety precautions that must be followed when using the method. A suitable low pressure, high volume air compressor must be used and cheaper high pressure, low volume compressors cannot be substituted. The compressor used must have a pressure regulator installed on the outlet which can be set so that air pressure does not exceed 50 psi. Rent or buy a compressor that is rated for 10 to 25 cubic feet per minute of air volume. There should be a quick connect fitting, a valve or plugged tee installed in the system located close to the water supply valve designed for connection of an air compressor to flush the system.
Before connecting the compressor, shut off the water supply valve and activate one station or zone from the controller to relieve water pressure from the system. Connect the air line and then flush the system with air by activating one station or zone at a time, beginning with the one most distant from the compressor. Gradually introduce air to the system by slowly opening the outlet valve on the compressor until a constant 50 psi is achieved. The sprinkler heads should pop up and seal and the air flush should be continued until nothing beyond a fine mist comes from the sprinkler heads. Typically the process will take no more than 4 -5 minutes per station or zone. After the last station or zone has been flushed, leave it activated while you shut down the compressor and disconnect the air hose. Then turn the controller to the off position.
If you do not have the time or the equipment needed to air flush your sprinkler system or do not feel confident you can do it alone, irrigation contractors will perform the task for you for a nominal fee.
Winterizing System Components
Sprinkler systems that do not have automatic drain valves installed that allow for automatic draining will not drain sufficiently from gravity draining alone. If the system is not flushed with compressed air, some sprinkler valves will have to be disassembled and drained individually to ensure all standing water is removed from them.
For sprinkler systems that have a pump installed, the pump manufacturer’s instructions for winterization should be followed. Any outdoor exposed (above ground) piping or valves should be insulated. Easily applied insulation materials for piping and valves can be obtained from hardware or home improvement retailers.
Leave the main water supply valve in the off position and set automatic controllers (or timers) to the “rain”, “off” or “rain/off” setting. For systems where a pump is installed it is a good idea to turn off the power or unplug the power cord to the pump during the winter months.
Sources:
“Winterizing Your Lawn Sprinkler System”. Green Touch Irrigation. July 27, 2009.
“Homeowner’s Guide to Winterization”. Rain Bird, Inc. July 27, 2009.

