A fireplace mantel is a great place to keep precious photos, neat knick knacks, or antique treasures. But if your old fireplace mantel is dingy, to rustic or outdated, then you can easily replace your fireplace mantel. Even if your fireplace mantel is securely in place, there’s still hope.
Common Mantels
Many fireplace mantels are a stoic piece of hardwood, suspended in air by magic, rustic reminders of time past. These basic structures are secured to the inner studs of the wall using pegs or notched studs to accommodate the mantel. Once the mantel is inserted into the studs, it is surrounded by drywall, wood, brick or stone to further tighten the grip of the wall to mantel.
The other type of common mantel is a brick hearth and mantel. This built in mantel was meant to stay forever. But with a little adjustment any mantel can be changed to suit you needs. Careful planning is required when doing demo work on these fireplace mantels. If one wrong brick gets removed; it just might become unstable enough to cause structural damage to the fireplace.
Removing a Mantel
Replacing a mantel starts with removing an old mantel. The surrounding wall structure must first be removed. Remove the fireplace doors and cover the opening with a drop cloth before you begin. Wood walls can easily be removed with a nail punch and pry bar. Start on one side then work your way down to the other. Drywall is just as easy. Simply make a hole between studs and remove the sheet.
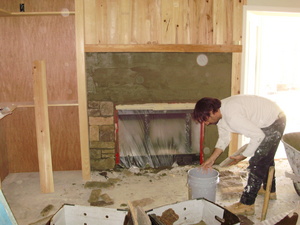
Brick and stone are more difficult and require chisels and hammers for delicate situations. Power tools such as a grinder and Dremel can help out on big jobs. Be careful not to scratch any brick or stone with the grinder if you plan on reusing the brick or stone. Also be certain you aren’t’ removing any structural bricks or stones.
Once the surrounding face material is removed, work can begin on removing the mantel. Using a reciprocating saw, cut any of the nails, glue or pegs that are holding the mantel in place to the studs. Prior to cutting have a helper handy to hold the mantel as you cut free each section, otherwise you could have an accident on your hands.
The New Mantel
Clear away any debris from the previous mantel. Measure and position a template of the mantel in place over the existing studs. Level and trace the position to the studs. Remove the template and cut the studs for a pocket mantel as needed or drill holes in the studs for pegs. Once the holes are drilled, place in the pegs with wood glue and a rubber mallet.
With a partners help, lift the new mantel in place positioning on side in at a time. Slowly work in the end about ½”. Now position the other mantel end into place, aligning the pegs and holes or stud pockets as you pound in the mantel with a rubber mallet. If an end gets pinched, back it out and start over. The trick is to work both ends together at the same time.


