A Holga is a small plastic toy camera with a cult like following. This unassuming little number makes it possible to take the most bizarre photos. Holgas are unpredictable and have so many things technically wrong with them it just stands to reason they are fun to use.
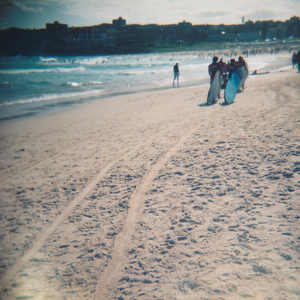
Experimenting with expired film, odd exposures and intense modifications make it all the more unique. I love the dream-like artsy photographs you can create with a holga, without the need for photoshop.
Since Holgas are so inexpensive from a photographer’s standpoint, or really any hobbyist or artist standpoint, it is smart to buy in multiples. Use one with black and white film, another with color at a different speed, another could be duct taped or have a sanded lens. The variations are endless.
Check out eBay for good deals, generally starting at $15.00, or http://holgamods.com http://www.squarefrog.co.uk/holga-links-buyholgas.html
Either one of these two sites will pimp your Holga if you want to have your camera modified from the start. They will do just enough modifications to make this imperfect camera a little better. From flocking the inside to prevent most of the stray light and cutting the 6×4.5 mask to 6×6 to colorizing the body; adding tripod socket or “BULB” feature.
1. So the first tip on using a Holga is having a backup to do experiments on.
2. Use duct tape to seal around the back edges. Doing so, does two things; it keeps the back on tight and stops light leaks. If you don’t mind light leaks, or want to experiment a little, just rubber band the back on while shooting. The little clips that are meant to hold the back on don’t always do the job.
3. Make a flap from the duct tape over the “film counter window” again to prevent light leaks.
4. Use close up filters, the fish eye lens or viewfinder or the tele-converter lenses, models HT-25 and HW-05 to fit on your Holga to either lengthen or shorten your focal length.
5. The Holga is notorious for its simply awful film advance. You will want to jam a piece of folded cardboard from your filmbox under the film spool. It will keep the film taut and light from creeping in.
6. If you want to use a tripod, you will need to do another little modification. Simply rubber band it to the tripod, or screw a socket right into the camera
7. There is a little switch on the bottom of the holga, normally you will want to set this to N, normal setting. B stands for Bulb. Use B when taking pictures at night for long exposures. You can make the holga into a permanent bulb by taking needle nose pliers and yank out the tiny metal spring that operates the shutter. This will blur and overexpose your shots, but that’s another great effect.
8. Avoid changing film in bright light, another good reason for having multiple Holgas.
9. Remember that the viewfinder doesn’t actually show you what the lens captures. It just points you in a general direction. Seriously. You need to use your imagination a bit when taking your shots.
10. Finally, leave room for unusual images, they are the norm with the holga.