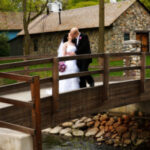
In this Photoshop tutorial I will show you how to create a Heart Shaped Photo. You will take a Photo and turn it into the shape of a heart. This is a nice effect to use for wedding photos or honeymoon photos. Photoshop makes it easy to create Heart Shaped Photos. I will write the first part of this tutorial for beginners and I will write the second part of this tutorial for the advance Photoshop users.
How to Create a Heart Shaped Photo in Photoshop for Beginners
Open your Photoshop program and let it load. Next you will need to create a new canvas. Go to the top of your Photoshop window and click File > New to create a new canvas. Create your canvas about 500 pixels by 500 pixels big. Set your back ground to white and click OK.
Create a New Layer in your Layers Panel. If you do not see your Layers Panel then press F7 on your keyboard and that will bring your Layers Panel up. In the bottom of your Layers Panel you will see an icon that looks like a sheet of paper with the corner curled up. Click on that to create a new layer.
Next you will need to select your Heart Shaped Tool. Click on your Shape Tool in your toolbar and hold it down until the menu pops up. Then select Custom Tool. At the top of your Photoshop window you will see Shape and then a drop down box. Click the drop down box and select the Heart Shaped Tool. Then draw your heart on your canvas. Make it kind of big so that your photo will fit in it.
Left click one time on your Shape Layer in your Layers Panel to highlight it. Now right click on the layer and select Rasterize Layer.
Go to the top of your Photoshop window and click File > Open. Locate the Photo that you want to use and open it. Now you should see your photo in your Photoshop window.
Select the Rectangular Marquee Tool and draw a rectangle around the edge of your photo. The Rectangular Marquee Tool is the first tool in your toolbar.
Click Edit > Copy at the top of your Photoshop window. Now minimize the window with the Photo. You should see your heart after you have minimized the Photo.
Click on the Shape Layer in the Layers Panel to highlight it. Then go to the top of your Photoshop window and click Select > Load Selection. Click OK on the box that pops up.
Now click Edit > Paste Into at the top of your window. You should see your Photo inside the heart now. Click on the Move Tool in your toolbar to move the photo around to get it the way you want it.
You can add a drop shadow to the heart by right clicking on the Shape Layer and selecting Blending Options. Then click on Drop Shadow and play around with it until you get it the way you want it.
How to Create a Heart Shaped Photo in Photoshop for the Advance
Create a New Canvas about 500 x 500. Set the background to white.
Create a new layer.
Select your Heart Shape Tool and draw a heart on your canvas. Draw it about as big as your canvas so that it will be large enough to paste your photo in.
Rasterize your Layer.
Open the photo that you want to place in the heart.
After you open the photo click on the Rectangular Marquee Tool and draw a rectangle around the edge of your photo.
Click Edit > Copy
Highlight your window with the heart and click Select > Load Selection.
Then click Edit > Paste Into
You can use the Move Tool to move the image around.
You can add different effects to the Heart Shaped Photo by opening the Blending Options.
If you have any problems with this Photoshop tutorial, please feel free to contact me using the contact button at the top of this page.


